Section 1 of 3
Introduction
Introduction
July 2022

Commercial Driver’s License
MANUAL
Published by The Idaho Transportation Department Division of Motor Vehicles P.O. Box 7129 Boise, Idaho 83707-1129
July 2022 Edition
Manual developed in conjunction with the American Association of Motor Vehicle Administrator's 2005 CDL Testing Model
This manual and the Idaho Driver’s Manual must both be studied in preparation for your CDL examinations. Both manuals paraphrase the language of the Idaho Motor Vehicle Code. Courts go by the actual language of the code, not these texts.
The Idaho Transportation Department (ITD) is committed to compliance with Title VI of the Civil Rights Act of 1964 and all related regulations and directives. ITD assures that no person shall on the grounds of race, color, national origin, gender, age, or disability be excluded from participation in, be denied the benefits of, or be otherwise subjected to discrimination under any ITD service, program, or activity. The department also assures that every effort will be made to prevent discrimination through the impacts of its programs, policies, and activities on minority and low-income populations. In addition, the department will take reasonable steps to provide meaningful access to services for persons with limited English proficiency. Catalog # 01-970001-2
IDAHO
COMMERCIAL
DRIVER’S LICENSE
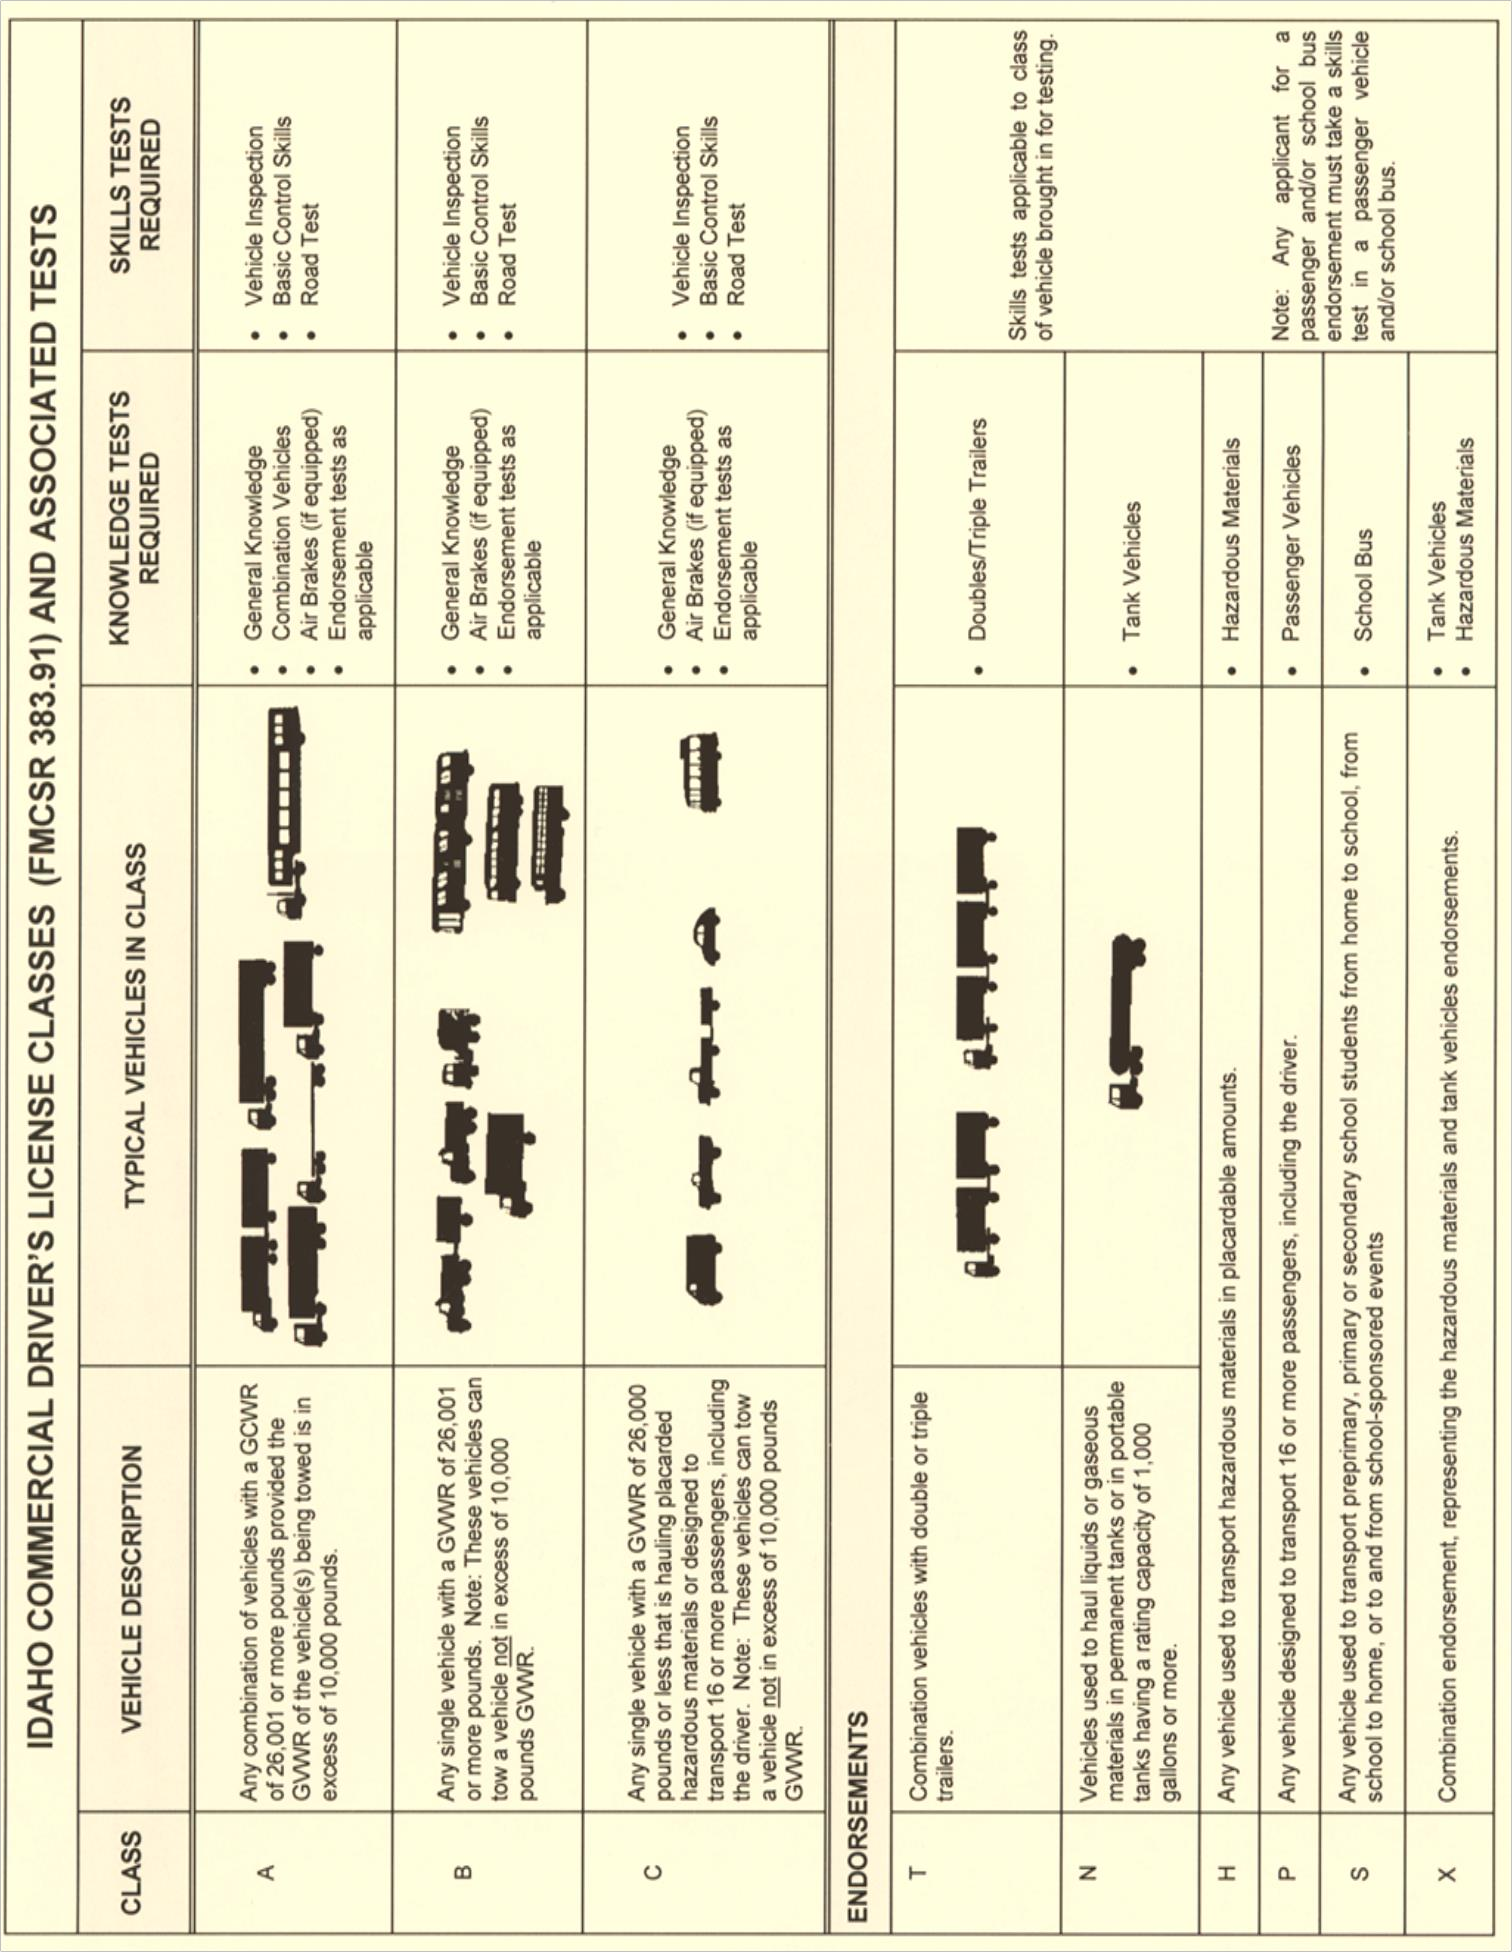
Check the chart below to see what kind of Commercial Driver’s License you need.




How to Use This Manual

Does the vehicle or combination of vehicles have a manufacturer’s weight rating (GVWR) of 26,001 pounds or more?

Is the vehicle a combination vehicle towing a unit over 10,000 pounds GVWR?

YES YES

You need a CDL
NO
YES


You need a CDL Does the single vehicle have a GVWR of 26,001 pounds or more?

NO
NO

Is the vehicle designed by the manufacturer (placarded) to carry 16 or more passengers, including the driver?
YES
You need a CDL
NO
YES
Does the vehicle require hazardous material placards?

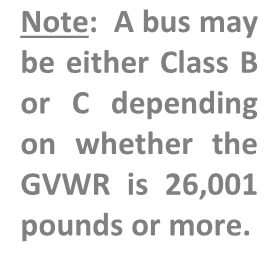
Note: A bus may be either Class B or C depending on whether the GVWR is 26,001 pounds or more. You need a CDL
NO

You DO NOT need a CDL
Knowledge Test Information: | | | | | | | |
Specific Test: | | | Number of Questions: | | | | Minimum |
| | | | | | | Correct |
| | | | | | | to Pass: |
General Knowledge | | | 50 | | | 40 | |
| Hazmat | | | 30 | | | 24 |
Air Brake | | | 25 | | | 20 | |
Combination Vehicles | | | 20 | | | 16 | |
Tank vehicles | | | 20 | | | 16 | |
| Doubles/ | | 20 | | | 16 | |
| Triples | | | | | | |
Passenger Vehicles | | | 20 | | | 16 | |
| School | | 20 | | | 16 | |
| Busses | | | | | | |
CDL License Fees •CDL: One year (age 20) $15.00 •CDL: Three year (age 18 to 21) $30.00 •CDL: Four year (age 21 and over) $40.00 •Seasonal CDL (180 Days) $44.00 •Commercial Learner’s Permit $29.00 •Duplicate CDL or permit $20.00 •License upgrade $30.00 •Add Endorsement (after issuance of a CDL --does not include written test fee) $20.00 •Written tests (each) $5.00 •Skills Test: County CDL License fee $10.00 •Skills Test: CDL Examiner Fee- Varies, may be up to $190 per Idaho Code 49-306(10).
| | | | | | | | | | | | | | | | | | | | | | | | | | | | | | | | | | | | | | | | |
To Obtain License Type | | | | Chapters to Study | | | | | | | | | | | | | | | | | | | | | | | | | | | | | | | | | | | | |
| | | | | | | | | | | | | | | | | | | | | | | | | | | | | | | | | | | | | | | | |
| | | | | | | | | | | | | | | | | | | | | | | | | | | | | | | | | | | | | | | | |
| | | | 1 | | | 2 | | | 3 | | | 4 | | | 5* | | | 6 | | | 7 | | | 8 | | | 9 | | | 10 | | | 11 | | | 12 | | | 13 |
| | | | | | | | | | | | | | | | | | | | | | | | | | | | | | | | | | | | | | | | |
| | | | | | | | | | | | | | | | | | | | | | | | | | | | | | | | | | | | | | | | |
Class A | | | | X | | | X | | | X | | | | | | X | | | X | | | | | | | | | | | | | | | X | | | X | | | X |
| | | | | | | | | | | | | | | | | | | | | | | | | | | | | | | | | | | | | | | | |
Class B | | | X | | | X | | | X | | | | | | X | | | | | | | | | | | | | | | | | | X | | | X | | | X | |
| | | | | | | | | | | | | | | | | | | | | | | | | | | | | | | | | | | | | | | | |
| | | | | | | | | | | | | | | | | | | | | | | | | | | | | | | | | | | | | | | | |
| | | | | | | | | | | | | | | | | | | | | | | | | | | | | | | | | | | | | | | | |
Class C | | | | X | | | X | | | X | | | | | | X | | | | | | | | | | | | | | | | | | X | | | X | | | X |
| | | | | | | | | | | | | | | | | | | | | | | | | | | | | | | | | | | | | | | | |
To Obtain Endorsements : | | | | | | | | | | | | | | | | | | | | | | | | | | | | | | | | | | | | | | | | |
| | | | | | | | | | | | | | | | | | | | | | | | | | | | | | | | | | | | | | | | |
Hazardous Materials | | | | | | | X | | | X | | | | | | | | | | | | | | | X | | | X | | | | | | | | | | | | |
| | | | | | | | | | | | | | | | | | | | | | | | | | | | | | | | | | | | | | | | |
| | | | | | | | | | | | | | | | | | | | | | | | | | | | | | | | | | | | | | | | |
Double/Triples | | | | | | | X | | | X | | | | | | X | | | X | | | X | | | | | | | | | | | | | | | | | | |
| | | | | | | | | | | | | | | | | | | | | | | | | | | | | | | | | | | | | | | | |
| | | | | | | | | | | | | | | | | | | | | | | | | | | | | | | | | | | | | | | | |
Tank Vehicle | | | | | | | X | | | X | | | | | | | | | | | | | | | X | | | X | | | | | | | | | | | | |
| | | | | | | | | | | | | | | | | | | | | | | | | | | | | | | | | | | | | | | | |
| | | | | | | | | | | | | | | | | | | | | | | | | | | | | | | | | | | | | | | | |
| Passenger | | | | | | X | | | X | | | X | | | | | | | | | | | | | | | | | | | | | X | | | X | | | X |
| | | | | | | | | | | | | | | | | | | | | | | | | | | | | | | | | | | | | | | | |
| | | | | | | | | | | | | | | | | | | | | | | | | | | | | | | | | | | | | | | | |
School Bus | | | | | | | X | | | X | | | X | | | | | | | | | | | | | | | | | | X | | | X | | | X | | | X |
| | | | | | | | | | | | | | | | | | | | | | | | | | | | | | | | | | | | | | | | |
| | | | | | | | | | | | | | | | | | | | | | | | | | | | | | | | | | | | | | | | |
| *Study Chapter 5 if you plan to operate vehicles equipped with air brakes. | | | | | | | | | | | | | | | | | | | | | | | | | | | | | | | | | | | | | | | |
| | | | | | | | | | | | | | | | | | | | | | | | | | | | | | | | | | | | | | | | |
1-1
1-2
1-3 1.0 Introduction .............................................................................................................................................. 1-1 1.0.1 Commercial Vehicle Defined ............................................................................................................. 1-1 1.0.2 Commercial Vehicle Exemptions ....................................................................................................... 1-2 1.0.3 Commercial License Types ................................................................................................................. 1-3 1.0.4 Commercial License Endorsements ..................................................................................................... 1-4 1.0.5 Commercial License Restrictions ...................................................................................................... 1-5 1.0.6 Seasonal CDL for Farm-Related Services ............................................................................................. 1-6 1.1 Commercial Driver License Tests .............................................................................................................. 1-7 1.1.1 Knowledge Tests and License Classes ................................................................................................ 1-7 1.1.2 Skills Tests .......................................................................................................................................... 1-8 1.2 Self-Certification & Medical Requirements .............................................................................................. 1-8 1.2.1 Interstate or Intrastate Commerce ................................................................................................... 1-8 1.2.2 Inter/Intrastate Commerce: Status Non-excepted or Excepted? ..................................................... 1-9 1.2.3 Self-Certification Statements ........................................................................................................... 1-10 1.2.4 Medical Requirements for CDL Holders .......................................................................................... 1-10 1.2.5 Submit Medical Examiner’s Certificate ............................................................................................ 1-11 1.2.6 Medical Qualifications for Drivers ................................................................................................... 1-11 1.2.7 National Registry of Medical Examiners .......................................................................................... 1-12 1.2.8 Medical Card Exemptions for Commercial Driver Qualifications .................................................... 1-12 1.2.9 Exempt Commodities List- Idaho ..................................................................................................... 1-13 1.2.10 Exempt Operations ........................................................................................................................ 1-14 1.3 CDL Disqualifications ............................................................................................................................. 1-14 1.3.1 General ............................................................................................................................................. 1-14 1.3.2 Alcohol, Leaving the Scene of an Accident, and Commission of a Felony ...................................... 1-14 1.3.3 Serious Traffic Violations ................................................................................................................ 1-15 1.3.4 Violation of Out-of-Service Orders ................................................................................................. 1-15 1.3.5 Railroad - Highway / Grade Crossing Violations ............................................................................ 1-15 1.3.6 Hazardous Materials Endorsement Background Check and Disqualifications ................................ 1-16 1.3.7 Traffic Violations in Your Personal Vehicle ..................................................................................... 1-16 1.4 Other CDL Rules ...................................................................................................................................... 1-16 1.5 International Registration Plan .............................................................................................................. 1-17 1.5.1 International Fuel Tax Agreement ................................................................................................... 1-17 1.6 CDL License Fees ..................................................................................................................................... 1-20 Table of Contents Chapter 1 : Introduction and Basic Information .................................................................. 1-1
i 1.7.2 Foreign Commercial Driver’s License (if applicable)........................................................................ 1-23 1.7.3 Commercial Learner’s Permit .......................................................................................................... 1-23 1.7.4 CDL Knowledge and Skills Tests ....................................................................................................... 1-25 1.7.5 Skills Test Restrictions ...................................................................................................................... 1-26 1.7.6 Skills Test Vehicle & Requirements ................................................................................................. 1-26 1.8 CSA Information (Compliance Safety Accountability) ............................................................................ 1-26 1.9 Keeping Your Address Current ............................................................................................................... 1-27 1.10 Central Issue of Driver’s Licenses ......................................................................................................... 1-28 1.11 Administrative License Suspensions (ALS) ........................................................................................... 1-28 1.12 Drug and Alcohol Testing ..................................................................................................................... 1-29 1.13 Driver Record Requests ........................................................................................................................ 1-29 Figure 1.4 Sample Idaho Motor Vehicle Driver’s License Record Request .............................................. 1-30 Chapter 2 : Driving Safely .................................................................................................. 2-1 2.1 Vehicle Inspection .................................................................................................................................... 2-1 2.1.1 Why Inspect ....................................................................................................................................... 2-1 2.1.2 Types of Vehicle Inspection ............................................................................................................... 2-1 2.1.3 What to Look For: .............................................................................................................................. 2-1 Figure 2.1 illustrates a typical steering system ............................................................................................ 2-2 Figure 2.2 Key Suspension Parts ................................................................................................................... 2-3 Figure 2.3 Broken Leaf Spring ..................................................................................................................... 2-3 Figure 2.4 Air Suspension Parts .................................................................................................................. 2-3 2.1.4 CDL Pre-Trip Vehicle Inspection Test ................................................................................................. 2-4 2.1.5 Seven-step Inspection Method .......................................................................................................... 2-4 Figure 2.5 Oil Pressure .................................................................................................................................. 2-5 2.1.6 – Inspection during a Trip .................................................................................................................... 2-9 2.1.7 – Post-trip (After Trip) Inspection and Report..................................................................................... 2-9 2.2 Basic Control of Your Vehicle ................................................................................................................. 2-10 2.2.1 Accelerating .................................................................................................................................... 2-10 2.2.2 Steering ............................................................................................................................................ 2-10 2.2.3 Stopping ........................................................................................................................................... 2-11 2.2.4 – Backing Safely ................................................................................................................................. 2-11 2.3 Shifting Gears .......................................................................................................................................... 2-11 2.3.1 Manual Transmissions ..................................................................................................................... 2-11 1.7 How to Get A CDL ................................................................................................................................... 1-20 1.7.1 General Commercial Driver Qualifications: ..................................................................................... 1-22
ii 2.3.4 Retarders (also called Jake Brakes) .................................................................................................. 2-12 2.4 Seeing ..................................................................................................................................................... 2-13 2.4.1 Seeing Ahead ................................................................................................................................... 2-13 Figure 2.6 Judging Distance ........................................................................................................................ 2-13 2.4.2 Seeing to the Sides and Rear .......................................................................................................... 2-14 Figure 2.7 Convex Mirrors ........................................................................................................................ 2-15 2.5 Communicating ...................................................................................................................................... 2-15 2.5.1 Signal Your Intentions ...................................................................................................................... 2-15 2.5.2 Communicating Your Presence ....................................................................................................... 2-16 Figure 2.8 Placing Warning Devices .......................................................................................................... 2-16 Figure 2.9 Where to Place Triangles ........................................................................................................... 2-17 Figure 2.10 Obstructed View Triangle placement ...................................................................................... 2-17 2.6 Controlling Speed ................................................................................................................................... 2-18 2.6.1 Stopping Distance ............................................................................................................................ 2-18 Figure 2.11 Total Stopping Distance ........................................................................................................... 2-18 2.6.2 Matching Speed to Road Surface .................................................................................................... 2-19 2.6.3 Speed and Curves ............................................................................................................................ 2-20 2.6.4 Speed and Distance Ahead .............................................................................................................. 2-20 2.6.5 Speed and Traffic Flow .................................................................................................................... 2-20 2.6.6 Speed on Downgrades ..................................................................................................................... 2-20 2.6.7 Roadway Work Zones ...................................................................................................................... 2-21 2.7 Managing Space ..................................................................................................................................... 2-21 2.7.1 Space Ahead..................................................................................................................................... 2-21 Figure 2.12 Following Distance ................................................................................................................... 2-22 2.7.2 Space Behind .................................................................................................................................... 2-22 2.7.3 Space to the Sides ............................................................................................................................ 2-22 2.7.4 Space Overhead ............................................................................................................................... 2-23 2.7.5 Space Below ..................................................................................................................................... 2-23 2.7.6 Space for Turns ................................................................................................................................ 2-23 Figure 2.13 Correct Execution of Right Turn .............................................................................................. 2-24 Figure 2.14 Correct Execution of Left Turn ................................................................................................ 2-24 2.7.7 Space Needed to Cross or Enter Traffic ........................................................................................... 2-24 2.8 Seeing Hazards ....................................................................................................................................... 2-24 2.3.2 Multi-speed Rear Axles and Auxiliary Transmissions ...................................................................... 2-12 2.3.3 Automatic Transmissions ................................................................................................................. 2-12
iii 2.8.3 Drivers Who Are Hazards ................................................................................................................. 2-26 2.8.4 Always Have a Plan .......................................................................................................................... 2-28 2.9 Distracted Driving ................................................................................................................................... 2-28 2.9.1 The Distracted Driving Crash Problem ............................................................................................. 2-29 2.9.2 Effects of Distracted Driving ............................................................................................................. 2-29 2.9.3 Types of Distractions ........................................................................................................................ 2-29 2.9.4 Cell/Mobile Phones .......................................................................................................................... 2-29 2.9.5 Texting .............................................................................................................................................. 2-30 2.9.6 Don’t Drive Distracted ..................................................................................................................... 2-31 .................................................................................................................................................................... 2-32 2.9.7 - Watch for Other Distracted Drivers ................................................................................................ 2-32 2.10 Aggressive Drivers/Road Rage .............................................................................................................. 2-32 2.10.1 What Is It? ...................................................................................................................................... 2-32 2.10.2 Don’t Be an Aggressive Driver ....................................................................................................... 2-33 2.10.3 What You Should Do When Confronted by an Aggressive Driver .................................................. 2-33 2.11 Driving at Night ..................................................................................................................................... 2-34 2.11.1 It Is More Dangerous ..................................................................................................................... 2-34 2.11.2 Driver Factors ................................................................................................................................. 2-34 2.11.3 Roadway Factors ............................................................................................................................ 2-36 2.11.4 Vehicle Factors ............................................................................................................................... 2-36 2.11.5 Night Driving Procedures ............................................................................................................... 2-37 2.12 Driving in Fog .................................................................................................................................... 2-37 2.13 Driving in Winter .................................................................................................................................. 2-38 2.13.1 Vehicle Checks ............................................................................................................................... 2-38 2.13.2 Driving Tips for Winter ................................................................................................................... 2-39 2.14 Driving in Very Hot Weather ................................................................................................................. 2-39 2.14.1 Vehicle Checks ............................................................................................................................... 2-39 2.14.2 Driving Tips for Hot Weather ......................................................................................................... 2-40 2.15 Railroad-highway Crossings .................................................................................................................. 2-41 2.15.1 Types of Crossings .......................................................................................................................... 2-41 2.15.2 Warning Signs and Devices ............................................................................................................ 2-41 Figure 2.15: Advance Warning Railroad Sign ............................................................................................ 2-41 Figure 2.16 Railroad Crossing Pavement Markings .................................................................................... 2-41 2.8.1 Importance of Seeing Hazards ......................................................................................................... 2-24 2.8.2 Hazardous Roads ............................................................................................................................. 2-25
iv 2.15.3 Driving Procedures ......................................................................................................................... 2-42 2.15.4 Stopping Safely at Railroad- highway Crossings ............................................................................ 2-43 2.15.5 Crossing the Tracks ........................................................................................................................ 2-43 2.15.6 Special Situations ........................................................................................................................... 2-43 2.16 Mountain Driving .............................................................................................................................. 2-43 2.16.1 Select a "Safe" Speed ..................................................................................................................... 2-44 2.16.2 Select the Right Gear before Starting Down the Grade ................................................................ 2-44 2.16.3 Brake Fading or Failure .................................................................................................................. 2-44 2.16.4 Proper Braking Technique ............................................................................................................. 2-45 2.17 Driving Emergencies ............................................................................................................................. 2-46 2.17.1 Steering to Avoid a Crash ............................................................................................................... 2-46 2.17.2 How to Stop Quickly and Safely ..................................................................................................... 2-47 2.17.3 Brake Failure ................................................................................................................................... 2-47 2.17.4 Tire Failure ..................................................................................................................................... 2-48 2.18 Antilock Braking Systems (ABS) ............................................................................................................. 2-48 2.18.1 How Antilock Braking Systems Work ............................................................................................. 2-48 2.18.2 Vehicles Required to Have Antilock Braking Systems ..................................................................... 2-48 2.18.3 How to Know If Your Vehicle Is Equipped with ABS ........................................................................ 2-49 2.18.4 How ABS Helps You ........................................................................................................................ 2-49 2.18.5 ABS on the Tractor Only or Only on the Trailer .............................................................................. 2-49 2.18.6 Braking with ABS ............................................................................................................................ 2-50 2.18.7 Braking If ABS Is Not Working ......................................................................................................... 2-50 2.18.8 Safety Reminders ........................................................................................................................... 2-50 2.19 Skid Control and Recovery .................................................................................................................... 2-50 2.19.1 Drive-wheel Skids ........................................................................................................................... 2-51 Figure 2.19 Tractor Jackknife ...................................................................................................................... 2-51 2.19.2 Correcting a Drive-wheel Braking Skid ........................................................................................... 2-51 2.19.3 Front-wheel Skids .......................................................................................................................... 2-51 2.20 Accident Procedures ............................................................................................................................. 2-52 2.20.1 Protect the Area ............................................................................................................................. 2-52 2.20.2 Notify Authorities .......................................................................................................................... 2-52 2.20.3 Care for the Injured ....................................................................................................................... 2-52 2.21 Fires ...................................................................................................................................................... 2-52 Figure 2.17 Cross-buck Signs ...................................................................................................................... 2-42 Figure 2.18 Railroad Gates/Lights .............................................................................................................. 2-42
v 2.21.3 Fire Fighting ................................................................................................................................... 2-53 2.22 Alcohol, Other Drugs, and Driving ........................................................................................................ 2-55 2.22.1 Alcohol and Driving ........................................................................................................................ 2-55 2.22.2 Other Drugs .................................................................................................................................... 2-57 2.22.3 Illness ............................................................................................................................................. 2-57 2.23 Hazardous Materials Rules for All Commercial Drivers ........................................................................ 2-57 2.23.1 What Are Hazardous Materials? .................................................................................................... 2-57 2.23.2 Why Are There Rules? ................................................................................................................... 2-57 Figure 2.24 Hazardous Materials ................................................................................................................ 2-58 2.23.3 Lists of Regulated Products ............................................................................................................ 2-58 Figure 2.25 Hazardous Materials Placards ............................................................................................... 2-58 Chapter 3 : Transporting Cargo Safely ................................................................................. 3-1 3.1 Inspecting Cargo ......................................................................................................................................... 3-1 3.2 Weight and Balance ................................................................................................................................... 3-1 3.2.1 Definitions You Should Know .............................................................................................................. 3-1 3.2.2 Legal Weight Limits .............................................................................................................................. 3-2 3.2.3 Don’t Be Top-heavy ............................................................................................................................. 3-2 3.2.4 Balance the Weight ............................................................................................................................. 3-2 Figure 3.1 Loading Cargo Correctly .............................................................................................................. 3-2 3.3 Securing Cargo ............................................................................................................................................ 3-2 3.3.1 Blocking and Bracing ............................................................................................................................ 3-2 3.3.2 Cargo Tie-down .................................................................................................................................. 3-3 Figure 3.2 Tie Down Devices ......................................................................................................................... 3-3 Figure 3.2.A Using Tie Down Devices ........................................................................................................... 3-3 3.3.3 Header Boards ................................................................................................................................... 3-4 Figure 3.3 Header Board ............................................................................................................................... 3-4 3.3.4 Covering Cargo ................................................................................................................................... 3-4 3.3.5 Sealed and Containerized Loads ......................................................................................................... 3-4 3.4 Cargo Needing Special Attention ............................................................................................................. 3-4 3.4.1 Dry Bulk .............................................................................................................................................. 3-4 3.4.2 Hanging Meat..................................................................................................................................... 3-4 3.4.3 Livestock ............................................................................................................................................ 3-5 3.4.4 Oversized Loads ................................................................................................................................. 3-5 2.21.1 Causes of Fire ................................................................................................................................. 2-52 2.21.2 Fire Prevention .............................................................................................................................. 2-53
vi 4.1 Vehicle Inspection .................................................................................................................................... 4-1 4.1.1 Vehicle Systems ................................................................................................................................ 4-1 4.1.2 Access Doors and Panels.................................................................................................................... 4-2 4.1.3 Bus Interior ........................................................................................................................................ 4-2 4.1.4 Roof Hatches ...................................................................................................................................... 4-2 4.1.5 Use Your Seatbelt! ............................................................................................................................. 4-2 4.2 Loading and Trip Start .............................................................................................................................. 4-2 4.2.1 Hazardous Materials .......................................................................................................................... 4-2 4.2.2 Forbidden Hazardous Materials ........................................................................................................ 4-2 Table 4.1 Hazard Class Definitions ............................................................................................................... 4-3 4.2.3 Standee Line....................................................................................................................................... 4-3 4.2.4 At Your Destination ............................................................................................................................ 4-3 4.3 On the Road .............................................................................................................................................. 4-3 4.3.1 Passenger Supervision ....................................................................................................................... 4-3 4.3.2 Stops .................................................................................................................................................. 4-3 4.3.3 Common Accidents ............................................................................................................................ 4-4 4.3.4 Speed on Curves ................................................................................................................................ 4-4 4.3.5 Railroad-highway Crossings ............................................................................................................... 4-4 4.3.6 Drawbridges ....................................................................................................................................... 4-4 4.4 Post-Trip (After Trip) Vehicle Inspection .................................................................................................. 4-4 4.5 Prohibited Practices .................................................................................................................................. 4-5 4.6 Use of Brake-Door Interlocks ................................................................................................................... 4-5 Chapter 5 : Air Brakes ......................................................................................................... 5-1 5.1 The Parts of an Air Brake System ............................................................................................................. 5-1 5.1.1 Air Compressor .................................................................................................................................. 5-1 5.1.2 Air Compressor Governor .................................................................................................................. 5-1 5.1.3 Air Storage Tanks ............................................................................................................................... 5-1 5.1.4 Air Tank Drains ................................................................................................................................... 5-2 Figure 5.1 Air Tank Drain .............................................................................................................................. 5-2 5.1.5 Alcohol Evaporator ............................................................................................................................ 5-2 5.1.6 Safety Valve ....................................................................................................................................... 5-2 5.1.7 The Brake Pedal ................................................................................................................................. 5-2 5.1.8 Foundation Brakes ............................................................................................................................. 5-3 Chapter 4 : Transporting Passengers Safely ........................................................................ 4-1 Figure 4.0 Class A Passenger Bus ................................................................................................................ 4-1
vii Figure 5.2b Disk Brake .................................................................................................................................. 5-4 5.1.9 Supply Pressure Gauges ..................................................................................................................... 5-4 5.1.10 Application Pressure Gauge .............................................................................................................. 5-4 5.1.11 Low Air Pressure Warning ............................................................................................................... 5-4 5.1.12 Stop Light Switch ............................................................................................................................. 5-5 5.1.13 Front Brake Limiting Valve ............................................................................................................... 5-5 5.1.14 Spring Brakes ................................................................................................................................... 5-5 5.1.15 Parking Brake Controls .................................................................................................................... 5-6 Figure 5.3 TPV and Brake Operation ............................................................................................................ 5-7 5.1.16 Antilock Braking Systems (ABS) ....................................................................................................... 5-7 Figure 5.4 ABS System .................................................................................................................................. 5-7 .......................................................................................................................................................................... 5-8 5.2 Dual Air Brake ........................................................................................................................................... 5-8 5.3 Inspecting Air Brake Systems ................................................................................................................... 5-8 5.3.1 During Step 2: Engine Compartment Checks ...................................................................................... 5-9 5.3.2 During Step 5: Walk-around Inspection ............................................................................................. 5-9 5.3.3 During Step 7: Final Air Brake Check ................................................................................................ 5-9 Figure 5.5 Low Air Pressure Warning ......................................................................................................... 5-11 5.4 Using Air Brakes ........................................................................................................................................ 5-12 5.4.1 Normal Stops ................................................................................................................................... 5-12 5.4.2 Braking with Antilock Brakes ........................................................................................................... 5-12 5.4.3 Emergency Stops.............................................................................................................................. 5-12 5.4.4 Stopping Distance ............................................................................................................................ 5-13 Figure 5.6 Stopping Distance ...................................................................................................................... 5-13 5.4.5 Brake Fading or Failure ................................................................................................................. 5-14 5.4.6 Proper Braking Technique ............................................................................................................... 5-14 5.4.7 Low Air Pressure .............................................................................................................................. 5-14 5.4.8 Parking Brakes.................................................................................................................................. 5-14 Appendix 1- the Air Brake System ................................................................................................................ 5-1 Chapter 6 : Combination Vehicles ....................................................................................... 6-1 6.1 Driving Combination Vehicles Safely ........................................................................................................ 6-1 6.1.1 Rollover Risks ..................................................................................................................................... 6-1 6.1.2 Steer Gently ....................................................................................................................................... 6-1 Figure 5.2 Drum Brake .................................................................................................................................. 5-3 Figure 5.2a Wedge Brake .............................................................................................................................. 5-3
viii 6.1.4 Railroad-highway Crossings ............................................................................................................... 6-2 6.1.5 Prevent Trailer Skids .......................................................................................................................... 6-3 Figure 6.2 Trailer Jackknife ........................................................................................................................... 6-3 6.1.6 Turn Wide For Off-Tracking ............................................................................................................... 6-3 Figure 6.3 Off-Tracking ................................................................................................................................. 6-3 Figure 6.4 Jug Handle vs. Buttonhook turns ................................................................................................. 6-4 6.1.7 Backing with a Trailer......................................................................................................................... 6-5 Figure 6.5 Backing a Trailer .......................................................................................................................... 6-5 6.2 Combination Vehicle Air Brakes ............................................................................................................... 6-6 6.2.1 Trailer Hand Valve .............................................................................................................................. 6-6 6.2.2 Tractor Protection Valve .................................................................................................................... 6-6 6.2.3 Trailer Air Supply Control ................................................................................................................... 6-6 6.2.4 Trailer Air Lines .................................................................................................................................. 6-6 6.2.5 Hose Couplers (Glad Hands) .............................................................................................................. 6-7 Figure 6.6 Coupling Components ................................................................................................................. 6-7 6.2.6 Trailer Air Tanks ................................................................................................................................. 6-8 6.2.7 Shut-off Valves ................................................................................................................................... 6-8 6.2.8 Trailer Service, Parking, and Emergency Brakes ................................................................................. 6-8 6.3 Antilock Brake Systems ............................................................................................................................ 6-9 6.3.1 Trailers Required to Have ABS ........................................................................................................... 6-9 Figure 6.7 – ABS Malfunction warning Light. ............................................................................................... 6-9 6.3.2 Braking with ABS ................................................................................................................................ 6-9 6.4 Coupling and Uncoupling ....................................................................................................................... 6-10 6.4.1 Coupling Tractor-Semitrailers .......................................................................................................... 6-10 6.4.2 Uncoupling Tractor-Semitrailers ...................................................................................................... 6-13 6.4.3 Coupling a Pintle Hook ...................................................................................................................... 6-14 6.4.4 Uncoupling a Pintle Hook ................................................................................................................ 6-15 6.4.5 - Coupling a Drawbar ......................................................................................................................... 6-16 6.4.6 - Uncoupling a Drawbar ..................................................................................................................... 6-17 6.4.7 - Coupling a Gooseneck Hitch ............................................................................................................ 6-17 6.4.8 Uncoupling a Gooseneck Hitch .......................................................................................................... 6-18 6.5 Inspecting a Combination Vehicle .......................................................................................................... 6-18 6.5.1 Additional Things to Check During a Walk-Around Inspection ....................................................... 6-18 Figure 6.1 Rearward Amplification ............................................................................................................... 6-2 6.1.3 Brake Early ......................................................................................................................................... 6-2
ix Chapter 7 : Doubles and Triples .......................................................................................... 7-1 7.1 Pulling Double/Triple Trailers ................................................................................................................... 7-1 7.1.1 Prevent Trailer from Rolling Over ...................................................................................................... 7-1 7.1.2 Beware of the Crack-the-Whip Effect ................................................................................................ 7-1 7.1.3 Inspect Completely .......................................................................................................................... 7-1 7.1.4 Look Far Ahead .................................................................................................................................. 7-1 7.1.5 Manage Space .................................................................................................................................... 7-1 7.1.6 Adverse Conditions .......................................................................................................................... 7-1 7.1.7 Parking the Vehicle ............................................................................................................................ 7-1 7.1.8 Antilock Braking Systems on Converter Dollies ............................................................................ 7-1 7.2 Coupling and Uncoupling ......................................................................................................................... 7-1 7.2.1 Coupling Twin Trailers ....................................................................................................................... 7-2 Figure 7.1 Converter gear on a dolly ............................................................................................................ 7-2 7.2.2 Uncoupling Twin Trailers ................................................................................................................... 7-4 7.2.3 Coupling & Uncoupling Triple Trailers ............................................................................................... 7-4 7.2.4 Coupling & Uncoupling Other Combinations ...................................................................................... 7-5 7.3 Inspecting Doubles & Triples .................................................................................................................... 7-5 7.3.1 Additional Checks .............................................................................................................................. 7-5 7.3.2 Additional Things to Check during a Walk-Around Inspection .......................................................... 7-6 7.4 Doubles/Triples Air Brake Check .............................................................................................................. 7-6 7.4.1 Additional Air Brake Checks ............................................................................................................... 7-6 7.5 Long Commercial Vehicles Certification .................................................................................................... 7-7 Chapter 8 : Tank Vehicles.................................................................................................... 8-1 8.1 Inspecting Tank Vehicles .......................................................................................................................... 8-1 8.1.1 Leaks .................................................................................................................................................. 8-1 8.1.2 Check Special Purpose Equipment .................................................................................................... 8-1 8.1.3 Special Equipment ............................................................................................................................. 8-2 8.2 Driving Tank Vehicles ................................................................................................................................ 8-2 8.2.1 High Center of Gravity ....................................................................................................................... 8-2 8.2.2 Danger of Surge ................................................................................................................................. 8-2 8.2.3 Bulkheads ........................................................................................................................................... 8-2 8.2.4 Baffled Tanks ...................................................................................................................................... 8-3 8.2.5 Un-baffled Tanks ................................................................................................................................ 8-3 Figure 6.9 Sliding Fifth Wheel ..................................................................................................................... 6-19 6.5.2 Combination Vehicle Brake Check ................................................................................................... 6-19
x 8.3 Safe Driving Rules ..................................................................................................................................... 8-3 8.3.1 Drive Smoothly .................................................................................................................................. 8-3 8.3.2 Controlling Surge ............................................................................................................................... 8-4 8.3.3 Curves ................................................................................................................................................ 8-4 8.3.4 Stopping Distance .............................................................................................................................. 8-4 8.3.5 Skids ................................................................................................................................................... 8-4 Chapter 9 : Hazardous Materials ......................................................................................... 9-1 9.0 Hazmat Endorsement ............................................................................................................................... 9-1 Application Process: ....................................................................................................................................... 9-1 9.0.1 Pre-Enrollment ................................................................................................................................... 9-2 9.0.2 Fingerprinting..................................................................................................................................... 9-2 9.0.3 Determination of Security Threat ...................................................................................................... 9-2 9.0.4 Knowledge Testing ............................................................................................................................. 9-3 9.0.5 Renewals and Extensions ................................................................................................................... 9-3 9.0.6 Issuance or Denial of Hazardous Materials Endorsements ................................................................. 9-3 9.0.7 Introduction to Hazardous materials ................................................................................................. 9-3 9.1 The Intent of the Regulations ................................................................................................................... 9-4 9.1.1 Contain the Material .......................................................................................................................... 9-4 9.1.2 Communicate the Risk ......................................................................................................................... 9-4 9.1.3 Assure Safe Drivers and Equipment .................................................................................................. 9-5 9.2 Hazardous Materials Transportation: Who Does What? ....................................................................... 9-5 9.2.1 The Shipper ........................................................................................................................................ 9-5 9.2.2 The Carrier ......................................................................................................................................... 9-5 9.2.3 The Driver .......................................................................................................................................... 9-6 9.3 Communication Rules ............................................................................................................................... 9-7 9.3.1 Definitions ............................................................................................................................................. 9-7 9.3.2 Package Labels ....................................................................................................................................... 9-8 Figure 9.2 Hazmat Labels .............................................................................................................................. 9-8 9.3.3 Lists of Regulated Products ................................................................................................................... 9-8 Figure 9.3 Hazmat Placards .......................................................................................................................... 9-8 Figure 9.5 Hazardous Substances and Reportable Quantities ................................................................... 9-10 9.3.4 The Shipping Paper .............................................................................................................................. 9-11 Figure 9.6 The Shipping Paper .................................................................................................................... 9-11 8.2.6 Outage................................................................................................................................................ 8-3 8.2.7 How Much to Load? ........................................................................................................................... 8-3
xi 9.3.7 Package Markings and Labels .......................................................................................................... 9-13 9.3.8 Recognizing Hazardous Materials ................................................................................................... 9-13 9.3.9 Hazardous Waste Manifest .............................................................................................................. 9-14 9.3.10 Placarding ...................................................................................................................................... 9-14 9.3.11 Placard Tables ................................................................................................................................ 9-14 9.4 Loading and Unloading ............................................................................................................................. 9-16 9.4.1 General Loading Requirements ....................................................................................................... 9-16 9.5 Bulk Packaging Marking, Loading and Unloading .................................................................................... 9-20 9.5.1 Markings .......................................................................................................................................... 9-20 9.5.2 Tank Loading .................................................................................................................................... 9-20 9.5.3 Flammable Liquids ........................................................................................................................... 9-21 9.5.4 Compressed Gas .............................................................................................................................. 9-21 9.6 Hazardous Materials -- Driving and Parking Rules ................................................................................... 9-21 9.6.1 Parking with Division 1.1, 1.2, or 1.3 Explosives .............................................................................. 9-21 9.6.2 Parking a Placarded Vehicle (Not Transporting Division 1.1, 1.2, or 1.3 Explosives) ...................... 9-21 9.6.3 Attending Parked Vehicles ............................................................................................................... 9-22 9.6.4 No Flares! ......................................................................................................................................... 9-22 9.6.5 Route Restrictions ............................................................................................................................ 9-22 9.6.6 No Smoking ...................................................................................................................................... 9-23 9.6.7 Refuel with Engine Off ..................................................................................................................... 9-23 9.6.8 10 B:C Fire Extinguisher .................................................................................................................. 9-23 9.6.9 Check Tires ..................................................................................................................................... 9-23 9.6.10 Where to Keep Shipping Papers and Emergency Response Information ...................................... 9-23 9.6.11 Equipment for Chlorine ................................................................................................................. 9-24 9.6.12 Stop Before Railroad Crossings ...................................................................................................... 9-24 9.7 Hazardous Materials -Emergencies .......................................................................................................... 9-24 9.7.1 Emergency Response Guidebook (ERG) .......................................................................................... 9-24 9.7.2 Crashes/Incidents ............................................................................................................................ 9-24 9.7.3 Fires .................................................................................................................................................. 9-25 9.7.4 Responses to Specific Hazards ......................................................................................................... 9-26 9.7.5 Required Notification ....................................................................................................................... 9-27 9.8 Hazardous Material Glossary ................................................................................................................... 9-29 Sec. 171.8 Definitions and abbreviations: .................................................................................................. 9-29 9.3.5 The Item Description ....................................................................................................................... 9-12 9.3.6 Shipper's Certification ...................................................................................................................... 9-13
xii 10.1.1 Danger Zones ................................................................................................................................. 10-1 10.1.2 Correct Mirror Adjustment ............................................................................................................ 10-1 10.1.3 Outside Left & Right Side Flat Mirrors ............................................................................................. 10-1 Figure 10.2 .................................................................................................................................................. 10-2 10.1.4 Outside Left and Right Side Convex Mirrors ................................................................................... 10-2 Figure 10.3 .................................................................................................................................................. 10-2 10.1.5 Outside Left and Right Side Crossover Mirrors ............................................................................... 10-2 10.1.6 Overhead Inside Rearview Mirror ................................................................................................. 10-3 Figure 10.4a- Student Mirror ...................................................................................................................... 10-3 10.2 Loading and Unloading ......................................................................................................................... 10-3 10.2.1 Approaching the Stop .................................................................................................................... 10-4 Figure 10.4.b Stop Position Undivided Hwy ............................................................................................... 10-4 Figure 10.4.c- Stop Position Divided Hwy ................................................................................................... 10-4 10.2.2 Loading Procedures ....................................................................................................................... 10-5 10.2.3 Unloading Procedures on the Route ............................................................................................. 10-5 10.2.4 Unloading Procedures at School .................................................................................................... 10-7 10.2.5 Special Dangers of Loading and Unloading ................................................................................... 10-7 10.2.6 Pre-trip and Post-trip Inspection ................................................................................................... 10-8 10.3 Emergency Exit and Evacuation ........................................................................................................... 10-8 10.3.1 Planning for Emergencies .............................................................................................................. 10-8 10.3.2 Evacuation Procedures .................................................................................................................. 10-9 10.4 Railroad-Highway Crossings ............................................................................................................... 10-10 10.4.1 Types of Crossings ........................................................................................................................ 10-10 10.4.2 Warning Signs and Devices .......................................................................................................... 10-10 Figure 10.5 Advance Warning Sign ........................................................................................................... 10-10 Figure 10.6 Pavement Markings ............................................................................................................... 10-11 Figure 10.7 Crossbuck Sign ....................................................................................................................... 10-11 Figure 10.8 Gate / Multiple Railroad Tracks ............................................................................................. 10-11 10.4.3 Recommended Procedures ......................................................................................................... 10-11 10.4.4 Special Situations ......................................................................................................................... 10-12 10.5 Student Management ........................................................................................................................ 10-13 10.5.1 Don’t Deal with On-bus Problems When Loading and Unloading .............................................. 10-13 10.5.2 Handling Serious Problems .......................................................................................................... 10-13 Chapter 10 : School Buses ................................................................................................. 10-1 10.1 Danger Zones and Use Of Mirrors ........................................................................................................ 10-1
xiii 10.6.2 How ABS Helps You ...................................................................................................................... 10-13 10.6.3 Braking with ABS .......................................................................................................................... 10-14 10.6.4 Braking if ABS is Not Working ...................................................................................................... 10-14 Figure 10.9 ABS Warning Light ................................................................................................................. 10-14 10.6.5 Safety Reminders ......................................................................................................................... 10-14 10.7 Special Safety Considerations .......................................................................................................... 10-15 10.7.1 Strobe Lights ................................................................................................................................ 10-15 10.7.2 Driving in High Winds ............................................................................................................... 10-15 10.7.3 Backing ......................................................................................................................................... 10-15 10.7.4 Tail Swing ..................................................................................................................................... 10-16 Figure 10.10 An example of Tail Swing ............................................................................................ 10-16 Chapter 11 Vehicle Inspection Test ................................................................................... 11-0 11.0 General Information ............................................................................................................................. 11-0 11.0.1 Scheduling Your Test...................................................................................................................... 11-0 11.0.2 Time Limit for Vehicle Inspection Test ............................................................................................ 11-0 11.0.3 Vehicle Used in the Test .................................................................................................................. 11-0 11.0.4 Restrictions .................................................................................................................................... 11-1 11.0.5 Conducting the Inspection ............................................................................................................. 11-1 11.0.6 Practice for the Vehicle Inspection ................................................................................................ 11-3 11.0.7 Vehicle Inspection Memory Aid ........................................................................................................ 11-3 11.0.8 Grounds for Immediate Failure of the Skills Test .......................................................................... 11-3 11.1 All Vehicles............................................................................................................................................ 11-4 11.1.1 Engine Compartment (Engine Off) .................................................................................................. 11-4 11.2 Steering and Suspension ........................................................................................................................ 11-7 11.2.1 Steering- Check the following components: ................................................................................... 11-7 11.2.2 Suspension- Front Axle .................................................................................................................. 11-7 11.2.3 Brake Components ........................................................................................................................ 11-9 11.2.4 Wheels ........................................................................................................................................ 11-12 11.2.5 Side of Vehicle ............................................................................................................................. 11-14 11.2.6 Rear of Vehicle ............................................................................................................................. 11-16 11.2.7 Tractor/Coupling ......................................................................................................................... 11-16 11.3 School Bus Inspection Items (found at the back of this Chapter) ...................................................... 11-21 11.4 Trailer .................................................................................................................................................. 11-21 10.6 Antilock Braking Systems.................................................................................................................... 10-13 10.6.1 Vehicles Required to Have Antilock Braking Systems ................................................................... 10-13
xiv 11.4.3 Remainder of Trailer .................................................................................................................... 11-22 11.5 In Cab Check/Engine Start .................................................................................................................. 11-26 11.6 Light Checks ........................................................................................................................................ 11-27 11.7 Brake Checks ........................................................................................................................................ 11-29 11.8 School Bus Only .................................................................................................................................... 11-32 11.9 Coach/Transit Bus Inspection Items ..................................................................................................... 11-38 11.9.1 Passenger Items ........................................................................................................................... 11-38 11.9.2 Entry/ Exit Doors: ......................................................................................................................... 11-40 11.9.3 External Bus Inspection ............................................................................................................... 11-40 11.9.4 Remainder of Coach/ Transit Bus ................................................................................................ 11-41 Chapter 12 : Basic Control Skills ........................................................................................ 12-1 12.1 SCORING ............................................................................................................................................... 12-1 12.1.1 Time Limits ..................................................................................................................................... 12-2 12.2 Exercises & Course Dimensions ............................................................................................................ 12-2 12.2.1 Straight Line Backing ...................................................................................................................... 12-2 12.2.2 Offset Back/Right ........................................................................................................................... 12-3 12.2.3 Offset Back/Left ............................................................................................................................. 12-3 12.2.4 Parallel Park (Driver Side) .............................................................................................................. 12-3 12.2.5 Parallel Park (Conventional) .......................................................................................................... 12-3 12.2.6 Alley Dock ...................................................................................................................................... 12-3 Figure 12.1 Straight Line Backing .............................................................................................................. 12-4 Figure 12.2 Offset Backing – Right ............................................................................................................ 12-5 Figure 12.3 Offset Backing – Left .............................................................................................................. 12-5 Figure 12.4 Parallel Park – Driver’s Side ................................................................................................... 12-6 Figure 12.5 Parallel Park – Conventional .................................................................................................. 12-6 Figure 12.6 Alley Dock Course and Dimensions ....................................................................................... 12-7 Figure 12.7 Offset Backing Course Dimensions ........................................................................................ 12-8 Figure 12.8 Parallel Park Course Dimensions ........................................................................................... 12-9 Chapter 13 : Road Test...................................................................................................... 13-1 13.1 How You Will Be Tested ....................................................................................................................... 13-1 13.1.1 Turns: ............................................................................................................................................. 13-1 Figure 13.1 Four Way Intersections............................................................................................................ 13-2 13.1.2 Intersections .................................................................................................................................. 13-2 11.4.1 Trailer Front ................................................................................................................................. 11-21 11.4.2 Side of Trailer .............................................................................................................................. 11-21
xv 13.1.5 Freeway/Expressway ..................................................................................................................... 13-3 13.1.6 Stop/Start ....................................................................................................................................... 13-3 13.1.7 Curve .............................................................................................................................................. 13-4 13.1.8 Railroad Crossing ........................................................................................................................... 13-4 13.1.9 Bridge /Overpass/Sign ................................................................................................................... 13-5 13.1.10 Student Discharge (School Bus Tests Only) ............................................................................... 13-5 13.1.11- General Driving Behaviors ............................................................................................................ 13-5 13.1.11(a) Clutch Usage (for Manual Transmission) ................................................................................ 13-5 13.1.12(b) Gear Usage (for Manual Transmission) ................................................................................... 13-5 13.1.13(c) Brake Usage ............................................................................................................................. 13-5 13.1.14(d) Lane Usage ............................................................................................................................. 13-5 13.1.15 Steering ........................................................................................................................................ 13-6 13.1.16 Regular Traffic Checks .................................................................................................................. 13-6 13.1.17 Use of Turn Signals ...................................................................................................................... 13-6 13.2 CDL Vehicle Inspection ......................................................................................................................... 13-6 Figure 13.2 Memory Aid (next page) .......................................................................................................... 13-6 13.3 Brake Test Practice Checklist-Truck ............................................................................................................ 8 13.3 Brake Test Practice Checklist-Bus ............................................................................................................... 9 13.1.3 Urban/Rural Straight ...................................................................................................................... 13-3 13.1.4 Lane Changes ................................................................................................................................. 13-3
xvi Commercial Driver License Tests

Restrictions and Endorsements
Exemptions
Fees
How to Get a CDL
Safety Rules
1.0 Introduction
Idaho’s Commercial Driver’s License (CDL) Program is designed to improve safety on our highways by meeting federal requirements for testing and licensing commercial drivers. On October 26, 1986, Congress passed the Commercial Motor Vehicle Safety Act of 1986. This law sets minimum standards for the licensing of drivers of commercial motor vehicles.
This manual provides driver’s license testing information for drivers wanting to obtain a Commercial Driver’s License (CDL). This manual does NOT provide information on all the federal requirements needed before you can drive a Commercial Motor Vehicle (CMV). Regulations such as hours of service requirements, commercial vehicle licensing, etc. are not covered in this manual.
To get a CDL, you must pass knowledge and skills tests. This manual will help you pass the tests.

This manual is not a substitute for a truck or bus driver training class or program. Formal training is the most reliable way to learn the many special skills required for safely driving a large commercial vehicle and becoming a professional driver in the trucking industry. 1.0.1 Commercial Vehicle Defined The first word in CDL is Commercial. A CDL is required to operate any of the following commercial vehicles:
oAny single vehicle with a gross vehicle weight rating (GVWR) of 26,001 pounds or more.
oA combination vehicle with a gross combination weight rating (GCWR) of 26,001 or more pounds, provided the GVWR of the vehicle(s) being towed is in excess of 10,000 pounds.
oA vehicle designed to transport 16 or more passengers (including the driver).
oAny size vehicle which requires hazardous material placards or is carrying material listed as a select agent or toxin in 42 CFR part 73. Federal regulations through the Department of Homeland Security require a background check and fingerprinting for the Hazardous Materials endorsement. See Chapter Nine for more information.
GROSS VEHICLE WEIGHT RATING (GVWR) The GVWR is the manufacturer’s assigned weight rating for the vehicle (truck, bus, or trailer), not the vehicle’s registered weight. On trucks, the GVWR is usually found on a laminated paper identification sticker inside the driver’s door. On trailers, it may be found anywhere but is commonly found on the front of the trailer on the driver’s side. For Idaho, in the absence of a GVWR, the actual weight of the vehicle plus its heaviest load is considered to be the GVWR. Other states may use other definitions. Chapter 1: Introduction and Basic Information
This Chapter Covers:
1-1
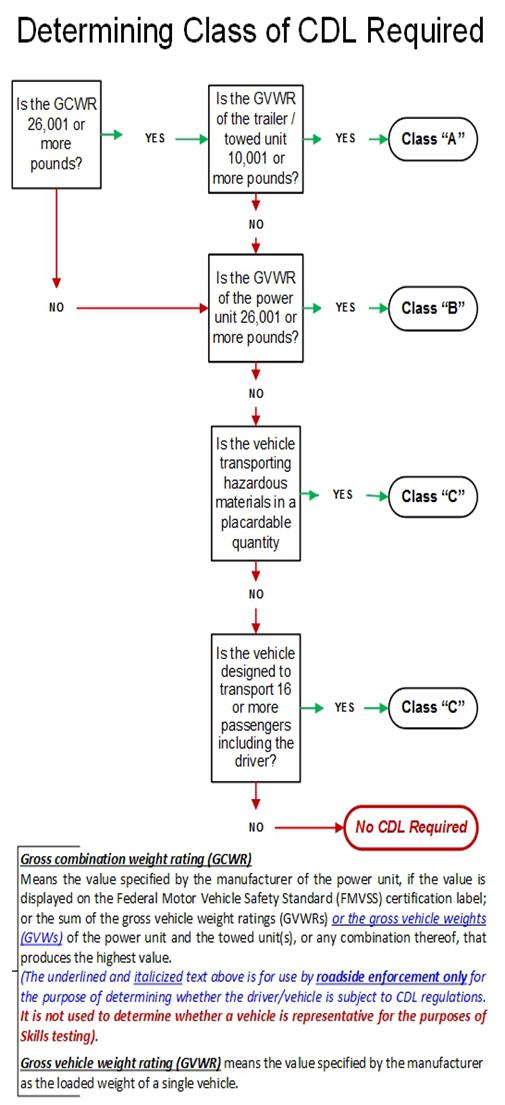
SPECIAL NOTE: Recreational Vehicles are exempt from the Commercial Driver’s License requirements. However, any person who operates a CUSTOM MOTORCOACH FOR COMMERCIAL PURPOSES, with a gross vehicle weight rating or gross vehicle weight greater than 26,001 pounds, is required to have a Commercial Driver’s License with a passenger endorsement. This rule applies even if the vehicle is designed or used to transport less than 16 passengers, including the driver.
Military Vehicle Exemption: The Military Vehicle Exemptionapplies to military vehicle operators who are considered active-duty military personnel and to civilians who are required to wear uniforms and are subject to the Code of Military Justice.
Emergency Vehicle Exemption: The Emergency Vehicle Exemptionapplies to drivers of firefighting or other emergency equipment used in response to emergencies involving the preservation of life or property. Figure 1.1: Determining Class of CDL Required 1.0.2 Commercial Vehicle Exemptions Even if your vehicle is a commercial vehicle as defined above, you may still qualify for one of the federal and/or state CDL exemptions. There are four categories of CDL exemptions.
Recreational Vehicle Exemption: The Recreational Vehicle Exemptionapplies to drivers of vehicles used exclusively to transport personal possessions or family members for non-business or recreational purposes. GROSS COMBINED WEIGHT RATING (GCWR): The GCWR is the total weight of the GVWRs of each unit of a combination vehicle (truck/tractor and trailer(s) added together.
1-2 1.Controlled and operated by the farmer
2.Used to transport agricultural products, supplies, and machinery to or from a farm
3.Not used in common or contract carrier operations, and
4.Not driven more than 150 miles (“as the crow flies”) from the farm.
The farm exemption is intended for small farm-to-market operations only. It does not extend beyond the boundaries of Idaho unless there is a current reciprocity agreement in affect between states. Also, it does not include farmers who are transporting other farmers’ products if they are receiving any compensation for the services.
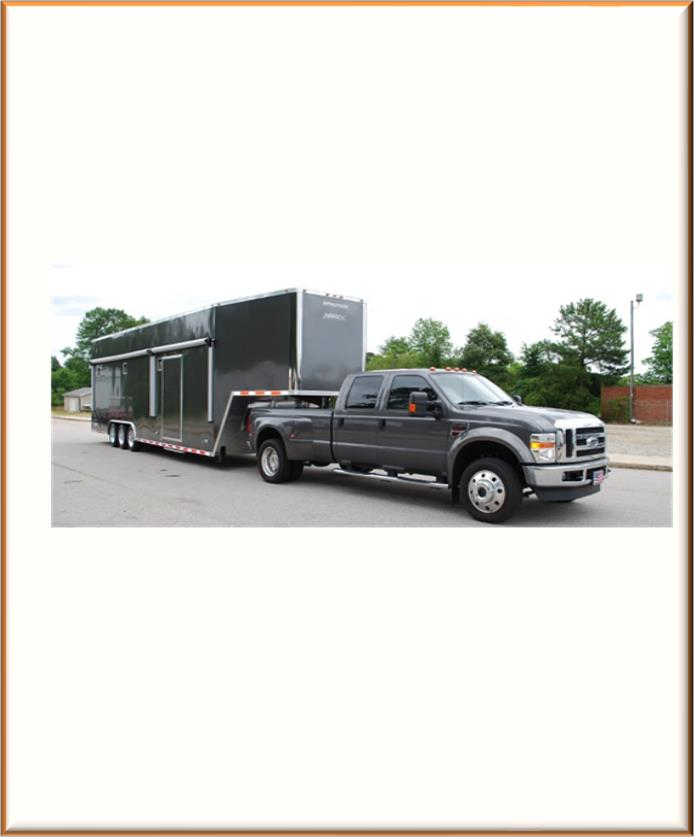
The definition of commercial vehicles includes many vehicles that might not seem to be commercial vehicles, but are when combined with large trailers, for example. GVWR should be closely checked to determine if the vehicle combination requires a CDL.
Vehicles weighing over 10,000 pounds GVWR used in commerce across state lines fall under Federal Motor Carrier requirements even though the driver may not need a CDL. Operators of vehicles in this Category should contact Idaho State Police, Commercial Vehicle Safety at (208) 884-7220 for guidance. Class A- Combination Vehicles: Any combination of vehicles with gross combination weight rating (GCWR) of 26,001 or more pounds falls in Group A provided the GVWR of the vehicle(s) being towed is more than 10,000 pounds.
Most Class A vehicles are trucks such as truck-tractor/semi-trailer or truck and trailer combinations. However, tractor-trailer buses may be found in a few communities.
Class A vehicles require considerably more skill and knowledge than driving vehicles in Classes B and C. Since these skills include those required to drive a B and C vehicle, a driver who has a Class A license also may drive vehicles in Classes B and C (with proper endorsements). Class B- Heavy Straight Vehicles: Any single vehicle with a GVWR of 26,001 or more pounds falls in Group B, or any such vehicle towing another vehicle not in excess of 10,000 pounds GVWR. Class B includes straight trucks and large buses, including articulated buses. Safely driving these heavy vehicles requires considerably more knowledge and skill than driving the small trucks and buses found in Class C. Since they include the skills required to drive Class C vehicles, drivers who have qualified for a Class B license may also drive vehicles in Class C (with proper endorsements).
Class C: Small Vehicles. Any single vehicle with a GVWR less than 26,001 pounds falls in Group C, or any such vehicle towing another vehicle not in excess of 10,000 pounds GVWR. However, vehicles of this size are included in the CDL program only if they are:
- 1) Designed to carry 16 or more passengers including the driver, or Farm Vehicle Exemption: The Farm Vehicle Exemptionapplies to drivers of farm vehicles, including family members and farm hands, under certain conditions only. The farm exemption applies to drivers of farm vehicles which are: 1.0.3 Commercial License Types The CDL vehicle classification included in the federal standard, together with the type of cargo to be transported, determine what type of CDL license and endorsement an applicant must apply for. There are three basic vehicle classes or groups: 1-3 There are a great variety of vehicles in Class C. Some rather large Class C vehicles may require more skill and knowledge to operate than do the smaller ones. However, the licensing category is based principally on the type of cargo carried. Because of the seriousness of an accident involving hazardous material or human passengers, the safe operation of even the smaller Class C vehicles requires special knowledge and the drivers of these vehicles must have a CDL. 1.0.4 Commercial License Endorsements All commercial drivers who drive certain types of vehicles or haul certain types of cargo must add endorsements to their CDL license and/or Commercial Learner’s Permit (CLP) to show that they have the specialized knowledge required for these operations. There are six kinds of CDL endorsements that may be required, depending on the vehicle or type of cargo. NOTE: The only endorsements that may be added to a Commercial Learner’s Permit (CLP) are: -Passenger -School bus -Tank vehicle (T) - Double and Triple Trailers: Many drivers who are qualified to drive Class A vehicles may wish to pull double or triple trailers. Research shows that considerable additional knowledge and skill is necessary to safely pull double and triple trailers in various traffic conditions and driving environments. Consequently, adding the endorsement to the licenses of Class A drivers is necessary if they wish to pull double or triple trailers. A special knowledge examination on the problems associated with pulling multiple trailers must be passed.
- 2) Used to transport hazardous materials in quantities requiring placarding under the Hazardous Materials Regulations (49 CFR Part 172, Subpart F) or
- 3) is carrying material listed as a select agent or toxin in 42 CFR Part 73. (N) - Tank Vehicle: Drivers ofany commercial motor vehicle that is designed to transport any liquid or gaseous materials within a tank or tanks having an individual rated capacity of more than 119 gallons and an aggregate rated capacity of 1,000 gallons or more that is either permanently or temporarily attached to the vehicle or the chassis must obtain this endorsement. Applies to Class A, B and C (only applicable to Class C if the vehicle is hauling hazardous materials) vehicles. Liquids in bulk cause driving control problems because the cargo is heavy, prone to shifting, and has a high center of gravity. These drivers must pass a special knowledge examination on the problems posed by large volume liquid cargos to add the endorsement to their CDL/CLP. (P) - Passengers: Drivers who wish to drive a vehicle having a design capacity to carry 16 or more people, including the driver, must add a passenger endorsement to their CDL/CLP. They must pass a special knowledge examination on safety considerations when transporting passengers and must pass skills tests in a passenger vehicle. The endorsement applies to applicants who wish to drive a bus in any class (A, B, or C). (H) - Hazardous Materials: Any driver, regardless of the vehicle Class/Group (A, B, or C) who wishes to haul any material that has been designated as hazardous under 49 U.S.C. 5103 and is required to be placarded under subpart F of 49 CFR part 172; or any quantity of a material listed as a select agent or toxin 42 CFR Part 73 must add a hazardous materials endorsement to their CDL. Hazmat drivers must pass a special written examination on how to recognize, handle, and transport hazardous materials. The Transportation Security Administration (TSA) and the US Department of Transportation require background checks on commercial drivers who are 1-4 1.0.5 Commercial License Restrictions Restrictions may be added to Commercial Driver Licenses/Permits based upon the type of vehicle and equipment that the driver uses for the Skills Test. There are ten standardized restriction codes. NOTE: If a CLP is issued with a Passenger (P) or a School Bus (S) endorsement, it must also contain a (P) – No passengers in a CMV bus restriction. If a CLP is issued with a Tanker (N) endorsement, it must also contain a (X) – No cargo in a CMV tank vehicle. certified to transport hazardous materials. The background checks include a review of criminal, immigration, and FBI records. If the driver is found to represent a security threat, TSA will notify the person and the state will deny issuance of an endorsement. A written test and a TSA security threat assessment are required each time the driver renews his/her license. (X) - Combination Hazardous Materials and Tank Vehicle: Drivers of tank vehicles who haul hazardous materials or waste in amounts requiring placards must add an X endorsement to their CDL, showing that they have passed the special knowledge examinations for both tank vehicles and hazardous materials. (S) - School Buses: Drivers who wish to drive a school bus must add a school bus endorsement to their CDL/CLP. They must pass a special knowledge examination on safety considerations when transporting passengers in a school bus and must pass skills tests in a school bus. The endorsement applies to applicants who wish to drive a school bus in any class (A, B, or C). (E) - Automatic Transmission: The (E) restriction prohibits driving of commercial vehicles with a manual transmission. If an applicant performs the CDL skills test in a vehicle equipped with an automatic transmission, this restriction will be placed on the CDL. For purposes of the CDL skills test and the restriction, an automatic transmission includes any transmission not operating fully on the gear shift and clutch principle. (K) - Intrastate only: If an applicantcertifies their status as either Non-Excepted Intrastate or Excepted Intrastate, a restriction must be placed on the CDL, if issued, that person is restricted from operating a CMV in interstate commerce. States may impose this restriction for reasons other than those specified above. (L) - No Air brake equipped CMV: If an applicant does not take or fails the air brake component of the knowledge test, or performs the skills test in a vehicle not equipped with air brakes, a restriction must be placed on the CLP or CDL, if issued, that the person is restricted from operating a CMV equipped with any type of air brakes. For the purposes of the skills test and the restriction, air brakes include any braking system operating fully or partially on the air brake principle. (M) - No Class A passenger vehicle: If an applicant applying for a passenger endorsement performs the skills test in a passenger vehicle requiring a Group B CDL, a restriction must be placed on the CDL, if issued, that the person is restricted from operating a passenger vehicle requiring a Group A CDL. (N) - No Class A and B passenger vehicle: If an applicant applying for a passenger endorsement performs the skills test in a passenger vehicle requiring a Group C CDL, a restriction must be placed on the CDL, if issued, that the person is restricted from operating a passenger vehicle requiring a Group A or B CDL 1-5 1.0.6 Seasonal CDL for Farm-Related Services A Seasonal Commercial Driver's License is available to qualified seasonal drivers for certain farm-related service industries such as custom harvesters, farm retail outlets and suppliers, agrichemical businesses, and livestock feeders. The Seasonal CDL is only valid within 150 miles of the business or farm being serviced. The Seasonal CDL is valid (with a Class D license) for 180 days in a 12 month period and can only be obtained twice in a lifetime. The Seasonal CDL is not valid for driving Class A (combination) vehicles or passenger vehicles constructed to carry 16 or more people including the driver. The Seasonal CDL is not valid for driving vehicles carrying hazardous materials requiring placards except for diesel fuel in quantities of 1,000 gallons or less, liquid fertilizers in vehicles or implements of husbandry with total capacities of 3,000 gallons or less, or solid fertilizers that are not mixed or transported with any organic substance. Requirements To apply for a Seasonal CDL you must: ➢Be at least 16 years of age. ➢Have a valid Class D license. (O) - No tractor trailer CMV: If an applicant performs the skills test in a combination vehicle for a Group A CDL with the power unit and towed unit connected with a pintle hook or other non-fifth wheel connection, a restriction will be placed on the CDL, if issued, that the person is restricted from operating a tractor-trailer combination connected by a fifth wheel that requires a Group A CDL. An applicant who passes a skills test using a combination vehicle that is NOT a Truck Tractor Semi-Trailer combination, but is otherwise equipped with a fifth wheel, will be issued a CDL with an “O” restriction. Any combination OTHER THAN a TRACTOR-TRAILER with a full size fifth wheel coupling will result in an (O) restriction. (P) - No passengers in CMV bus: A CLP holder with a P endorsement is prohibited from operating a CMV carrying passengers, other than Federal/State auditors and inspectors, test examiners, other trainees, and the CDL holder accompanying the CLP holder as prescribed by § CFR 383.25(a)(1) of this part. A CLP holder with a (S) endorsement is prohibited from operating a school bus with passengers, other than Federal/State auditors and inspectors, test examiners, other trainees, and the CDL holder accompanying the CLP holder as prescribed by § CFR 383.25(a)(1) of this part. (V) - Medical Variance: If the State is notified according to § 383.73(o)(3) that the driver has been issued a medical variance, the State must indicate the existence of such a medical variance on the CDLIS driver record and the CDL document, if issued, using the restriction code ‘‘V’’ to indicate there is information about a medical variance on the CDLIS driver record. (X) - No cargo in CMV tank vehicle: A CLP holder with an N endorsement may only operate an empty tank vehicle and is prohibited from operating any tank vehicle that previously contained hazardous materials that has not been purged of any residue. (Z) - No full air brake equipped CMV: If an applicant performs the skills test in a vehicle equipped with air over hydraulic brakes, the State must indicate on the CDL, if issued, that the person is restricted from operating a CMV equipped with any braking system operating fully on the air brake principle. For the purposes of the skills test and the restriction, air over hydraulic brakes includes any braking system operating partially on the air brake and partially on the hydraulic brake principle. 1-6 any type of motor vehicle. ➢Have not violated the CDL single license requirements. ➢Have not had any license suspensions, revocations, or cancellations. ➢Have not had any convictions in any vehicle for any of the following offenses: 1.Excessive speeding (15 or more miles above the posted speed limit) 2.Reckless driving 3.Improper or erratic lane changes 4.Following the vehicle ahead too closely 5.Driving a commercial motor vehicle without obtaining a CDL 6.Driving a commercial motor vehicle without a CDL in the driver’s possession 7.Driving a commercial motor vehicle without the proper class of CDL and/or endorsements for the specific vehicle group being operated or for the passengers or type of cargo being transported 8.Violation of any other motor vehicle traffic control laws which result in a fatal traffic accident 9.Driving while under the influence of alcohol or a controlled substance, including a refusal to test 10.Leaving the scene of an accident, or 11.Using a vehicle to commit a felony. 1.1 Commercial Driver License Tests This manual provides the information necessary to pass all CDL knowledge (written) tests. Information regarding the skills test requirements is also included. The headings for each paragraph subsection may help with locating specific topics of interest. 1.1.1 Knowledge Tests and License Classes One or more knowledge tests (taken at the local County Sheriff’s DMV) are required depending on what class of license and what endorsements you need. The CDL knowledge tests include: oGeneral Knowledge - taken by all applicants. oPassenger – required if the vehicle has a design capacity to carry 16 or more people, including the driver . oAir Brakes - required if the vehicle has air brakes, including air over hydraulic brakes. oCombination Vehicles - required if operating a combination of vehicles. oHazardous Materials - required if hauling hazardous materials as defined in 49 CFR 383.5. In order to obtain this endorsement, passing a Transportation Security Administration (TSA) background check is required- see Chapter Nine for details. oTank vehicle - required if hauling any liquid or gaseous materials in a tank or tanks having an individual rated capacity of more than 119 gallons and an aggregate rated The holder of a Seasonal CDL is subject to all disqualifying offenses and requirements applicable to CDL holders. Each applicant's driving record will be checked prior to issuance of a Seasonal CDL. Issuance of a Seasonal CDL will be entered on the Commercial Driver’s License Information System (CDLIS). The holder of a Seasonal CDL must pass the CDL General Knowledge written test. The Air Brakes test is also required if the vehicles to be driven are equipped with air brakes. Endorsement tests and skills tests are not required. ➢Have at least 1 year of driving experience in 1-7 double or triple trailers. oSchool Bus - required (along with a passenger endorsement) if operating a school bus. 1.1.2 Skills Tests If you pass the required knowledge test(s), you can take the CDL skills tests when you are eligible. The CDL Skills Test consists of three segments: Vehicle Inspection, Basic Control Skills, and a Road Test. Segments must be taken in the order listed and each segment passed before moving to the next. Tests must be taken in a representative vehicle for the type of license intended to be used. Any vehicle that has components marked or labeled cannot be used for the CDL Skills Test. Vehicle Inspection: You will be tested to see if you know whether your vehicle is safe to drive. You will be asked to do a Vehicle inspection of your vehicle. You must point to/touch and name the item you are inspecting and explain to the examiner what you would inspect and why. Basic Vehicle Control: You will be tested on your skill to control the vehicle. You will be asked to move your vehicle forward, backward, and turn it within a defined area. These areas may be marked with traffic lanes, cones, barriers, or something similar. The examiner will tell you how each control test is to be done. On-road Test: You will be tested on your skill to safely drive your vehicle in a variety of traffic situations. The situations may include left and right turns, intersections, railroad crossings, curves, up and down grades, single or multi-lane roads, streets, or highways. The examiner will tell you where to drive. 1.2 Self-Certification & Medical Requirements When applying for a Commercial Learner’s Permit; or are renewing, upgrading, adding endorsements to or transferring a CDL from another state, federal rules require that you provide information to the Idaho Transportation Department regarding the type of commercial motor vehicle operation you operate or expect to operate with your CDL. This process is known as Self Certification. Self-Certification can be accomplished at your county driver’s license office, or you can complete your own self-certification on the ITD website at the following web address: https://dmvapps.itd.idaho.gov/cdlselfcertification/ There is no charge to self-certify and you can change your category at any time. Be aware, if you self-certify in the “Intrastate” category, a (K) (intrastate operation only) restriction will be placed on your commercial license. To comply with the requirements for medical certification, it is important to know how you are using the CMV. The following information will help you decide how to self-certify: 1.2.1 Interstate or Intrastate Commerce Do you, or will you, use a CDL to operate a CMV in interstate or intrastate commerce? Interstate commerce is when you drive a CMV: • From one State to another State or a foreign country • Between two places within a State, but during part of the trip, the CMV crosses into another State or foreign country; or • Between two places within a State, but the cargo or passengers are part of a trip that capacity of 1,000 gallons or more that is either permanently or temporarily attached to the vehicle or chassis. oDoubles/Triples - required if operating See the chart in the front of this manual to see which sections you should study for each class of license and for each endorsement. 1-8 1.2.2 Inter/Intrastate Commerce: Status Non-excepted or Excepted? Once you decide whether you will operate in interstate commerce or intrastate commerce, you must decide whether you will operate (or expect to operate) in a non-excepted or excepted status. This decision will tell you to which of the four types of commerce you must self-certify. Interstate Commerce: You operate in excepted interstate commerce when you drive a CMV in interstate commerce only for the following excepted activities: *Note: Idaho Department of Education and Idaho Code requires public school bus drivers to maintain a medical examiner’s certificate. If you answered no to all of the above activities, you operate in non-excepted interstate commerce and are required to provide a current medical examiner’s certificate (49 CFR 391.45),commonly referred to as a medical certificate or DOT card, to ITD. Most CDL holders who drive CMVs in interstate commerce are non-excepted interstate commerce drivers. If you operate in both excepted interstate commerce and non-excepted interstate commerce, you must choose non-excepted interstate commerce to be qualified to operate in both types of interstate commerce. Intrastate Commerce: You operate in excepted intrastate commerce when you drive a CMV only in intrastate commerce hauling exempt commodities or other activities which do not require you to meet medical certification requirements. You operate in non-excepted intrastate commerce when you drive a CMV only in intrastate commerce • To transport school children and/or school staff between home and school *; • As Federal, State or local government employees; • To transport human corpses or sick or injured persons; • Fire truck or rescue vehicle drivers during emergencies and other related activities; • Primarily in the transportation of propane winter heating fuel when responding to an emergency condition requiring immediate response such as damage to a propane gas system after a storm or flooding; • In Response to a pipeline emergency condition requiring immediate response such as a pipeline leak or rupture; • In custom harvesting on a farm or to transport farm machinery and supplies used in the custom harvesting operation to and from a farm or to transport custom harvested crops to storage or market; • Beekeeper in the seasonal transportation of bees; • Controlled and operated by a farmer, but is not a combination vehicle (power unit and towed unit), and is used to transport agricultural products, farm machinery or farm supplies (no placardable hazardous materials) to and from a farm and within 150 air-miles of the farm; • As a private motor carrier of passengers for non-business purposes ; or • To transport migrant workers. If you answered yes to one or more of the above activities as the only operation in which you drive, you operate in excepted interstate commerce and do not need a Federal medical examiner’s certificate. began or will end in another State or foreign country. Intrastate commerce is when you drive a CMV within a State and you do not meet any of the descriptions above for interstate commerce. If you operate in both intrastate commerce and interstate commerce, you must choose interstate commerce. 1-9 1.2.3 Self-Certification Statements When completing an application for your CDL, you will be required to check the box next to the statement that describes your status. Based on the information above, choose from: Interstate non-excepted Interstate excepted Intrastate non-excepted Intrastate excepted Note: The above federal definitions can be confusing. Generally, if you are 21 or older and maintain your medical certification and ever drive commercially across state lines (or think you might) you should self-certify “Interstate -non-excepted” to avoid restrictions on your CDL. If you have questions call Driver Services (208) 334-8736 1.2.4 Medical Requirements for CDL Holders Most people who drive commercial motor vehicles are required to have a valid Medical Examiner’s Certificate (MEC). The certificate is issued to the driver upon passing a medical exam done by a provider listed on the National Registry of Medical Examiners (see section 1.2.7). The driver then submits a copy of the MCSA 5876 form to their local DMV or to ITD Headquarters to be entered onto the driver’s record. This must be completed prior to operating a CMV in most cases. Figure 1.2 Sample MCSA 5876 Form A Medical Examiner’s Certificate may be valid for up to 24 months. The medical examiner may also issue a certificate for less than 24 months when it is desirable to monitor a health condition. If the medical examiner finds that the person, he/she examined is physically qualified to drive a CMV, the medical examiner will furnish one copy of the results to the person who was examined. The Driver should receive an MCSA 5875 ‘long form’-several pages detailing the exam- and an MCSA 5876 form- one page that is submitted to the DMV for entry onto the driver’s electronic record. •A copy of the MCSA 5875 form must be submitted to your employer. •A copy of the MCSA 5876 form must be submitted to ITD. •Driver should keep the original 5876 form for his or her records. Your employer is also required to obtain a copy of your Idaho driving record by completing an “Idaho Motor Vehicle Driver’s License Record Request” form (see example at end of this chapter) and paying a small fee.

and are required to meet DOT medical certification requirements.
If you operate in both excepted intrastate commerce and non-excepted intrastate commerce, you must choose non-excepted intrastate commerce.
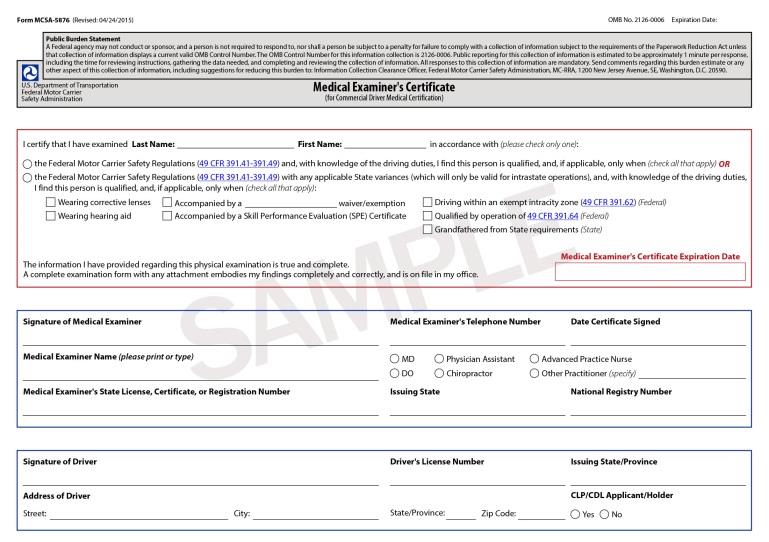
1-10 •FAX a photocopy of your MCSA 5876 form to (208) 334-8586 •E-Mail a photo of your MCSA 5876 form to: DLMail@itd.idaho.gov •Mail a photocopy of your MCSA 5876 form to: Idaho Transportation Department Driver Services PO Box 7129 Boise ID 83707-1129 ---------- OR----------- •Take your MCSA-5876 certificate to your local Sheriff’s DMV office to be scanned
Drivers MUST keep a copy of the MCSA5876 form with them when driving a commercial motor vehicle for at least two weeks after the form has been submitted to ITD or your DMV Office. If you are required to have a ”certified” medical status and fail to provide and keep up-to-date your medical examiner’s certificate you become ”not-certified” and may have your CDL privileges downgraded on your Idaho Commercial Driver’s License. 1.2.5 Submit Medical Examiner’s Certificate
Most drivers operating commercial vehicles will be required to submit a current medical examiner’s certificate and/or any medical variance documents that you have been issued, i.e. Vision Waiver, Skills Performance Examination, Diabetes Waiver or other exemptions, to ITD to obtain a “certified” medical status as part of the driving record.
You may provide this by mail, e-mail or faxing in a copy of your DOT medical card to the Idaho Transportation Department, Driver Services. Your medical provider may do this service for you, but most do not.
You may also take your medical certificate to your local Sheriff’s DMV Office to be scanned to your driving record. 1.2.6 Medical Qualifications for Drivers
When applying for a commercial driver’s license, you will also be asked if you are subject to and in compliance with the requirements of Part 391 of the Federal Motor Carrier Safety Regulations (Qualifications of Drivers). This requirement applies to CMV drivers who are or will be required to have a Medical Examiner’s Certificate to perform the driving functions they plan to do. This report may be obtained by electronic means via Access Idaho at: https://www.accessidaho.org/secure/itd/dlr/intera ctive/search.html
or –
the Driver Record Dashboard at: https://www.accessidaho.org/itd/monitoring/
Some states require all persons who drive a CMV to be medically qualified, or they will lose their commercial driver’s license. Idaho does not require a medical certificate to keep a CDL, but you may not drive a CMV without a valid medical certificate unless you are operating in Idaho only, hauling ONLY exempt commodities (see Section 1.2.8- 1.2.9) or fall under one of the other exemptions to the medical requirements.
It is the responsibility of the commercial driver to determine if he/she is required to be medically qualified for the type of driving he/she plans to do. If you have questions, contact Driver Services at (208) 334-8736. IMPORTANT It is the driver’s responsibility to ensure the medical certificate has been submitted to ITD by one of the following methods:
1-11 “I am subject to the Qualifications of Drivers, Federal Motor Carrier Safety Regulations, Part 391, including the DOT Medical Card Requirements, and I certify that I am in compliance with these requirements. Yes___ No ___”
If you are required to possess a current Medical Examiner’s Certificate to legally operate a commercial motor vehicle according to Idaho law or Federal Motor Carrier Safety Regulations, you must be able to pass the physical examination and check the appropriate box on the application form:
•Not medically qualified to drive a CMV in Interstate Commerce, but intend to operate in Idaho hauling exempt commodities, you should answer “No” to this question.
•Haul exempt commodities and are therefore not required to maintain a DOT Physical, you may answer “No” to this question.
•Current CDL but are not currently driving or do not have a valid medical, you may answer “No” to this question.
If you knowingly are not medically qualified under the FMCSRs (see FMCSA website for disqualifying medical conditions) and you check the box that you are in compliance with Part 391, you have falsified your application and the state could cancel your CDL.

1.2.7 National Registry of Medical Examiners
CMV drivers are required to obtain their medical examination from a certified medical examiner that is listed on the National Registry of Certified Medical Examiners.
Designed to improve safety by achieving high-quality medical exams that are consistent with Federal regulations and guidelines, the National 1.2.8 Medical Card Exemptions for Commercial Driver Qualifications
Most commercial vehicle operations are not exempt from the medical card requirement, even when operating only in Idaho. Federal Motor Carrier Safety Administration (FMCSA) requirements for DOT medical certification are followed in Idaho. When you apply for (or renew) a Commercial Driver’s License, you will be asked this question: Registry will help commercial motor vehicle drivers find trained and qualified medical examiners to perform physical qualification examinations.
Medical Examiners must take a training course and pass a certification exam to be listed on the National Registry. The list of certified medical providers is available on the National Registry website located at: https://nationalregistry.fmcsa.dot.gov
For help with the FMCSA registry or to find a provider, Email: fmctechsup@dot.gov or call 617- 494-3003.
For Medical and Health-Related Questions: Email: fmcsamedical@dot.gov or telephone 1-202-366-4001
For more information or help with medical reporting or self-certification, contact your County DMV or call ITD at (208) 334-8736, or see our website at www.itd.idaho.gov
1-12 1.2.9 Exempt Commodities List- Idaho Commercial Driver’s License holders who operate in IDAHO ONLY can legally transport the following exempt commodities without a DOT Medical Card in their possession:
| Exempt Commodities List- Idaho | | |
Bedding Plants | | | |
Bees (apiary) | | | |
Beet Pulp (for dairy feed) | | | |
Christmas Trees | | | |
Clay | | | |
Coal | | | |
Compost (soil aid) | | | |
Dirt (equipment towed behind the truck to unload the dirt is regulated) | | | |
Firewood | | | |
Fish (Live fish in tanks) | | | |
Fruits (fresh) | | | |
Furniture (moving & storage) | | | |
Fur Bearing Animals | | | |
Grain | | | |
Grass (sod) | | | |
Gravel (Equipment towed behind the truck to unload the gravel is regulated) | | | |
Hay (alfalfa) | | | |
Hops | | | |
Horses (riding, show, race, & rodeo) | | | |
Household Goods | | | |
Humus | | | |
Livestock | | | |
Livestock Feed/Silage | | | |
Logs | | | |
Mail | | | |
Manure (fresh, dry, & dehydrated) | | | |
Milk (bulk) | | | |
Minerals (mined, unprocessed, Ore only) | | | |
Sand (Equipment towed behind the truck to unload the sand is regulated) Sap (maple) Silage Sugar Beets Top Soil (Equipment towed behind the truck to unload the top soil is regulated) Wheat (farm) Whey Worms
A current, complete list of regulated and exempt commodities can be found on the Idaho State Police website:
https://isp.idaho.gov/cvs/commodities/
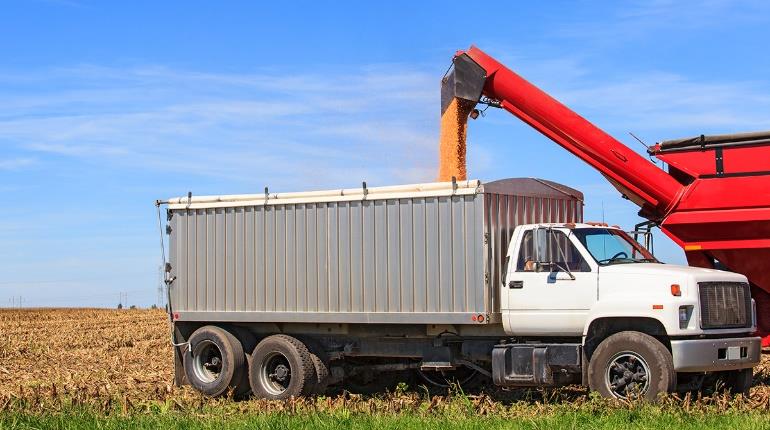
Idaho does not provide exceptions to the medical requirements; however, current Idaho law allows certain CDL Holders to drive a CMV without obtaining a medical card. These drivers can haul Exempt commodities and perform other types of CMV operations with a valid CDL as outlined in the following sections. Mobile/Modular Homes Molasses (as livestock feed) Mushrooms (fresh) Newspapers & newsprint Onions (bulk) Ores (raw products of the Mine) Peat Moss (bulk) Pit Run Potatoes (seed) Potatoes (unprocessed) Potato Waste (used for cattle Feed) Poultry Rock (Equipment towed behind the truck to unload the rocks is regulated)
1-13 ➢School bus operations. While exempt under FMCSA rules, current Idaho law requires school bus operators to maintain a valid DOT Medical Examiner’s Certificate. ➢Transportation performed by federal, state, or local governments. ➢Occasional transportation of personal property. ➢Transportation of sick and/or injured people or the deceased. ➢The operation of fire trucks and rescue vehicles while involved in emergency and related operations. ➢Farm custom operations. ➢Apiarian industries. (Seasonal transportation of bees only) ➢Certain farm vehicle drivers.
Intrastate: Intrastate drivers travel only within the borders of the State of Idaho:
➢Transportation performed by federal, state, or local governments. ➢Occasional transportation of personal property. ➢Transportation of sick and/or injured people or the deceased. ➢The operation of fire trucks and rescue vehicles while involved in emergency and related operations. ➢Apiarian industries (seasonal transportation of bees only). ➢Vehicles used to transport agricultural products, livestock, or feed. ➢Vehicles used to transport forest products. ➢Vehicles used to carry mine products including sand, gravel, or aggregates. Petroleum products are not exempt. ➢Wrecker or tow truck operations. ➢Taxi service. ➢Hotel service. ➢Vehicles used to distribute newspapers. ➢Vehicles used by airlines to transport customers or baggage. ➢Intra-city movement of people or property. ➢Vehicles used to transport household goods.
➢ School bus operations: NOTE- although |
| exempt under federal law, Idaho law
| requires school bus operators to maintain a
| valid Medical Examiner’s Certificate
exempt under federal law, Idaho law requires school bus operators to maintain a valid Medical Examiner’s Certificate
More information on Interstate exemptions specified under Federal Motor Carrier Safety Regulations (FMCSR) 390.3, 391.2, & 391.67 can be found at www.fmcsa.dot.gov
1.3 CDL Disqualifications
1.3.1 General
You may not drive a commercial motor vehicle if you are disqualified for any reason.
1.3.2 Alcohol, Leaving the Scene of an
Accident, and Commission of a Felony It is illegal to operate a CMV if your blood alcohol concentration (BAC) is .04% or more. If you operate a CMV, you shall be deemed to have given your consent to alcohol testing. You will be put out-of-service for 24 hours if you have any detectable amount of alcohol under .04%. 1.2.10 Exempt Operations
Federal Motor Carrier Safety Regulations exempt drivers under certain circumstances from the DOT Medical card requirements (but these operations are not exempt from CDL licensing requirements):
Interstate or Foreign: Interstate drivers travel in the State of Idaho and through other states. ➢Farm vehicles used to transport the farmer’s equipment or supplies.
1-14 •Driving a CMV if your blood alcohol concentration is .04% or higher. •Driving a CMV under the influence of alcohol. •Refusing to undergo blood alcohol testing. •Driving a CMV while under the influence of a controlled substance. •Leaving the scene of an accident involving a CMV. •Committing a felony involving the use of a CMV. •Driving a CMV when the CDL is suspended. •Causing a fatality through negligent operation of a CMV.
You will lose your CDL for at least three years if the offense occurs while you are operating a CMV that is placarded for hazardous materials. You will lose your CDL for one year for a conviction of Driving Under the Influence (DUI) in any type of vehicle. You will lose your CDL for life for a second DUI conviction. You will lose your CDL for life if you use a CMV to commit a felony involving controlled substances.
1.3.3 Serious Traffic Violations
Serious traffic violations include:
•excessive speeding (15 mph or more above the posted limit) •reckless driving •improper or erratic lane changes •following a vehicle too closely •traffic offenses committed in a CMV in connection with fatal traffic accidents •driving a CMV without obtaining a CDL or having a CDL in the driver’s possession •driving a CMV without the proper class of CDL and/or endorsements. •texting or using a handheld phone while driving a CMV 1.3.4 Violation of Out-of-Service Orders
You will lose your CDL: •For at least 90 days if you have committed your first violation of an out-of-service order. •For at least one year if you have committed two violations of an out-of-service order in a ten-year period. •For at least three years if you have committed three or more violations of an out-of-service order in a ten-year period.
1.3.5 Railroad - Highway / Grade Crossing
Violations You will lose your CDL:
•For at least 60 days for your first violation. •For at least 120 days for your second violation within a three-year period. •For at least one year for your third violation within a three-year period.
These violations include violation of a federal, state or local law or regulation pertaining to one of the following six offenses at a railroad-highway grade crossing:
1.For drivers who are not required to always stop, failing to stop before reaching the crossing if the tracks are not clear. 2.For drivers who are not required to always stop, failing to slow down and check that the tracks are clear of an approaching train. 3.For drivers who are always required to stop, failing to stop before driving onto the crossing. You will lose your CDL for at least one year for a first offense for: You will lose your CDL: •For at least 60 days if you have committed two serious traffic violations within a three-year period involving a CMV. •For at least 120 days for three or more serious traffic violations within a three-year period involving a CMV.
1-15 1.3.6 Hazardous Materials Endorsement Background Check and Disqualifications
If you require a hazardous materials endorsement you will be required to submit your proof of legal presence in the United States and complete a fingerprint/ background check.
You will be denied or you will lose your hazardous materials endorsement if you: 1.4 Other CDL Rules There are other federal and state rules that affect drivers operating CMVs in all states. Among them are: •Are not a lawful permanent resident of the United States. •Renounce your United States citizenship. •Are wanted or under indictment for certain felonies. •Have a conviction in military or civilian court for certain felonies. •Have been adjudicated as lacking mental capacity or have been involuntarily committed to a mental health facility as specified in 49 CFR 1572.109 •Are considered to pose a security threat as determined by the Transportation Security Administration.
Contact TSA at (855)-347-8371 for the information you need to complete the required TSA background check procedures, or see their website at https://universalenroll.dhs.gov •You cannot have more than one license. If you break this rule, a court may fine you up to $5,000 or put you in jail and keep your home state license and return any others.
•You must notify your employer within 30 days of conviction for any traffic violations (except parking). This is true no matter what type of vehicle you were driving.
•You must notify your motor vehicle licensing agency within 30 days if you are convicted in any other jurisdiction of any traffic violation (except parking). This is true no matter what type of vehicle you were driving.
•You must notify your employer within two business days if your license is suspended, revoked, or canceled, or if you are disqualified from driving. 1.3.7 Traffic Violations in Your Personal Vehicle
The Motor Carrier Safety Improvement Act (MCSIA) of 1999 requires a CDL holder to be disqualified from operating a commercial motor vehicle if the 4.For all drivers failing to have sufficient space to drive completely through the crossing without stopping. 5.For all drivers failing to obey a traffic control device or the directions of an enforcement official at the crossing. 6.For all drivers failing to negotiate a crossing because of insufficient undercarriage clearance. CDL holder has been convicted of certain types of moving violations in their personal vehicle.
If your privilege to operate your personal vehicle is revoked, cancelled, or suspended due to violations of traffic control laws (other than parking violations) you will also lose your CDL driving privileges.
If your privilege to operate your personal vehicle is revoked, cancelled, or suspended due to alcohol, controlled substance or felony violations, you will lose your CDL for 1 year. If you are convicted of a second violation in your personal vehicle or CMV you will lose your CDL for life.
If your license to operate your personal vehicle is revoked, cancelled, or suspended you may not obtain a “hardship” license to operate a CMV.
1-16 1.5 International Registration Plan If you operate a CDL required vehicle in interstate commerce, the vehicle, with few exceptions, is required to be registered under the International Registration Plan (IRP) and the International Fuel Tax Agreement (IFTA). These federally mandated programs provide for the equitable collection and distribution of vehicle license fees and motor fuels taxes for vehicles traveling throughout the 48 contiguous United States and 10 Canadian provinces.
Under the IRP, jurisdictions must register apportioned vehicles which includes issuing license plates and cab cards or proper credentials, calculate, collect and distribute IRP fees, audit carriers for accuracy of reported distance and fees and enforce IRP requirements.
Registrant responsibilities under the Plan include applying for IRP registration with base jurisdiction, providing proper documentation for registration, paying appropriate IRP registration fees, properly displaying registration credentials, maintaining accurate distance records, and making records available for jurisdiction review.
1.5.1 International Fuel Tax Agreement
The basic concept behind IFTA is to allow a licensee (motor carrier) to license in a base jurisdiction for the reporting and payment of motor fuel use taxes. Under the IFTA, a licensee is issued one set of credentials which will authorize operations through all IFTA member jurisdictions. The fuel use taxes collected pursuant to the IFTA are calculated based on the number of miles (kilometers) traveled and the number of gallons (liters) consumed in the •You must be properly restrained by a safety belt at all times while operating a commercial motor vehicle. The safety belt design holds the driver securely behind the wheel during a crash, helping the driver to control the vehicle and reduces the chance •You must give your employer information on all driving jobs you have held for the past 10 years. You must do this when you apply for a commercial driving job.
•No one can drive a commercial motor vehicle without a CDL. A court may fine you up to $5,000 or put you in jail for breaking this rule.
•If you have a hazardous materials endorsement you must notify and surrender your hazardous materials endorsement to the state that issued your CDL within 24 hours of any conviction or indictment in any jurisdiction, civilian or military, for, or found not guilty by reason of insanity of a disqualifying crime listed in 49 CFR 1572.103;who is adjudicated as lacking mental capacity or has been involuntarily committed to a mental health facility as specified in 49 CFR 1572.109; or who renounces his or her U. S. citizenship;
•Your employer may not let you drive a commercial motor vehicle if you have more than one license or if your CDL is suspended or revoked. A court may fine the employer up to $5,000 or put him/her in jail for breaking this rule.
•You are not allowed to hold a mobile telephone to conduct a voice communication or dial a mobile telephone by pressing more than a single button when driving.
•You are not allowed to send or read text messages while driving. of serious injury or death. If you do not wear a safety belt, you are four times more likely to be fatally injured if you are thrown from the vehicle.
All states are connected to one computerized system to share information about CDL drivers. The states will check on drivers' accident records to be sure that drivers do not have more than one CDL.
1-17 ▪Distance ▪Per Article IV of the IRP Plan (i) Date of trip (starting and ending) (ii) Trip origin and destination – City and State (iii) Route(s) of travel (iv) Beginning and ending odometer or hubometer reading of the trip (v) Total distance traveled (vi) In-Jurisdiction distance (vii) Power unit number or vehicle identification number. Fuel Per Section P560 of the IFTA Procedures Manual .300 An acceptable receipt or invoice must include, but shall not be limited to, the following: .005 Date of purchase .010 Seller's name and address .015 Number of gallons purchased .020 Fuel type .025 Price per gallon or total amount of sale (i)has two Axles and a gross Vehicle weight or registered gross Vehicle weight in (ii)excess of 26,000 pounds, or (iii)has three or more Axles, regardless of weight, or (iv)is used in combination when the gross Vehicle weight of such combination exceeds 26,000 pounds. While similar, the Qualified Motor Vehicle in IFTA means a motor vehicle used, designed, or maintained for transportation of persons or property and: 1)Having two axles and a gross vehicle weight or registered gross vehicle weight exceeding 26,000 pounds; or 2)Is used in combination, when the weight of such combination exceeds 26,000 pounds gross vehicle or registered gross vehicle weight. Qualified Motor Vehicle does not include recreational vehicles.
If the vehicle you operate is registered under IRP and you are a motor carrier licensed under IFTA, then you are required to comply with the mandatory record keeping requirements for operating the vehicle. A universally accepted method of capturing this information is through the completion of an Individual Vehicle Distance Record (IVDR), sometimes times referred to as a Driver Trip Report. This document reflects the distance traveled and fuel purchased for a vehicle that operates interstate under apportioned (IRP) registration and IFTA fuel tax credentials.
Although the actual format of the IVDR may vary, the information that is required for proper record keeping does not.
In order to satisfy the requirements for Individual Vehicle Distance Records, these documents must include the following information: member jurisdictions. The licensee files one quarterly tax return with the base jurisdiction by which the licensee will report all operations through all IFTA member jurisdictions.
It is the base jurisdiction's responsibility to remit the taxes collected to other member jurisdictions and to represent the other member jurisdictions in the tax collection process, including the performance of audits.
An IFTA licensee must retain records to support the information reported on the IFTA quarterly tax return
The IRP registrant and the IFTA licensee may be the vehicle owner or the vehicle operator.
The requirement for acquiring IRP plates for a vehicle and IFTA license for a motor carrier is determined by the definitions from the IRP Plan and the IFTA for Qualified Vehicle and Qualified Motor Vehicle:
For purposes of IRP:
A Qualified Vehicle is (except as provided below) any Power Unit that is used or intended for use in two or more Member Jurisdictions and that is used for the transportation of persons for hire or designed, used, or maintained primarily for the transportation of property, and:
1-18 ▪At the beginning of the day ▪When leaving the state or province ▪At the end of the trip/day
Not only do the trips need to be logged, but the fuel purchases need to be documented as well. You must obtain a receipt for all fueling and include it with your completed IVDR. ▪Make sure that any trips that you enter are always filled out in descending order and that your trips include all state/provinces that you traveled through on your route.
There are different routes that a driver may take, and most of the miles may be within one state. Whether or not the distance you travel is primarily IFTA reporting

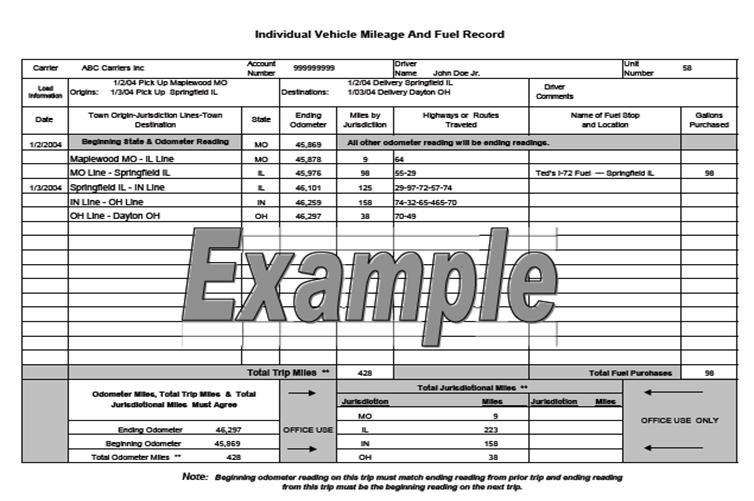
.030 Unit number or other unique vehicle identifier .035 Purchaser's name An example of an IVDR that must be completed in its entirety for each trip can be found in Figure 1 below. Each individual IVDR should be filled out for only one vehicle. The rules to follow when trying to determine how and when to log an odometer reading are the following: in one jurisdiction or spread among several jurisdictions, all information for the trip must be recorded. This includes the dates, the routes, odometer readings and fuel purchases.
By completing this document in full and keeping all records required by both the IRP and the IFTA, you will have ensured that you and your company are in compliance with all State and Provincial laws surrounding fuel and distance record keeping requirements.
The IVDR serves as the source document for the calculation of fees and taxes that are payable to the jurisdictions in which the vehicle is operated, so these original records must be maintained for a minimum of four years.
In addition, these records are subject to audit by the taxing jurisdictions. Failure to maintain complete and accurate records could result in fines, penalties and suspension or revocation of IRP registrations and IFTA licenses.
Figure 1.3 Sample Mileage and Fuel Record for
For additional information on the IRP and the requirements related to the IRP, contact Commercial Vehicle Services at I.T.D., (208) 334-8611; or IRP, Inc. the official repository for the IRP. Additional information can be found on the IRP, Inc. website at www.irponline.org. There is a training video on the website home page available in English, Spanish and French. 1-19 1.6 CDL License Fees •CDL: One year (age 20) $15.00 •CDL: Three year (age 18 to 21) $30.00 •CDL: Four year (age 21 and over) $40.00 •Seasonal CDL (180 Days) $44.00 •Commercial Learner’s Permit $29.00 •Duplicate CDL or permit $20.00 •License upgrade $30.00 •Add Endorsement (after issuance of a CDL --does not include written test fee) $20.00 •Written tests (each) $ 5.00 •Skills Test: County CDL License fee $10.00 CDL Skills Test Examiners may charge any amount for a CDL test up to $190 as set by the 2017 Idaho legislature. Amount charged by examiners for tests will be posted on the Idaho Commercial Driver’s License Skills Tester List available online at: https://itd.idaho.gov/itddmv/?target=drivers-license-id-cards/#cdl
1.7 How to Get A CDL
To apply for a commercial driver’s license, you must:
•Be at least 18 years old •Have a valid Idaho non-commercial license (Class D) or have passed all tests required to obtain one. You may be able to take your Class D license tests and your CDL tests at the same time •You must have at least one year of licensed driving experience in order to obtain a CDL per Idaho Code 49-303(4). For additional information on IFTA and the requirements related to IFTA, contact Commercial Vehicle Services at Idaho Transportation Department, (208), 334-8611. You will also find useful information about the Agreement at the official repository of IFTA at http://www.iftach.org/index.php. To apply for your CDL, go to your county DMV Office. Bring a current driver’s license, Social Security card, a form of payment to pay fees, and proof of lawful presence in the United States via one of six federally approved documents (the approved documents are shown on the following page).
All applications shall also state whether the applicant has previously been licensed as a driver, and if so, when and by what state or country, and whether a driver's license or privileges have ever been suspended, revoked, denied, disqualified, canceled or whether an application has ever been refused, and if so, the date of and reason for the suspension, revocation, denial, disqualification, cancellation or refusal and the applicant's oath that all information is correct as signified by the applicant's signature.
Every applicant for a class A, B or C driver's license or commercial learner's permit shall provide proof of United States citizenship or lawful permanent residency in the United States upon application for issuance, transfer, upgrade or renewal, unless the applicant's driving record already contains documentation confirming United States citizenship or lawful permanent residency.
The applicant must submit proof of Lawful Presence acceptable to the County Driver’s License examiner. The document(s) presented must be original. No photocopies will be accepted. If the name on the birth certificate is not the same as the driver’s current legal name, supporting documents must be presented that establish the changes in name. Examples include marriage license, divorce decrees, or other legal documents.
When a certified copy of a birth certificate or a delayed birth certificate is impossible to obtain from a vital statistics agency, it may still be possible to obtain a US Passport, which meets identity requirements. For more information, contact your local post office or visit the US Department of State website at: https://travel.state.gov/content/travel/en.html
1-20 The documents above are the only legally acceptable proof of legal presence in the United States under FMCSA Regulations. Additionally, drivers may need to provide additional documentation if the name on their birth certificate or other legal presence document does not match with their current legal name. For assistance, contact your local DMV Office or Driver Services at (208) 334-8736.
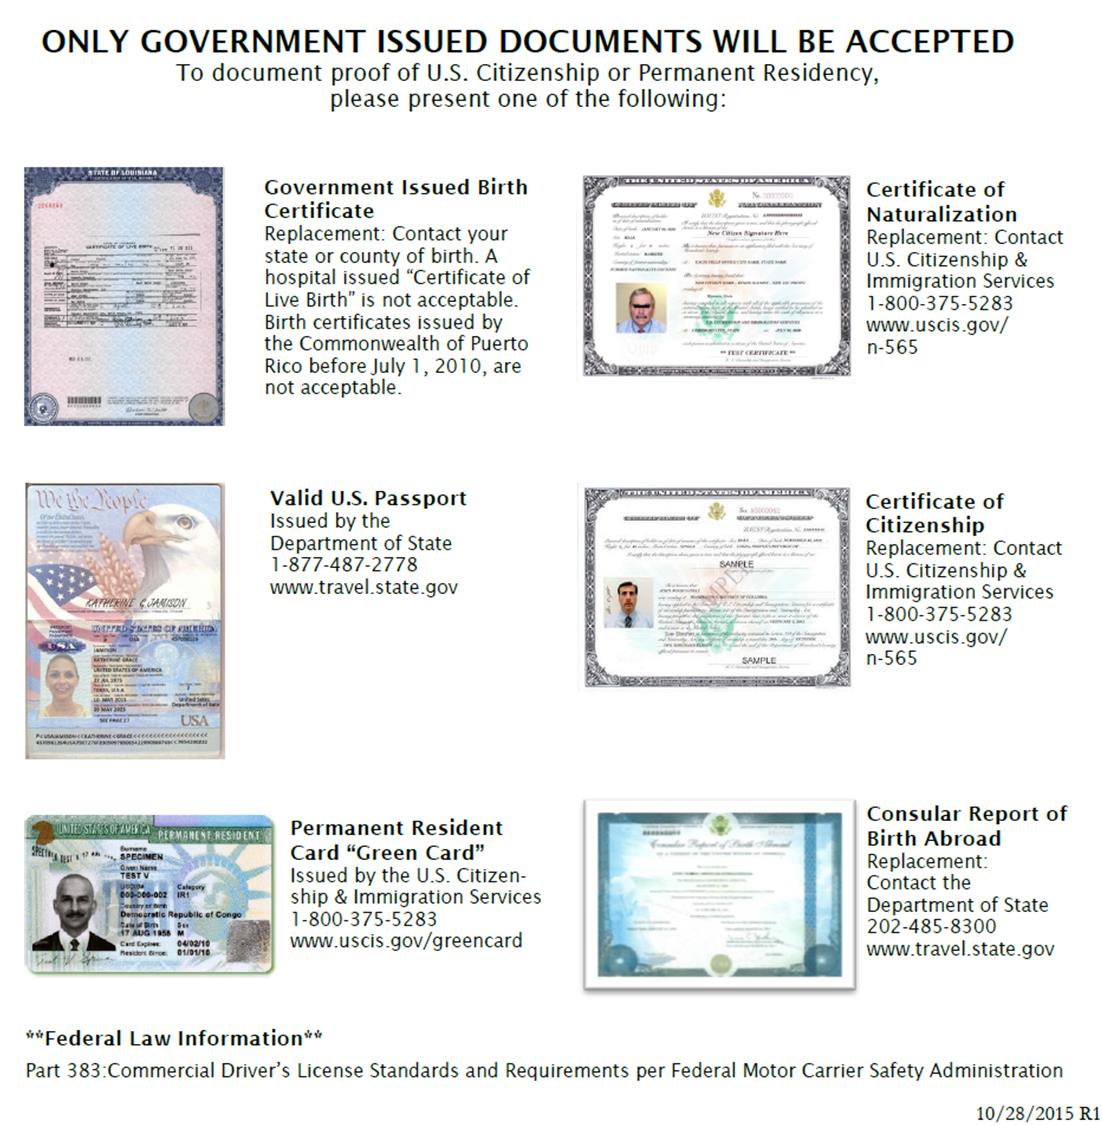
1-21 1.Non-excepted interstate. The applicant operates or expects to operate in interstate commerce, and is required to provide a medical examiner's certificate; ➢ Are at least 21 years of age for Interstate operations (traveling across state lines). 2.Excepted interstate. The applicant operates or expects to operate in interstate commerce, but engages exclusively in transportation or operations excepted by the federal motor carrier safety administration from all or parts of the qualification requirements of federal motor carrier safety regulation 49, part 391, and is therefore not required to provide a medical examiner'scertificate;
3.Non-excepted intrastate. The applicant
operates only in intrastate commerce and is subject to and meets all Idaho driver qualification requirements and the applicable parts of federal motor carrier safety regulation 49, part 391, and is required to provide a medical examiner's certificate; or ➢ Are at least 18 years of age for Intrastate operations (traveling only within the borders of Idaho).
➢ Can read and speak the English language sufficiently to talk with the general public; understand traffic signs and signals and make entries on reports and records.
➢ Have the experience and/or training to safely operate a commercial vehicle.
➢ If not exempt under federal and/or state of Idaho law, carry a current medical examiner’s certificate (DOT Medical Card) stating that he or she is physically qualified to drive a commercial vehicle (Federal Motor Carriers Safety Regulations Section 391 – Subpart E) 4.Excepted intrastate. The applicant operates in intrastate commerce, but engages exclusively in exempted transportation or operations as listed in section 67-2901B(2), Idaho Code, and the applicable parts of federal motor carrier safety regulation 49, part 391, and is therefore not required to provide a medical examiner's certificate. ➢ Have a valid CDL issued from only (1) state or jurisdiction.
➢ Have provided his/her employer with a current list of traffic violations. Every applicant for a non-domiciled class A, B or C driver's license or commercial learner's permit domiciled in a foreign country must provide an unexpired employment authorization document issued by the department of homeland security or an unexpired foreign passport accompanied by an approved I-94 form documenting the applicant's most recent admittance into the United States.
Every application for a class A, B or C license shall state where the applicant has been licensed for the preceding ten (10) years and under which of the following driving categories the applicant will operate: All applications shall also state whether the applicant has previously been licensed as a driver, and if so, when and by what state or country, and whether a driver's license or privileges have ever been suspended, revoked, denied, disqualified, canceled or whether an application has ever been refused, and if so, the date of and reason for the suspension, revocation, denial, disqualification, cancellation or refusal and the applicant's oath that all information is correct as signified by the applicant's signature.
1.7.1
General Commercial Driver Qualifications:
Individuals are qualified to drive a commercial vehicle in Idaho if they:
1-22 ➢ Have successfully passed the appropriate written examinations and road skills test for the commercial vehicle(s) he/she intends to operate.
Providing false or incorrect information when applying for your driver’s license may result in cancellation of your driving privileges and other penalties. If you obtain a CDL using false or incorrect information, you will be disqualified from operating a commercial motor vehicle for a period of 60 days. When applying for your CDL, your driving record will be checked, fees will be collected, and you will be required to take the necessary knowledge tests.
After passing the knowledge tests and obtaining a commercial learner’s permit, you must schedule a skills test with a certified Idaho CDL Skills Tester. The Driver’s License office will provide you with a list of Third-Party Skills Testers. After passing the skills test, you may obtain your CDL at the Driver’s License office. 1.7.3 Commercial Learner’s Permit
A Commercial Learners Permit (CLP) is a permit that only authorizes you to practice on public roads with a qualified CDL holder sitting next to you. Getting the permit involves more than just passing all the knowledge tests for the type of driving you intend to do. To make sure that you are eligible your driving record is checked for the last 10 years in all 50 states and the District of Columbia.
A CLPis obtained by taking the appropriate tests for the type of vehicle you intend to operate. Upon passing the knowledge tests, a CLP may be issued. The CLP will be valid for 1 year (365 days) and will not be renewed. The CLP holder will be required to retake and pass all knowledge tests for the class of CLP they intend to obtain if a CDL is not issued during the 1 year validity of the CLP. Qualifications for a CLP: 1.7.2 Foreign Commercial Driver’s License (if applicable) If you are a foreign driver from any country other than Mexico or Canada, holding a temporary work visa for the United States, you may apply for an Idaho non-domiciled commercial instruction permit or CDL, and you do not have to surrender your home country license. If you become a permanent legal resident or citizen of the United States and resident of Idaho, you must surrender the non-domiciled CDL and any other licenses to receive a regular CDL without retesting unless you are upgrading your CDL or are adding endorsements.
If you are from Canada or Mexico, you are not allowed to purchase a non-domiciled CDL. Canadian and Mexican CDL holders are only required to surrender their license if they change their permanent residence from their country of origin to ➢Be at least 18 years old.
➢Hold a valid Idaho Class D driver’s license.
➢Have at least one year of documented driving experience.
You must have a valid CLP before taking a skills test. The examiner must verify that you have taken the appropriate knowledge tests before you can take the skills test. If upgrading from a farm or another exemption to a CDL, a valid CLP is required prior to taking the CDL Skills test. By Federal law a CLP holder must wait at least 14 days before taking a skills test. A current Medical Examiner’s Certificate (if required to do so by Idaho Code and/or Federal Motor Carrier Regulations) and a CLP is required ➢ Are not currently disqualified by the U.S. Department of Transportation (DOT) to drive a commercial vehicle. the United States. If they reside in Idaho they can apply for an Idaho CDL. In order to comply with the North American Free Trade Agreement (NAFTA) requirements, if the license you are surrendering was issued in Mexico or Canada you must provide a driving record no older than 30 days.
1-23 Following are the Federal Rules regarding the Commercial Learner’s Permit:
383.25: Commercial learner's permit (CLP).
(a) A CLP is considered a valid CDL for purposes of behind-the-wheel training on public roads or highways, if all the following minimum conditions are met: (1) The CLP holder is at all times accompanied by the holder of a valid CDL who has the proper CDL group and endorsement(s) necessary to operate the CMV. The CDL holder must at all times be physically present in the front seat of the vehicle next to the CLP holder or, in the case of a passenger vehicle, directly behind or in the first row behind the driver and must have the CLP holder under observation and direct supervision. (2) The CLP holder holds a valid driver's license issued by the same jurisdiction that issued the CLP. (3) The CLP holder must have taken and passed a general knowledge test that meets the Federal standards contained in subparts F, G, and H of this part for the commercial motor vehicle that person operates or expects to operate. (4) The CLP holder must be 18 years of age or older. (5) Endorsements: (i) A CLP holder with a passenger (P) endorsement must have taken and passed the P endorsement knowledge test. A CLP holder with a P endorsement is prohibited from operating a CMV carrying passengers, other than Federal/State auditors and inspectors, test examiners, other trainees, and the CDL holder accompanying the CLP holder as anytime a commercial vehicle is operated need to prior to taking a skills test.
The Medical Certificate may be required, and a CLP is required even if you are attending a professional truck driving school, company sponsored training program, or receiving private instruction from a friend in his / her own vehicle. prescribed by paragraph (a)(1) of this section. The P endorsement must be class specific. (ii) A CLP holder with a school bus (S) endorsement must have taken and passed the S endorsement knowledge test. A CLP holder with an S endorsement is prohibited from operating a school bus with passengers other than Federal/State auditors and inspectors, test examiners, other trainees, and the CDL holder accompanying the CLP holder as prescribed by paragraph (a)(1) of this section. (iii) A CLP holder with a tank vehicle (N) endorsement must have taken and passed the N endorsement knowledge test. A CLP holder with an N endorsement may only operate an empty tank vehicle and is prohibited from operating any tank vehicle that previously contained hazardous materials that has not been purged of any residue. (iv) All other Federal endorsements are prohibited on a CLP. (6) The CLP holder does not operate a commercial motor vehicle transporting hazardous materials as defined in CFR 383.5. (b) The CLP must be a separate document from the CDL or non-CDL. (c) The CLP must be valid for no more than one year from the initial date of issuance without requiring the CLP holder to retake the general and endorsement knowledge tests. CLPs issued for a period of less than one year may be renewed provided the CLP is not valid for more than one year from the date of initial issuance.
(d) The issuance of a CLP is a precondition to the initial issuance of a CDL. The issuance of a CLP is also a precondition to the upgrade of a CDL if the upgrade requires a skills test.
(e) The CLP holder is not eligible to take the CDL skills test in the first 14 days after initial issuance of the CLP.
1-24 A CDL will be issued only after you have passed all of the required knowledge and skills tests. Knowledge Tests
•All test results will remain valid for one year from the date they were passed. If the appropriate license is not issued within the one-year period, the tests must be retaken. •If you do not pass a test (knowledge or skills), you must wait three days before retaking the test (i.e., If you failed the test on Monday, you would be eligible to retest on Thursday). •The test fees must be paid again.
CDL tests are not required at renewal time, with the exception of the Hazardous Materials knowledge test which must be passed prior to each renewal.
Applicants must take the knowledge tests for the class of license applied for and also the test(s) for any endorsement(s) they wish to hold. In the front of this manual, you will find a table showing you which sections of this manual to study for each test.
Skills Tests
After passing the knowledge tests and obtaining a CLP, you must make an appointment with a CDL Examiner to take the skills test. Federal law requires applicants to hold a CLP for at least 14 days before taking a skills test.
| Federal law requires
applicants to hold a CLP for at least 14 days before |
taking a skills test. |

NOTE: You should contact the examiner well ahead of your desired test date. Examiners are required to notify ITD of your skills test a minimum of 48 hours prior to the test taking place.
This allows state and federal auditors to monitor tests periodically to insure the examiner is conducting the test properly.
If an ITD or FMCSA auditor monitors your test, do not be concerned. The examiner will conduct your test the same as if the auditor was not there.
You can find a list of CDL Examiners at your DMV, or online at: https://itd.idaho.gov/itddmv/?target=drivers-license-id-cards/#cdl
Before taking your skills test, it is highly recommended you review a study aid you can find on the ITD Website known as “Ten Easy Steps to a CDL”. You’ll find it here: https://itd.idaho.gov/wp-content/uploads/2016/06/TenEasyStepsToACDL.pdf
Test Length: The test consists of three parts, and usually takes about two hours to complete. The Vehicle Inspection and Basic Control sections of the test are timed. See Chapter 11 and 12 for more information.

Special Note:The skills test is one test with three parts, not three separate tests; therefore,failing any part of the test counts as a failure for the entire test, and the entire test must be retaken. A commercial driver must be able to do a pre-trip inspection, backing maneuvers, and drive on public roads on a daily basis under stressful conditions. The test reflects these requirements. CDL skills test examiners are contractors for the Idaho Transportation Department (ITD) and most work other jobs. 1.7.4 CDL Knowledge and Skills Tests
1-25
IMPORTANT NOTE: If the vehicle used for the test: | |
| • is not equipped with air brakes, your CDL |
| will show an (L) restriction stating that |
| you are not licensed to operate vehicles |
| equipped with air brakes. |
| |
• is equipped with an automatic transmission, your CDL will show an (E) restriction- no manual transmission commercial vehicle. For purposes of the CDL skills test and the restriction, an automatic transmission includes any transmission not operating fully on the gear shift and clutch principle. | |
| • is other than a tractor-trailer with fifth |
| wheel for Class A combination, your CDL |
| will show an (O) restriction- no tractor- |
| trailer. For purposes of the CDL test, the |
| (O) restriction will be placed on your CDL |
| if you test in any combination vehicle |
| EXCEPT a tractor and a trailer with a full |
| size fifth wheel coupling. |
| |
| Further Information: |
| |
- The tractor-trailer is not required to have a sleeper | |
| - There is no minimum length or type |
| requirement for the trailer, except that it |
| is a full size fifth wheel hitch semi-trailer |
- Any pintle-hitch, gooseneck, bumper pull, or RV style fifth wheel equipped combination will receive an (O) restriction. | |
| - Any tow vehicle except a dedicated |
| tractor will receive an (O) restriction |
- 1. A roadworthy commercial vehicle with all lights, brakes, and required safety equipment in clean, good working order. 2.Proof of current insurance and vehicle registration. 3.Your Driver’s License and your receipt showing you have passed the knowledge tests and paid the skills test fee. After completing the testing process, please wait 24 hours (or as directed by the Examiner) to ensure that the test results have been entered on your driving record. You must return to the Driver’s License office to obtain your CDL. You do not have the authority to operate a commercial vehicle until you obtain the CDL. 1.8 CSA Information (Compliance Safety Accountability) CSA is the Federal Motor Carrier Safety Administration's (FMCSA) safety compliance and enforcement program, which holds motor carriers and drivers accountable for their safety on our Nation’s roads. Since the 1970s, Federal and State enforcement efforts have progressively reduced the rate of CMV crashes resulting in injuries or fatalities on our Nation’s highways. The rate of crash reduction slowed, prompting the FMCSA to develop a new way to evaluate the safety of motor carriers and drivers. FMCSA wanted to improve its safety monitoring, evaluation, and intervention processes. Compliance, Safety, Accountability (CSA) is the result of this effort. CSA began in 2010. 1.7.5 Skills Test Restrictions The skills test must be taken in a vehicle that is representative of the license class you wish to operate. 1.7.6 Skills Test Vehicle & Requirements Some examiners have vehicles available to rent to perform the skills test. Our examiners are required to have all of the appropriate vehicle documentation and insurance required by the state. If you use a vehicle other than an examiner’s, you will need to bring to the test: 1-26 The three main components of CSA: 1.Compare safety records of carriers and drivers known as "Behavior Analysis and Safety Improvement Categories" or BASICS. 2.Evaluate safety performance of carriers and drivers and identify behavior patterns that may result in unsafe operations. 3.Take necessary tailored steps to correct safety violations and procedures necessary to ensure future compliance. Carriers are held accountable for all safety-based violations recorded during roadside inspections. Drivers are responsible for compliance with some vehicle maintenance regulations. For example, drivers are required, by regulation, to do a pre-trip vehicle inspection to ensure that the vehicle is safe. While the Federal Motor Carrier Safety Administration does not use the Safety Measurement System (SMS) or any other system to assign formal safety ratings to individual drivers, the agency recognizes that holding drivers accountable for safe driving behavior is an important part of the safety compliance and enforcement process. Safety Investigators investigate drivers with egregious violations when investigating a motor carrier. Additionally, investigators use the Driver SMS, an internal safety assessment tool, to review drivers Tickets or warnings that drivers receive while operating their personal vehicles do not count; only violations of Federal Motor Carrier Safety Regulations (and those regulations apply only to people driving commercial motor vehicles). Commercial Drivers should become familiar with what CSA is and how it affects them and their employer. Further information on CSA can be found at: https://csa.fmcsa.dot.gov/
| If you move, you must
notify the department in writing of the old and new |
address within 30 days. |
Don’t let your mail end up here! Call Driver Services at 334-8736 or go online to change your address. Here is the link: http://itd.idaho.gov/wp-content/uploads/2016/06/Address.pdf CSA affects carriers subject to the Federal Motor Carrier Safety Regulations, carriers transporting passengers or cargo in interstate commerce, and Hazardous Materials carriers operating in intrastate commerce. CSA may also impact carriers whose State requires that they obtain a U.S. DOT Number.
The Safety Measurement System (SMS) is FMCSA’s system for identifying unsafe carriers that should receive interventions. The SMS allows FMCSA, law enforcement, and motor carriers to see a comprehensive profile of safety issues. The SMS automatically identifies carriers that pose the greatest safety risk so that resources can be prioritized. The safety interventions include tools to more efficiently and effectively bring carriers into compliance. with strong patterns of noncompliance. Any violations that are not corrected may result in a Notice of Violation or Notice of Claim for the driver.
1-27
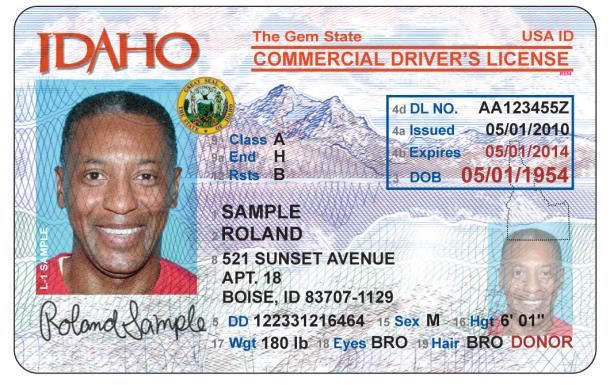
Example of Idaho Commercial Driver’s License
1.11 Administrative License Suspensions
(ALS)
Your driving privileges will be suspended under Section 18-8002A, Idaho Code, if you fail an evidentiary test for any of the following reasons:
➢Having a blood alcohol concentration of .08% or greater while operating or being in actual physical control of any motor vehicle.
➢Having a blood alcohol concentration of .04% or greater while operating or being in actual physical control of a commercial motor vehicle.
➢Having test results indicating the presence of drugs or other intoxicating substances.
The suspension will become effective 30 days from the date the Notice of Suspension is issued upon failure of an evidentiary test. If you are driving a ➢CDL driving privileges: One Year absolute disqualification of commercial vehicle driving privileges.
➢Class D driving privileges: 90-day suspension with absolutely no driving privileges for the first 30 days. Restricted driving privileges that allow for the operation of a non-commercial vehicle may be requested for the remaining 60 days of the suspension.
Second offense: While operating any vehicle (BAC .08% or greater) or a commercial vehicle* (BAC .04% or greater)- ➢CDL driving privileges: Lifetime disqualification.
➢Class D driving privileges: one year suspension with absolutely no driving privileges of any kind.
*If the failure(s) occurred in a commercial vehicle (BAC.04 to less than .08%), Class D driving privileges will remain valid.
These suspensions are separate from any additional penalties or suspensions imposed by the court as a result of being convicted of the offense. Additional information on this law may be found in the Idaho Driver’s Manual. A periodic review of both manuals is recommended for all commercial drivers. 1.10 Central Issue of Driver’s Licenses
All Idaho drivers’ licenses are issued from a central location. You will receive a temporary card printed on security paper before you leave your local licensing office. The temporary card includes your photo and all the information included on the plastic card. The temporary card will be issued for driving and identity purposes. The new card will be mailed to you within about 10 business days. When the plastic card arrives in the mail, the temporary document should be destroyed. Commercial Motor Vehicle (CMV) at the time of your arrest, your commercial privileges are lost immediately and will remain suspended throughout the administrative process.
Penalties
First offense: While operating any vehicle (BAC .08% or greater) or a commercial vehicle* (BAC .04% or greater)-
1-28 It is very important for drivers to research and know the laws regarding medical certification for the loads they will be transporting.
The Federal Motor Carrier Safety Regulations may be found on the internet at www.fmcsa.dot.gov
Printed books with current FMCSA regulations may be purchased from: 1.13 Driver Record Requests
Drivers may obtain a copy of their driving record online, at the DMV, or by mail.
Driver's license records as maintained by the Idaho Transportation Department can be found at:
https://www.accessidaho.org/secure/itd/dlr/intera ctive/search.html?ScriptForm.startstep=personal
You can also obtain a copy of your Idaho driving record by completing an “Idaho Motor Vehicle Driver’s License Record Request” form (See Figure 1.4) and paying a small fee. The Driver’s License Request (DLR) form can be obtained at most County Sherriff’s offices or on the State of Idaho website at: http://www.accessidaho.org
The Driver Record Dashboard is a very effective way to monitor driving records of multiple drivers. See: https://www.accessidaho.org/itd/monitoring/
Depending on your circumstances, you can travel to the closest County Sherriff’s office, fill out the form, pay the fees and receive your record while you wait. You may also fax or mail the form to the ITD or complete the application on the State of Idaho’s website. Idaho Trucking Association 3405 East Overland Road, Suite 175 Meridian, ID 83642 Phone: (208) 342-3521 Fax: (208) 343-8397 http://www.idtrucking.org/
For guidance on exempt and regulated commodities, hazardous materials, etc. contact:
Idaho State Police Commercial Vehicle Safety Unit (208) 884-7220
For specific guidance on medical card requirements & driver medical qualification issues such as diabetes, vision limitations, loss of limbs, waiver applications, etc. contact:
Federal Motor Carrier Safety Administration Boise Field Office (208) 334-1842
For general guidance on CDL Licensing requirements, contact:
Idaho Transportation Department Driver Services (208) 334-8736

1.12 Drug and Alcohol Testing
Most drivers subject to CDL requirements are also required to participate in a controlled-substance and alcohol-testing program. These requirements include random, reasonable suspicion, post-accident, return-to-duty, and follow-up testing for controlled substances and alcohol. Pre-employment controlled substance testing is also required.

RESOURCES:
1-29
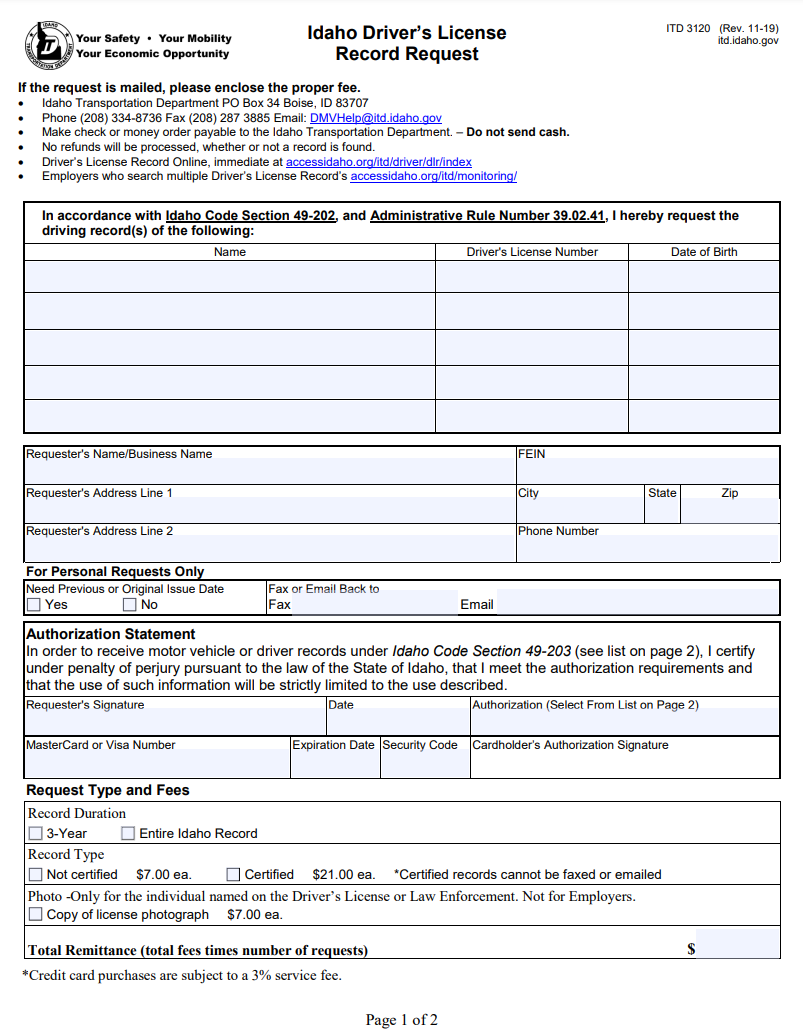
Figure 1.4 Sample Idaho Motor Vehicle Driver’s License Record Request

1-30

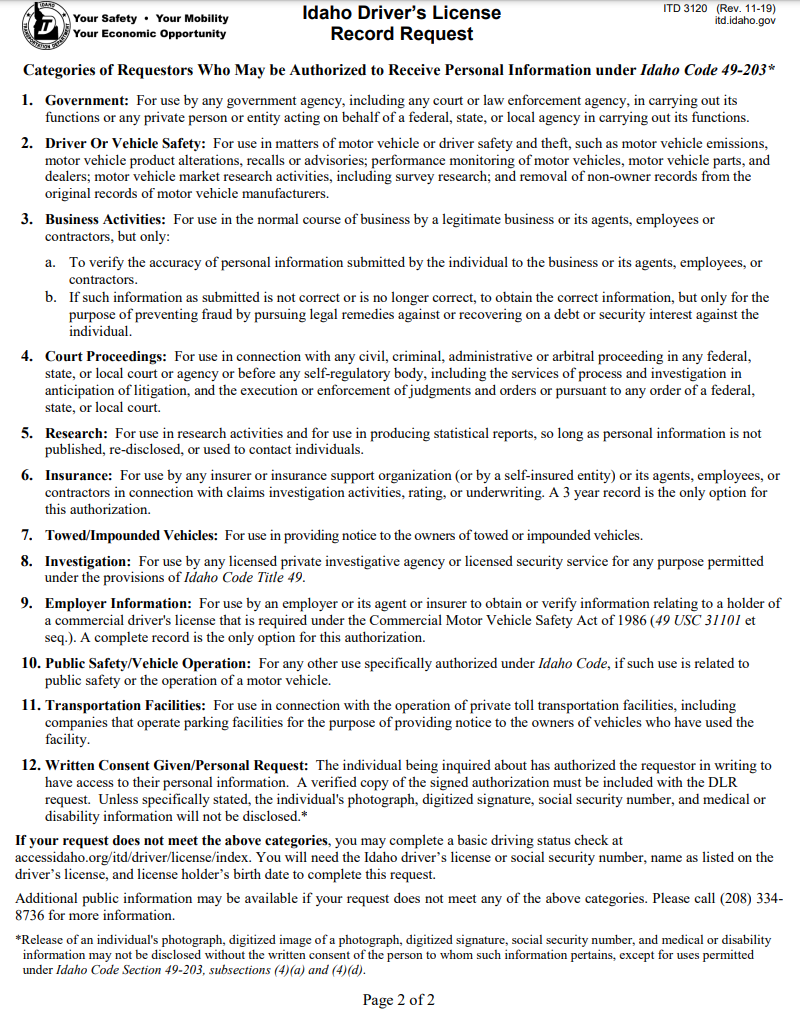
1-31 Vehicle Inspection

Basic Control of Your Vehicle
Shifting Gears
Seeing
Communicating
Space Management
Controlling Your Speed
Seeing Hazards
Distracted Driving
Aggressive Drivers/Road Rage
Night Driving & Driver Fatigue
Driving in Fog
Winter Driving
Hot Weather Driving
Railroad-highway Crossings
Mountain Driving
Driving Emergencies
Antilock Braking Systems
Skid Control and Recovery
Accident Procedures
Fires
Alcohol, Other Drugs, and Driving
Hazardous Materials Rules
This section contains knowledge and safe driving information that all commercial drivers should know. You must pass a test on this information to get a CDL. This section does not have specific information on air brakes, combination vehicles, doubles, or passenger vehicles. When preparing for the Vehicle Inspection Test, you must review the material in Section 11 in addition to the information in this section. This section does have basic information on hazardous materials (HazMat) that all drivers should know. If you need a HazMat endorsement, you should study Section 9.
2.1 Vehicle Inspection
2.1.2 Types of Vehicle Inspection
Pre-Trip Vehicle Inspection: A Vehicle inspection will help you find problems that could cause a crash or breakdown.
During a Trip: For safety you should:
Watch gauges for signs of trouble.
Use your senses to check for problems (look,
listen, smell, feel). Check critical items when you stop:
Tires, wheels and rims.
Brakes.
Lights and reflectors.
Brake and electrical connections to trailer.
Trailer coupling devices.
Cargo securement devices.
Post-trip Inspection and Report: You should do an after-trip inspection at the end of the trip, day, or tour of duty on each vehicle you operated. It may include filling out a vehicle condition report listing any problems you find. The inspection report helps a motor carrier know when the vehicle needs repairs.
2.1.3 What to Look For:
Tire Problems Too much or too little air pressure.
Bad wear. You need at least 4/32-inch tread
A vehicle defect found during an inspection could save you problems later. You could have a breakdown on the road that will cost time and dollars, or even worse, a crash caused by the defect.
Federal and state laws require that drivers inspect their vehicles. Federal and state inspectors also may inspect your vehicles. If they judge the vehicle to be unsafe, they will put it "out of service" until it is fixed. Chapter 2: Driving Safely
This Section Covers
2.1.1 Why Inspect
Safety is the most important reason you inspect your vehicle, safety for yourself and for other road users. depth in every major groove on front tires. You need 2/32 inch on other tires. No fabric should show through the tread or sidewall.
2-1 Dual tires that come in contact with each
other or parts of the vehicle. Mismatched sizes.
Radial and bias-ply tires used together.
Cut or cracked valve stems.
Re-grooved, recapped, or retreaded tires on
the front wheels of a bus are prohibited. Wheel and Rim Problems Damaged rims.
Rust around wheel nuts may mean the nuts
are loose--check tightness. After a tire has been changed, stop a short while later and re-check tightness of nuts. Missing clamps, spacers, studs, or lugs
means danger. Mismatched, bent, or cracked lock rings are
dangerous. Wheels or rims that have had welding
repairs are not safe.
Bad Brake Drums or Shoes Cracked drums.
Shoes or pads with oil, grease, or brake fluid
on them. Shoes worn dangerously thin, missing, or
broken.
Steering System Defects Missing nuts, bolts, cotter keys, or other
parts. Bent, loose, or broken parts, such as steering
column, steering gear box, or tie rods. If power steering equipped, check hoses,
pumps, and fluid level; check for leaks. Steering wheel play of more than 10 degrees
(approximately 2 inches movement at the rim of a 20-inch steering wheel) can make it hard to steer.
Emergency Equipment Warning devices for parked vehicles
Figure 2.1 illustrates a typical steering system
Suspension System Defects
The suspension system holds up the vehicle and its load. It keeps the axles in place. Therefore, broken suspension parts can be extremely dangerous. Look for: Spring hangers that allow movement of axle
from proper position. See Figure 2.2 Cracked or broken spring hangers.
Missing or broken leaves in any leaf spring. If
one-fourth or more are missing, it will put the vehicle "out of service", but any defect could be dangerous. See Figure 2.3. Broken leaves in a multi-leaf spring or leaves
that have shifted so they might hit a tire or other part. Leaking shock absorbers.
Torque rod or arm, U-bolts, spring hangers,
or other axle positioning parts that are cracked, damaged, or missing. Any loose, cracked, broken, or missing frame
members. Air suspension systems that are damaged
and / or leaking. See Figure 2.4.
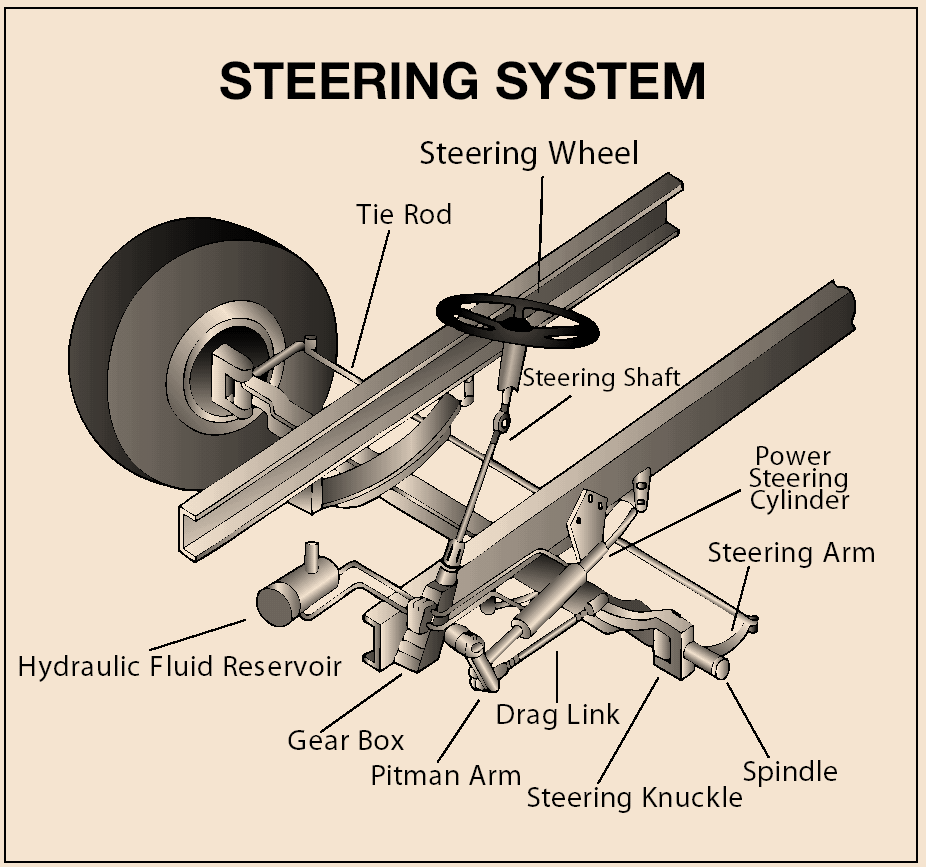
Cuts or other damage.
Tread separation.
2-2 Figure 2.2 Key Suspension Parts
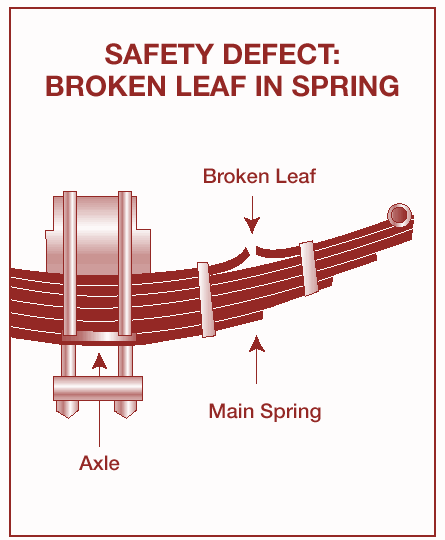
Figure 2.3 Broken Leaf Spring Figure 2.4 Air Suspension Parts
Exhaust System Defects
A broken exhaust system can let poison fumes into the cab or sleeper berth. Look for:
Loose, broken, or missing exhaust pipes,
mufflers, tailpipes, or vertical stacks. Loose, broken, or missing mounting brackets, clamps, bolts, or nuts.
Exhaust system parts rubbing against fuel
system parts, tires, or other moving parts of vehicle. Exhaust system parts that are leaking.
Emergency Equipment
Vehicles must be equipped with emergency equipment. Look for:
Fire extinguisher(s).
Spare electrical fuses (unless equipped with
circuit breakers). Warning devices for parked vehicles (for
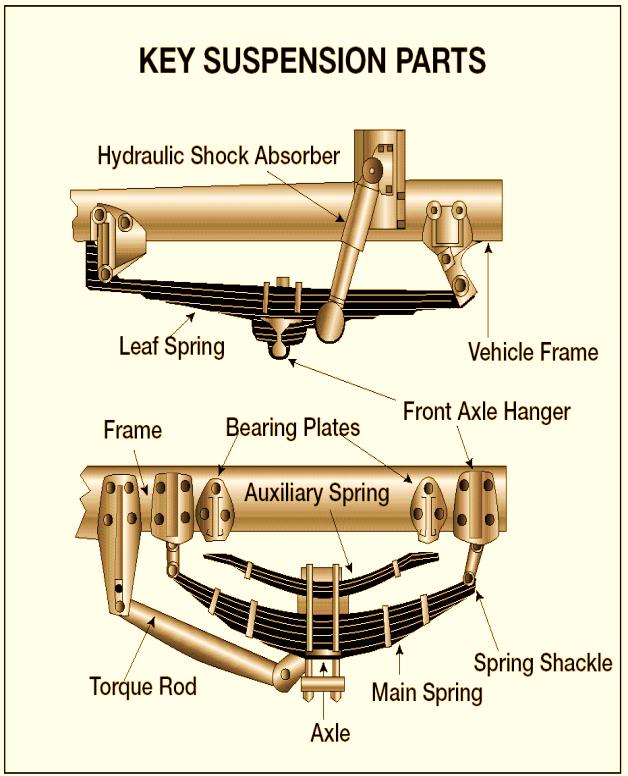
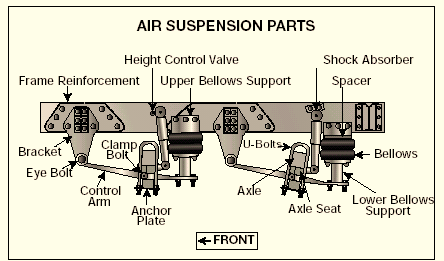
example, three reflective warning triangles or 6 fusees or 3 liquid burning flares).
Cargo (Trucks)
You must make sure the truck is not overloaded and the cargo is balanced and secured before each trip. If the cargo contains hazardous materials, you must inspect for proper papers and placarding.
2-3 2.1.5 Seven-step Inspection Method
Method of Inspection: You should do a Vehicle inspection the same way each time so you will learn all the steps and be less likely to forget something. Approaching the Vehicle: Note general condition- look for damage or
vehicle leaning to one side. Look under the vehicle for fresh oil, coolant,
grease, or fuel leaks. Check the area around the vehicle for
hazards to vehicle movement (people, other vehicles, objects, low-hanging wires, limbs, etc.). Coolant level in radiator; condition of hoses.
Power steering fluid level; hose condition (if
so equipped). Windshield washer fluid level.
Battery fluid level, connections and tie
downs (battery may be located elsewhere) Automatic transmission fluid level (may
require engine to be running). Check belts for tightness and excessive wear
(alternator, water pump, air compressor)-- learn how much "give" the belts should have when adjusted right, and check each one. Leaks in the engine compartment (fuel,
coolant, oil, power steering fluid, hydraulic fluid, battery fluid). Cracked, worn electrical wiring insulation.
Lower and secure hood, cab, or engine
compartment door.
Step 3: Start Engine and Inspect Inside the Cab
Get In and Start Engine
Make sure parking brake is on.
Put gearshift in neutral (or "park" if
automatic). Start engine; listen for unusual noises.
If equipped, check the Anti-lock Braking
System (ABS) indicator lights. Light on dash should come on and then turn off. If it stays on the ABS is not working properly. For trailers only, if the yellow light on the left rear of the trailer stays on, the ABS is not working properly.
Look at the Gauges Oil pressure. Should come up to normal
within seconds after engine is started. See Figure 2.5 Air pressure. Pressure should build from 50
to 90 psi within 3 minutes. Build air pressure to governor cut-out; usually around 120 – 140 psi. Know your vehicle’s requirements. Ammeter and/or voltmeter. Should be in
2.1.4 CDL Pre-Trip Vehicle Inspection Test
In order to obtain a CDL you will be required to pass a Vehicle inspection test. You will be tested to see if you know whether your vehicle is safe to drive. You will be asked to do a Vehicle inspection of your vehicle and explain to the examiner what you would inspect and why. You must point to/touch and name the item you are inspecting. The following seven-step inspection method should be useful. Check the following: Engine oil level.
Vehicle Inspection Guide
Step 1: Vehicle Overview
Review Last Vehicle Inspection Report. Drivers may have to make a vehicle inspection report in writing each day. The motor carrier must repair any items in the report that affect safety and certify on the report that repairs were made or were unnecessary. You must sign the report only if defects were noted and certified to be repaired or not needed to be repaired.
Step 2: Check Engine Compartment Check That the Parking Brakes Are On and/or Wheels Chocked. You may have to raise the hood, tilt the cab (secure loose things so they don't fall and break something), or open the engine compartment door.
normal range(s).
2-4 Engine oil temperature. Should begin
gradual rise to normal operating range. Warning lights and buzzers. Oil, coolant,
charging circuit warning, and antilock brake system lights should go out right away.
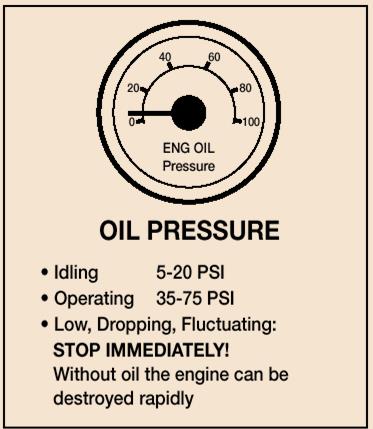
Figure 2.5 Oil Pressure
Check Condition of Controls. Check all of the following for looseness, sticking, damage, or improper setting:
Steering wheel.
Clutch.
Accelerator ("gas pedal").
Brake controls.
Foot brake.
Trailer brake (if vehicle has one).
Parking brake.
Retarder (Jake Brake) controls (if vehicle has
them). Transmission controls.
Interaxle differential lock (if vehicle has one).
Horn(s).
Windshield wiper/washer.
Lights.
Headlights.
Dimmer switch.
Turn signal.
Check Emergency Equipment: Check for the following safety equipment. The first three are always required in a commercial vehicle:
Spare electrical fuses (unless vehicle has
circuit breakers). Three red reflective triangles, 6 fusees or 3
liquid burning flares. Properly charged & rated fire extinguisher.
Check for optional items such as: Chains (where winter conditions require).
Tire changing equipment.
List of emergency phone numbers
Accident reporting kit (packet).
Check Safety Belt: Check that the safety belt is securely
mounted, adjusts; latches properly and is not ripped or frayed.
Step 4: Turn Off Engine and Check Lights:
Make sure the parking brake is set
Turn off the engine, and take the key with
you. Turn on headlights (low beams) and four-
way emergency flashers, and get out of the vehicle.
Step 5: Do Walk-around Inspection:
Go to front of vehicle and check that low
beams are on and both of the four-way flashers are working. Push dimmer switch and check that high
beams work. Turn off headlights and four-way emergency
flashers. Coolant temperature. Should begin gradual Parking, clearance, identification, marker
rise to normal operating range. light switches.
Check Mirrors and Windshield. Inspect mirrors and windshield for cracks, dirt, illegal stickers, or other obstructions to seeing clearly. Clean and adjust as necessary.
Turn on parking, clearance, side-marker, and
Four-way flashers.
identification lights. 2-5 Walk around and inspect.
Clean all lights, reflectors, and glass as you
go along. Left Front Side: Driver's door glass should be clean.
Door latches or locks should work properly.
Left front wheel.
Condition of wheel and rim--missing, bent,
broken studs, clamps, lugs, or any signs of misalignment. Condition of tires--properly inflated, valve
stem and cap OK, no serious cuts, bulges, or tread wear. Use wrench to test rust-streaked lug nuts,
indicating looseness. Hub oil level OK, no leaks.
Left front suspension.
Condition of spring, spring hangers, shackles,
U-bolts.
Shock absorber condition.
Left front brake.
Condition of brake drum or disc.
Condition of hoses.
Front:
Condition of front axle.
Condition of steering system.
No loose, worn, bent, damaged or missing
parts. Must grab steering mechanism to test for
looseness. Condition of windshield.
Check for damage and clean if dirty.
Check windshield wiper arms for proper
spring tension. Check wiper blades for damage, "stiff"
rubber, and securement. Lights and reflectors.
Parking, clearance, and identification lights
Right front turn signal light clean, operating,
and proper color (amber or white on signals facing forward).
Right Side: Right front: check all items as done on left
front. Primary and secondary safety cab locks
engaged (if cab-over-engine design). Right fuel tank(s).
Securely mounted, not damaged, or leaking.
Fuel crossover line secure.
Tank(s) contain enough fuel.
Cap(s) on and secure.
Condition of visible parts.
Rear of engine--not leaking.
Transmission--not leaking.
Exhaust system--secure, not leaking, not
touching wires, fuel, or air-lines. Frame and cross members--no bends or
cracks. Air-lines and electrical wiring--secured against snagging, rubbing, wearing.
Spare tire carrier or rack not damaged (if so
equipped). Spare tire and/or wheel securely mounted in
rack. Spare tire and wheel adequate (proper size,
properly inflated). Cargo securement (trucks).
Cargo properly blocked, braced, tied,
chained, etc. Header board adequate, secure (if required).
Side boards, stakes strong enough, free of
damage, properly set in place (if so equipped). Canvas or tarp (if required) properly secured
to prevent tearing, billowing, or blocking of mirrors. If oversize, all required signs (flags, lamps,
and reflectors) safely and properly mounted and all required permits in driver's possession. Curbside cargo compartment doors in good
Turn on right turn signal, and start walk- Reflectors clean and proper color (amber at
around inspection.
General: front).
clean, operating, and proper color (amber at front). condition, securely closed, latched/locked and required security seals in place. 2-6 bent, or broken spacers, studs, clamps, or lugs. Condition of tires--properly inflated, valve
stems and caps OK, no serious cuts, bulges, tread wear, tires not rubbing each other, and nothing stuck between them. Tires same type, e.g., not mixed radial and
bias types. Tires evenly matched (same sizes).
Wheel bearing/seals not leaking.
Suspension.
Condition of spring(s), spring hangers,
shackles, and U-bolts. Axle secure.
Powered axle(s) not leaking lube (gear oil).
Condition of torque rod arms, bushings.
Condition of shock absorber(s).
If retractable axle equipped, check condition
of lift mechanism. If air powered, check for leaks. Condition of air ride components.
Brakes.
Brake adjustment.
Condition of brake drum(s) or discs.
Condition of hoses--look for any wear due to
rubbing. Lights and reflectors.
Side-marker lights clean, operating, and
proper color (red at rear, others amber). Side-marker reflectors clean and proper
color (red at rear, others amber). Rear: Lights and reflectors.
Rear clearance and identification lights
clean, operating, and proper color (red at rear). Reflectors clean and proper color (red at
rear). Taillights clean, operating, and proper color
(red at rear). Right rear turn signal operating, and proper
color (red, yellow, or amber at rear). License plate(s) present, clean, and secured.
Splash guards present, not damaged,
chained, etc. Tailboards up and properly secured.
End gates free of damage, properly secured
in stake sockets. Canvas or tarp (if required) properly secured
to prevent tearing, billowing, or blocking of either the rearview mirrors or rear lights. If over-length, or over-width, make sure all
signs and/or additional lights/flags are safely and properly mounted and all required permits are in driver's possession. Rear doors securely closed, latched/locked.
Left Side:
Check all items as done on right side, plus:
Battery or batteries (if not mounted in
engine compartment). Battery box or boxes securely mounted to
vehicle. Box has secure cover.
Batteries secured against movement.
Batteries not broken or leaking.
Fluid in batteries at proper level (except
maintenance-free type). Cell caps present and securely tightened
(except maintenance-free type). Vents in cell caps free of foreign material
(except maintenance-free type).
Step 6: Check Signal Lights
Get In and Turn Off Lights
Turn off all lights.
Turn on stop lights (apply trailer hand brake
or have a helper put on the brake pedal). Turn on left turn signal lights.
Get Out and Check Lights
Left front turn signal light clean, operating
and proper color (amber or white on signals facing the front). Left rear turn signal light and both stop lights
Cargo secure (trucks).
Right Rear: Condition of wheels and rims--no missing, Cargo properly blocked, braced, tied,
clean, operating, and proper color (red, yellow, or amber).
properly fastened, not dragging on ground, or rubbing tires. 2-7 Turn off lights not needed for driving.
Check for all required papers, trip manifests,
permits, etc. Secure all loose articles in cab (they might
interfere with operation of the controls or hit you in a crash). Start the engine.
Step 7: Start the Engine and Check
Test for Hydraulic Leaks: If the vehicle has hydraulic brakes, pump the brake pedal three times. Then apply firm pressure to the pedal and hold for five seconds. The pedal should not move. If it does, there may be a leak or other problem. Get it fixed before driving. If the vehicle has air brakes, do the checks described in Sections 5 and 6 of this manual, and the step by step instructions in Chapter 11.
Brake System
Test Parking Brake(s)
Fasten safety belt
Set parking brake (power unit only).
Release trailer parking brake (if applicable).
Place vehicle into a low gear.
Gently pull forward against parking brake to
make sure the parking brake holds. Repeat the same steps for the trailer with
trailer parking brake set and power unit parking brakes released (if applicable). If it doesn't hold vehicle, it is faulty; get it
fixed.
Test Service Brake Stopping Action
Go about five miles per hour.
Push brake pedal firmly
"Pulling" to one side or the other can mean
brake trouble. Any unusual brake pedal "feel" or delayed
stopping action can mean trouble. If you find anything unsafe during the
Release the parking brake(s)
Pull the Trolley Valve handle all the way
down Gently pull forward against the brake to
make sure it will hold the trailer.
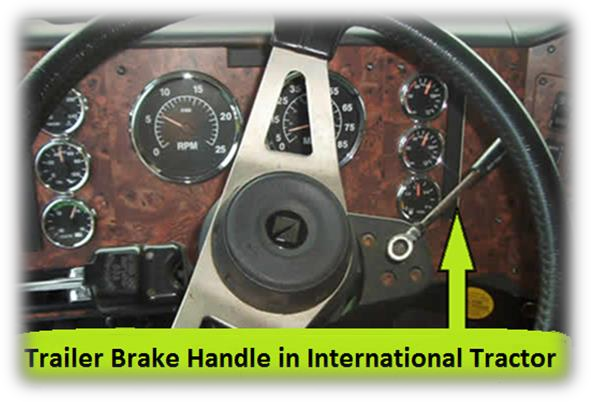
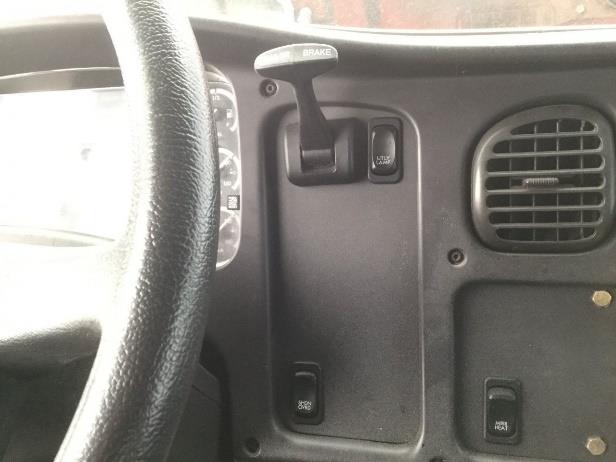
Get In Vehicle: Test Trailer Service Brake (if so equipped) In many truck/tractors equipped with air brakes, the Trailer Brake Valve- also known as a Trolley Valve or “Johnson Bar” is a device used to apply the service brakes on a trailer gradually. It does NOT activate the brakes on the tractor.
This braking device is activated by pulling down on a handle usually located on the steering column or dashboard. It may be spring loaded so the driver will have a feel for the braking action. The more he/she moves the control lever, the harder the trailer brakes come on. The system allows drivers to activate and control the trailer brakes independently from the tractor brakes.
To test the Trailer Brake System:
Trailer Brake Handle in Freightliner Tractor Vehicle inspection, get it fixed. Federal and state laws forbid operating an unsafe vehicle. 2-8 Instruments.
Air pressure gauge (if you have air brakes).
Temperature gauges.
2.1.7 – Post-trip (After Trip) Inspection and
Report
You may have to make a written report each day on the condition of the vehicle(s) you drove. Report anything affecting safety or possibly leading to mechanical breakdown. Pressure gauges.
Ammeter/voltmeter.
Mirrors.
Tires.
Cargo, cargo straps or securement, cargo
tarps or covers. Lights, etc.
If you see, hear, smell, or feel anything that might mean trouble, check it out.
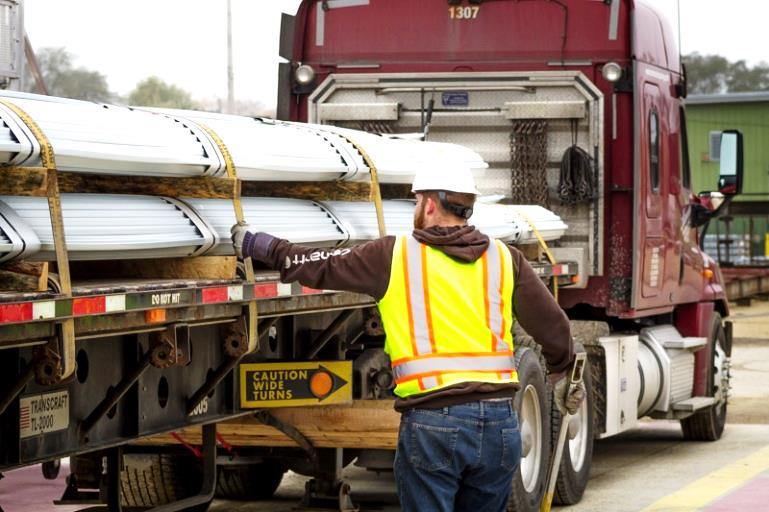
2.1.6 – Inspection during a Trip
Check Vehicle Operation Regularly! It is very important that you make a quick walk around to look for problems when you stop your truck or bus during your trip.
You should check:
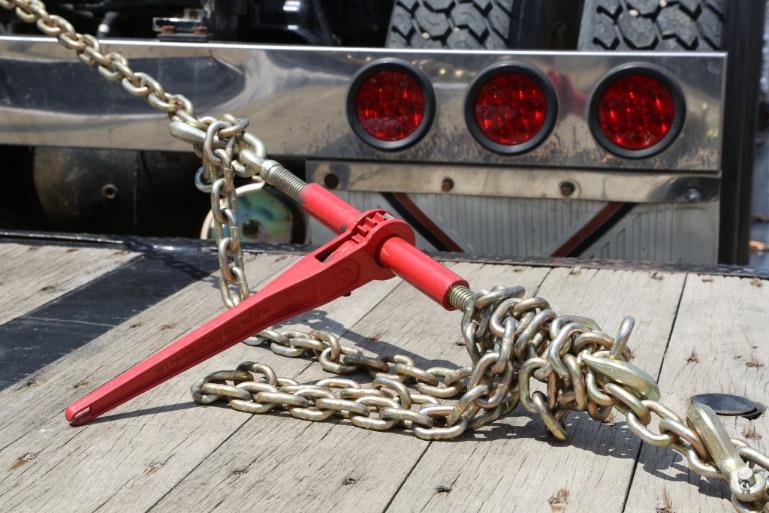
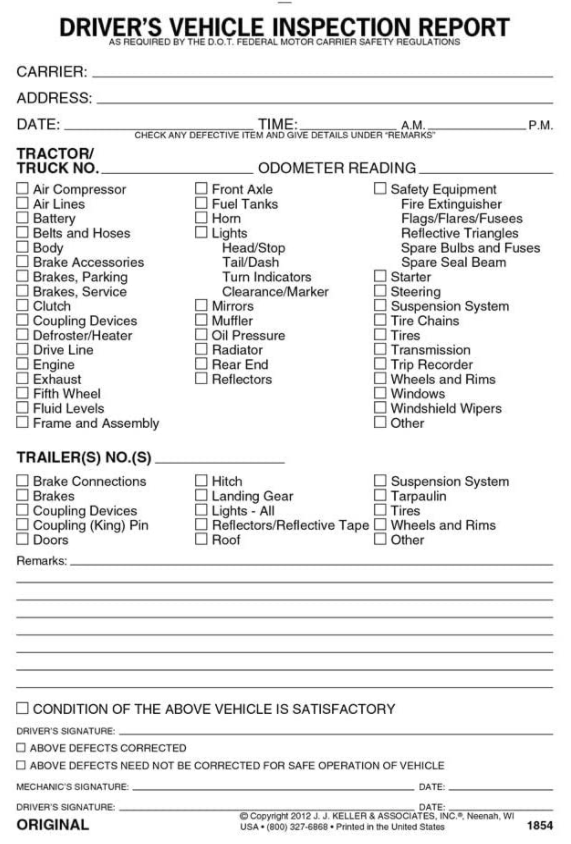
Safety Inspection:
Drivers of trucks and truck tractors when transporting cargo must inspect the securement of the cargo within the first 50 miles of a trip and every 150 miles or every three hours (whichever comes first) after. This is a very important part of being a professional driver. Often cargo will move slightly or settle during the first part of a trip. By making careful checks on cargo securement, you can avoid losing all or part of your load and possibly injuring someone or damaging property. 2-9 Subsection 2.1-Test Your Knowledge The vehicle inspection report tells the motor carrier about problems that may need fixing. Keep a copy of your report in the vehicle for one day. That way, the next driver can learn about any problems you have found. 1.What is the most important reason for doing a vehicle inspection? 2.What things should you check during a trip? 3.Name some key steering system parts. 4.Name some suspension system defects. 5.What three kinds of emergency equipment must you have? 6.What is the minimum tread depth for front tires? For other tires? 7.Name some things you should check on the front of your vehicle during the walk around inspection. 8.What should wheel bearing seals be checked for? 9.How many red reflective triangles should you carry? 10.How do you test hydraulic brakes for leaks? 11.Why put the starter switch key in your pocket during the Vehicle inspection?
These questions may be on your test. If you can’t answer them all, re-read subsection 2.1. Accelerating
Steering
Stopping
Backing safely
Fasten your seatbelt when on the road. Apply the parking brake when you leave your vehicle.
2.2.1 Accelerating
Don't roll back when you start. You may hit someone behind you. If you have a manual transmission vehicle, partly engage the clutch before you take your right foot off the brake. Put on the parking brake whenever necessary to keep from rolling back. Release the parking brake only when you have applied enough engine power to keep from rolling back. On a tractor-trailer equipped with a trailer brake hand valve, the hand valve can be applied to keep from rolling back.
Speed up smoothly and gradually so the vehicle does not jerk. Rough acceleration can cause mechanical damage. When pulling a trailer, rough acceleration can damage the coupling.
Speed up very gradually when traction is poor, as in rain or snow. If you use too much power, the drive wheels may spin. You could lose control. If the drive wheels begin to spin, take your foot off the accelerator. 2.2 Basic Control of Your Vehicle
To drive a vehicle safely, you must be able to control its speed and direction. Safe operation of a commercial vehicle requires skill in:
2.2.2 Steering
Hold the steering wheel firmly with both hands. Your hands should be on opposite sides of the wheel. If you hit a curb or a pothole (chuckhole), the wheel could pull away from your hands unless you have a firm hold.
2-10 2.2.4 – Backing Safely Because you cannot see everything behind your vehicle, backing is always dangerous. Avoid backing whenever you can. When you park, try to park so you will be able to pull forward when you leave. When you have to back, here are a few simple safety rules: Start in the proper position.
Look at your path.
Use mirrors on both sides.
Back slowly.
Back and turn toward the driver's side
whenever possible.
2.3 Shifting Gears
Correct shifting of gears is important. If you can't get your vehicle into the right gear while driving, you will have less control.
2.3.1 Manual Transmissions
Transmission Types: Most heavy vehicles that require a CDL have either an automatic or an unsynchronized manual transmission. Some trucks are equipped with a synchronized manual transmission. For these vehicles, double clutching is NOT required. The following guidance is for UNSYNCHRONIZED manual transmissions:
Basic Method for Shifting Up: Unsynchronized manual transmissions require double clutching to change gears. This is the basic method: Release accelerator, push in clutch and shift
to neutral at the same time. Release clutch.
Let engine and gears slow down to the rpm
required for the next gear (this takes practice). Push in clutch and shift to the higher gear at
the same time. Release clutch and press accelerator at the
2.2.3 Stopping
Push the brake pedal down gradually. The amount of brake pressure you need to stop the vehicle will depend on the speed of the vehicle and how quickly you need to stop. Control the pressure so the vehicle comes to a smooth, safe stop. If you have a manual transmission, push the clutch in when the engine is close to idle. can't see as well. If you back and turn toward the driver's side, you can watch the rear of your vehicle by looking out the side window. Use driver-side backing--even if it means going around the block to put your vehicle in this position. The added safety is worth it.
Use a Helper: Use a helper when you can. There are blind spots you can't see. That's why a helper is important. The helper should stand near the back of your vehicle where you can see the helper. Before you begin backing, work out a set of hand signals that you both understand. Agree on a signal for "stop."
Use a helper whenever possible. These rules are discussed in turn below.
Start in the Proper Position: Put the vehicle in the best position to allow you to back safely. This position will depend on the type of backing to be done.
Look at Your Path: Look at your line of travel before you begin. Get out and walk around the vehicle. Check your clearance to the sides and overhead, in and near the path your vehicle will take.
Use Mirrors on Both Sides: Check the outside mirrors on both sides frequently. Get out of the vehicle and check your path if you are unsure.
Back Slowly: Always back as slowly as possible. Use the lowest reverse gear. That way you can more easily correct any steering errors. You also can stop quickly if necessary.
Back and Turn toward the Driver's Side: Back to the driver's side so that you can see better. Backing toward the right side is very dangerous because you same time.
Shifting gears using double clutching requires practice. If you remain too long in neutral, you may have difficulty putting the vehicle into the next gear. If so, don't try to force it. Return to neutral, release 2-11 Release accelerator, push in clutch, and shift
to neutral at the same time. Release clutch.
Press accelerator, increase engine and gear
speed to the rpm required in the lower gear. Push in clutch and shift to lower gear at the
same time. Release clutch and press accelerator at the
same time. Downshifting, like upshifting, requires knowing when to shift. Use either the tachometer or the speedometer and downshift at the right rpm or road speed.
2.3.2 Multi-speed Rear Axles and Auxiliary
Transmissions Multi-speed rear axles and auxiliary transmissions are used on many vehicles to provide extra gears. You usually control them by a selector knob or switch on the gearshift lever of the main transmission. There are many different shift patterns. Learn the right way to shift gears in the vehicle you will drive.
2.3.3 Automatic Transmissions
Some vehicles have automatic transmissions. You can select a low range to get greater engine braking when going down grades. The lower ranges prevent the transmission from shifting up beyond the selected gear (unless the governor rpm is exceeded). It is very important to use this braking effect when going down grades.
2.3.4 Retarders (also called Jake Brakes)
Some vehicles have "retarders." Retarders help slow a vehicle, reducing the need for using your brakes. They reduce brake wear and give you another way to slow down. There are four basic types of retarders (exhaust, engine, hydraulic, and electric). All retarders can be turned on or off by the driver. On some vehicles the retarding power can be adjusted. When turned "on," retarders apply their braking power (to the drive wheels only) whenever you let up on the accelerator pedal all the way.
Because these devices can be noisy, be sure you know where their use is permitted.
Caution: When your drive wheels have poor traction, the retarder may cause them to skid. Therefore, you should turn the retarder off whenever the road is wet, icy, or snow covered. clutch, increase engine speed to match road speed, and try again.
Knowing When to Shift Up: There are two ways of knowing when to shift:
Use Engine Speed (rpm): Study the driver's manual for your vehicle and learn the operating rpm range. Watch your tachometer, and shift up when your engine reaches the top of the range. (Some newer vehicles use "progressive" shifting: the rpm at which you shift becomes higher as you move up in the gears. Find out what's right for the vehicle you will operate.)
Use Road Speed (mph): Learn what speeds each gear is good for. Then, by using the speedometer, you'll know when to shift up.
With either method, you may learn to use engine sounds to know when to shift.
Basic Procedures for Shifting Down: Before Entering a Curve: Slow down to a safe speed, and downshift to the right gear before entering the curve. This lets you use some power through the curve to help the vehicle be more stable while turning. It also allows you to speed up as soon as you are out of the curve.
Special conditions where you should downshift:
Before going down a Hill: Slow down, and shift down to a speed that you can control without needing to use your brakes very much. Otherwise the brakes can overheat and lose their braking power.
Downshift before starting down the hill. Make sure you are in a low enough gear, usually lower than the gear required to climb the same hill. 2-12 Subsections 2.2 and 2.3 -Test Your Knowledge
1.Why should you back toward the driver's side?
2.If stopped on a hill, how can you start moving
without rolling back? 3.When backing, why is it important to use a helper? 4.What's the most important hand signal that you and the helper should agree on? 5.What are the two special conditions where you should downshift? 6.When should you downshift automatic transmissions? 7.Retarders keep you from skidding when the road is slippery. True or False? 8.What are the two ways to know when to shift?
These questions may be on the test. If you can't answer them all, re-read subsections 2.2 and 2.3.
2.4 Seeing
To be a safe driver you need to know what's going on all around your vehicle. Not looking properly is a major cause of accidents.
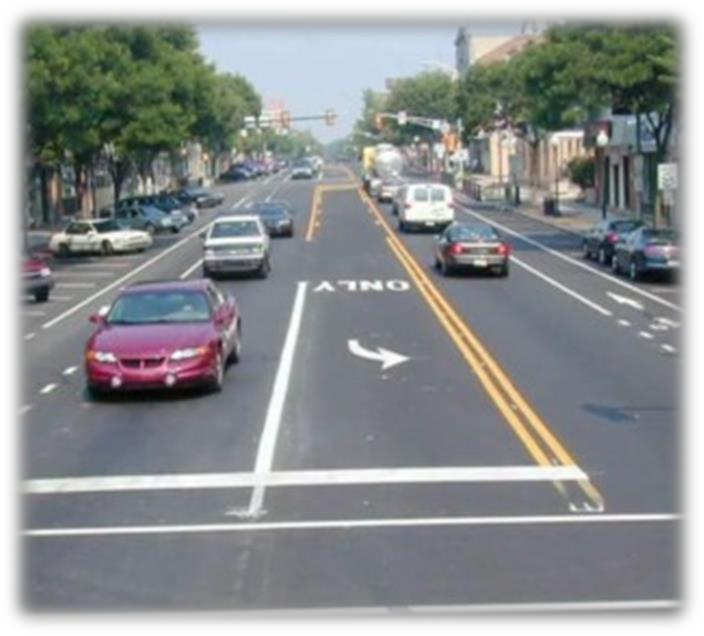
City Driving – 12-15 Seconds is About One Block

Open Highway – 12-15 Seconds is about 1/4 Mile How Far Ahead to Look: Most good drivers look at least 12 to 15 seconds ahead. That means looking ahead the distance you will travel in 12 to 15 seconds. At lower speeds, that's about one block. At highway speeds it's about a quarter of a mile. If you're not looking that far ahead, you may have to stop too quickly or make quick lane changes. Looking 12 to 15 seconds ahead doesn't mean not paying attention to things that are closer. Good drivers shift their attention back and forth, near and far. Figure 2.6 illustrates how far to look ahead.
2.4.1 Seeing Ahead
All drivers look ahead; but many don't look far enough ahead.
Importance of Looking Far Enough Ahead: Because stopping or changing lanes can take a lot of distance, knowing what the traffic is doing on all sides of you is very important. You need to look well ahead to make sure you have room to make these moves safely. Figure 2.6 Judging Distance
2-13 Before you change lanes to make sure there
is enough room. After you have signaled, to check that no one
has moved into your blind spot. Right after you start the lane change, to
double-check that your path is clear. 2.4.2 Seeing to the Sides and Rear It's important to know what's going on behind and to the sides. Check your mirrors regularly. Check more often in special situations.
Mirror Adjustment: Mirror adjustment should be checked prior to the start of any trip and can only be checked accurately when the trailer(s) are straight. You should check and adjust each mirror to show some part of the vehicle. This will give you a reference point for judging the position of the other images.
Regular Checks: You need to make regular checks of your mirrors to be aware of traffic and to check your vehicle.
Traffic: Check your mirrors for vehicles on either side and in back of you. In an emergency, you may need to know whether you can make a quick lane change. Use your mirrors to spot overtaking vehicles. There are "blind spots" that your mirrors cannot show you. Check your mirrors regularly to know where other vehicles are around you, and to see if they move into your blind spots.
Check Your Vehicle: Use the mirrors to keep an eye on your tires. It's one way to spot a tire fire. If you're carrying open cargo, you can use the mirrors to check it. Look for loose straps, ropes, or chains. Watch for a flapping or ballooning tarp.
Special Situations: Special situations require more than regular mirror checks. These are lane changes, turns, merges, and tight maneuvers. After you complete the lane change.
Turns: In turns, check your mirrors to make sure the rear of your vehicle will not hit anything.
Merges: When merging, use your mirrors to make sure the gap in traffic is large enough for you to enter safely.
Tight Maneuvers: Any time you are driving in close quarters, check your mirrors often. Make sure you have enough clearance.
How to Use Mirrors: Use mirrors correctly by checking them quickly and understanding what you see.
When you use your mirrors while driving on the road, check quickly. Look back and forth between the mirrors and the road ahead. Don't focus on the mirrors for too long. Otherwise, you will travel quite a distance without knowing what's happening ahead.
Many large vehicles have curved (convex, "fisheye," "spot," "bug-eye") mirrors that show a wider area than flat mirrors. This is often helpful. But everything appears smaller in a convex mirror than it would if you were looking at it directly. Things also seem farther away than they really are. It's important to realize this and to allow for it. Figure 2.7 shows the field of vision using a convex mirror.
Look for Traffic. Look for vehicles coming onto the highway, into your lane, or turning. Watch for brake lights from slowing vehicles. By seeing these things far enough ahead, you can change your speed, or change lanes if necessary to avoid a problem. If a traffic light has been green for a long time it will probably change before you get there. Start slowing down and be ready to stop. Lane Changes: You need to check your mirrors to make sure no one is alongside you or about to pass you. Check your mirrors:
2-14 Figure 2.7 Convex Mirrors
2.5 Communicating
2.5.1 Signal Your Intentions
Other drivers can't know what you are going to do until you tell them.
Signaling what you intend to do is important for safety. Here are some general rules for signaling:
Turns: There are three good rules for using turn signals: Signal early. Signal well before you turn. It is
the best way to keep others from trying to pass you. Signal continuously. You need both hands on
the wheel to turn safely. Don't cancel the signal until you have completed the turn. Cancel your signal. Don't forget to turn off
your turn signal after you've turned (if you don't have self-canceling signals).
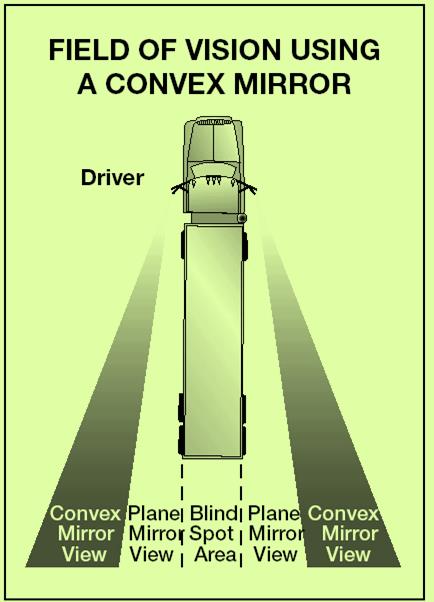
Lane Changes: Put your turn signal on before changing lanes. Change lanes slowly and smoothly. That way a driver you didn't see may have a chance to honk his/her horn, or avoid your vehicle.
Slowing Down: Warn drivers behind you when you realize you'll need to slow down. A few light taps on the brake pedal -- enough to flash the brake lights -- should warn following drivers. Use the four-way emergency flashers for times when you are driving very slowly or are stopped. Warn other drivers in any of the following situations:
Trouble Ahead: The size of your vehicle may make it hard for drivers behind you to see hazards ahead. If you see a hazard that will require slowing down, warn the drivers behind by flashing your brake lights.
Tight Turns: Most car drivers don't know how slowly you have to go to make a tight turn in a large vehicle. Give drivers behind you warning by braking early and slowing gradually.
Stopping on the Road: Truck and bus drivers sometimes stop in the roadway to unload cargo or passengers, or to stop at a railroad crossing. Warn following drivers by flashing your brake lights. Don't stop suddenly.
Driving Slowly: Drivers often do not realize how fast they are catching up to a slow vehicle until they are very close. If you must drive slowly, alert following drivers by turning on your emergency flashers if it is legal. (Laws regarding the use of flashers differ from one state to another. Check the laws of the states where you will drive.)
Don't Direct Traffic: Some drivers try to help out others by signaling when it is safe to pass. You should not do this. You could cause an accident. You could be blamed and it could cost you many thousands of dollars.
2-15 If you must stop on or by a one-way or
divided highway, place warning devices 10 feet, 100 feet, and 200 feet toward the approaching traffic. See Figure 2.8. Figure 2.8 Placing Warning Devices
If you stop on a two-lane road carrying traffic
in both directions or on an undivided highway, place warning devices within 10 feet of the front or rear corners to mark the location of the vehicle and 100 feet behind and ahead of the vehicle, on the shoulder or in the lane you stopped in. See Figure 2.9. 2.5.2 Communicating Your Presence Other drivers may not notice your vehicle even when it's in plain sight. To help prevent accidents, let them know you're there.
When Passing: Whenever you are about to pass a vehicle, pedestrian, or bicyclist, assume they don't see you. They could suddenly move in front of you. When it is legal, tap the horn lightly or, at night, flash your lights from low to high beam and back. And, drive carefully enough to avoid a crash even if they don't see or hear you.
When It's Hard to See: At dawn, dusk, in rain, or snow, you need to make yourself easier to see. If you are having trouble seeing other vehicles, other drivers will have trouble seeing you. Turn on your lights. Use the headlights, not just the identification or clearance lights. Use the low beams; high beams can bother people in the daytime as well as at night.
When Parked at the Side of the Road: When you pull off the road and stop, be sure to turn on the four-way emergency flashers. This is even more important at night.
If you must stop on a road or the shoulder of any road, you must put out your emergency warning devices within ten minutes.
Depending on the type of road you are traveling (one-way, two-lane or multi-lane) place your warning devices at the following locations:
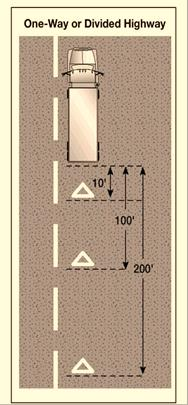
2-16 Figure 2.9 Where to Place Triangles
Figure 2.10 Obstructed View Triangle placement
When putting out the triangles, hold them between yourself and the oncoming traffic for your own safety. (So other drivers can see you.)
Use Your Horn When Needed: Your horn can let others know you're there. It can help to avoid a crash. Use your horn when needed. However, it can startle others and could be dangerous when used unnecessarily. If you stop beyond any hill, curve, or other
obstruction that prevents other drivers from seeing the vehicle within 500 feet.
If line of sight view is obstructed due to hill
or curve, move the rear-most triangle to a point back down the road so warning is provided. See Figure 2.10.
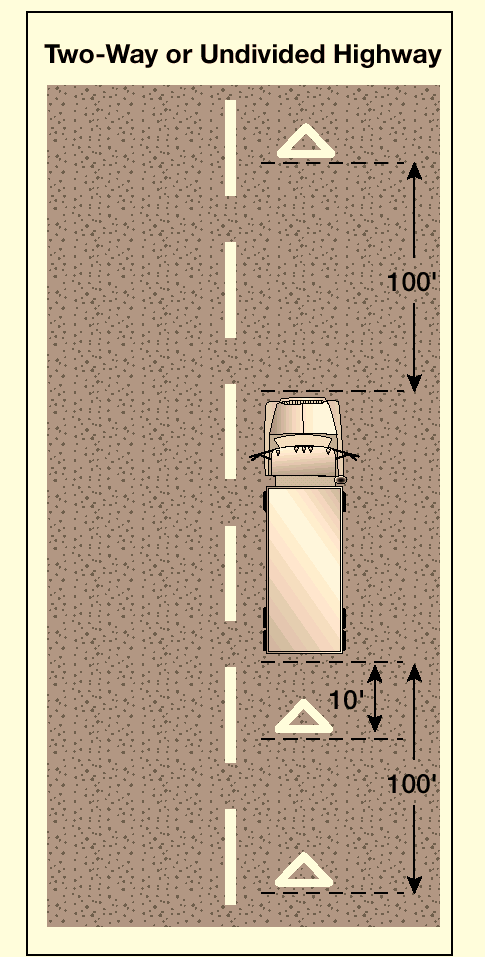
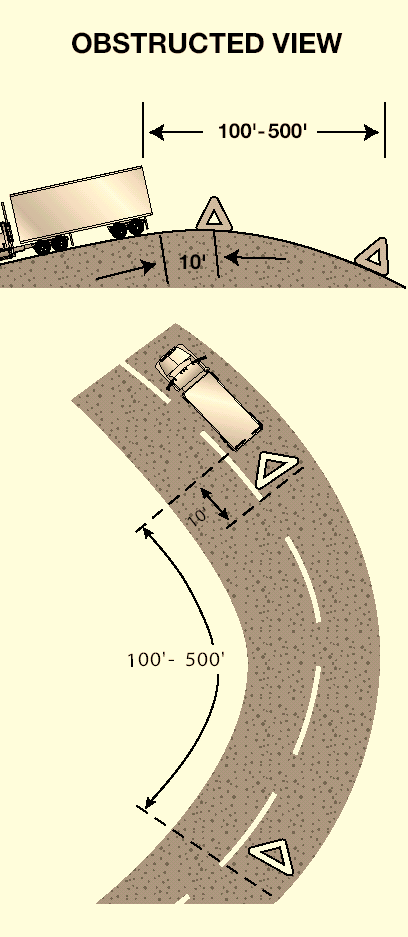
2-17 Braking distance: The distance your vehicle will travel, in ideal conditions; while you are braking. At 55 mph on dry pavement with good brakes, it can take about 216 feet. Total stopping distance: The total minimum distance your vehicle has traveled, in ideal conditions; with everything considered, including perception distance, reaction distance and braking distance, until you can bring your vehicle to a complete stop. At 55 mph, your vehicle will travel a minimum of 419 feet. See Figure 2.11. Effect of Speed on Stopping Distance:
The faster you drive, the greater the impact or striking power of your vehicle. When you double your speed from 20 to 40 mph the impact is 4 times greater. The braking distance is also 4 times longer. Triple the speed from 20 to 60 mph and the impact and braking distance is 9 times greater. 2.6.1 Stopping Distance
Perception Distance + Reaction Distance + Braking Distance= Total Stopping Distance
Perception distance: The distance your vehicle travels, in ideal conditions; from the time your eyes see a hazard until your brain recognizes it. Keep in mind certain mental and physical conditions can affect your perception distance. It can be affected greatly depending on visibility and the hazard itself. The average perception time for an alert driver is 1¾ seconds. At 55 mph this accounts for 142 feet traveled.
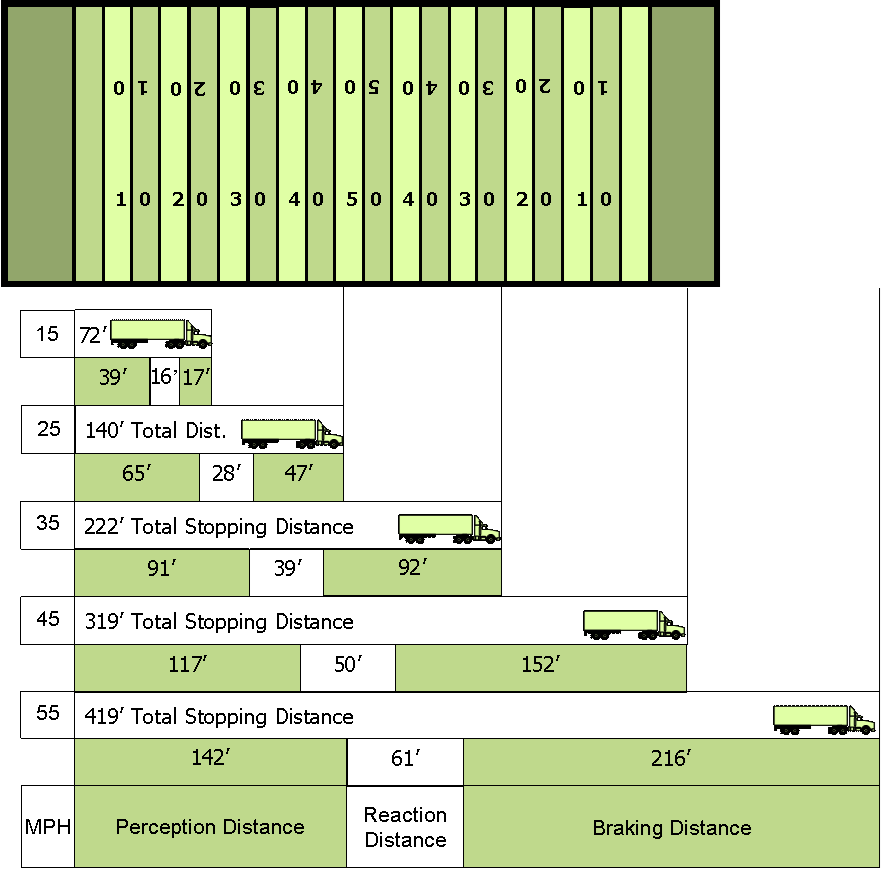
2.6 Controlling Speed
Driving too fast is a major cause of fatal crashes. You must adjust your speed depending on driving conditions. These include traction, curves, visibility, traffic and hills. Reaction distance: The distance you will continue to travel, in ideal conditions; before you physically hit the brakes, in response to a hazard seen ahead. The average driver has a reaction time of ¾ second to 1 second. At 55 mph this accounts for 61 feet traveled.
Figure 2.11 Total Stopping Distance 2-18 2.6.2 Matching Speed to Road Surface You can't steer or brake a vehicle unless you have traction. Traction is friction between the tires and the road. There are some road conditions that reduce traction and call for lower speeds.
Slippery Surface: It will take longer to stop, and it will be harder to turn without skidding, when the road is slippery. Wet roads can double stopping distance. You must drive slower to be able to stop in the same distance as on a dry road. Reduce speed by about one-third (e.g., slow from 55 to about 35 mph) on a wet road. On packed snow, reduce speed by a half, or more. If the surface is icy, reduce speed to a crawl and stop driving as soon as you can safely do so.
Identifying Slick Surfaces: Sometimes it's hard to know if the road is slick. Here are some signs of slippery roads:
Shaded Areas: Shady parts of the road will
remain icy and slippery long after open areas have melted. Bridges: When the temperature drops,
Black Ice: Black ice is a thin layer that is clear
enough that you can see the road underneath it. It makes the road look wet. Any time the temperature is below freezing and the road looks wet, watch out for black ice.
Vehicle Icing: An easy way to check for ice is
to open the window and feel the front of the mirror, mirror support, or antenna. If there's ice on these, the road surface is probably starting to ice up.
Road Spray: If your tires were kicking up wet
road spray, and they stop, that is a sign the road surface may be freezing up.
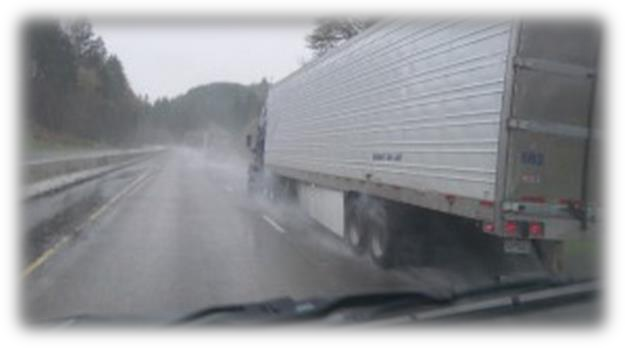
Just After Rain Begins. Right after it starts to
Melting Ice: Slight melting will make ice
At 60 mph, your stopping distance is greater than the length of a football field. Increase the speed to 80 mph and the impact and braking distance are 16 times greater than at 20 mph. High speeds greatly increase the severity of crashes and stopping distances. By slowing down, you can reduce braking distance.
Effect of Vehicle Weight on Stopping Distance:
The heavier the vehicle, the more work the brakes must do to stop it, and the more heat they absorb. But the brakes, tires, springs, and shock absorbers on heavy vehicles are designed to work best when the vehicle is fully loaded. Empty trucks require greater stopping distances because an empty vehicle has less traction. wet. Wet ice is much more slippery than ice that is not wet.
rain, the water mixes with oil left on the road by vehicles. This makes the road very slippery. If the rain continues, it will wash the oil away.
Hydroplaning: In some weather, water or slush collects on the road. When this happens, your vehicle can hydroplane. It's like water skiing--the tires lose their contact with the road and have little or no traction. You may not be able to steer or brake. You can regain control by releasing the accelerator and pushing in the clutch. This will slow your vehicle and let the wheels turn freely. If the vehicle is hydroplaning, do not use the brakes to slow down. If the drive wheels start to skid, push in the clutch to let them turn freely. bridges will freeze before the road will. Be especially careful when the temperature is close to 32 degrees Fahrenheit.
2-19 2.6.3 Speed and Curves Drivers must adjust their speed for curves in the road. If you take a curve too fast, two things can happen. The tires can lose their traction and continue straight ahead, so you skid off the road. Or, the tires may keep their traction and the vehicle rolls over. Tests have shown that trucks with a high center of gravity can roll over at the posted speed limit for a curve.
Slow to a safe speed before you enter a curve. Braking in a curve is dangerous because it is easier to lock the wheels and cause a skid. Slow down as needed. Don't ever exceed the posted speed limit for the curve. Be in a gear that will let you accelerate slightly in the curve. This will help you keep control. 2.6.6 Speed on Downgrades Your vehicle's speed will increase on downgrades because of gravity. Your most important objective is to select and maintain a speed that is not too fast for the:
Total weight of the vehicle and cargo.
Length of the grade.
Steepness of the grade.
Road conditions.
Weather.
If a speed limit is posted, or there is a sign indicating "Maximum Safe Speed," never exceed the speed shown. Also, look for and heed warning signs indicating the length and steepness of the grade.
2.6.4 Speed and Distance Ahead
You should always be able to stop within the distance you can see ahead. Fog, rain, or other conditions may require that you slowdown to be able to stop in the distance you can see. At night, you can't see as far with low beams as you can with high beams. When you must use low beams, slow down.
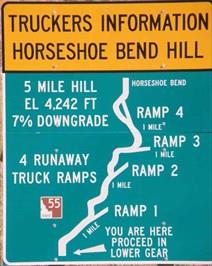
It does not take a lot of water to cause hydroplaning. Hydroplaning can occur at speeds as low as 30 mph if there is a lot of water. Hydroplaning is more likely if tire pressure is low, or the tread is worn. (The grooves in a tire carry away the water; if they aren't deep, they don't work well.)
Road surfaces where water can collect can create conditions that cause a vehicle to hydroplane. Watch for clear reflections, tire splashes, and raindrops on the road. These are indications of standing water. an illegal or unsafe speed. Keep a safe following distance.
The main reason drivers exceed the speed limit is to save time. But, anyone trying to drive faster than the speed of traffic will not be able to save much time. The risks involved are not worth it. If you go faster than the speed of other traffic, you'll have to keep passing other vehicles. This increases the chance of a crash, and it is more tiring. Fatigue increases the chance of a crash. Going with the flow of traffic is safer and easier.
You must use the braking effect of the engine as the principal way of controlling your speed on downgrades. The braking effect of the engine is greatest when it is near the governed rpms and the transmission is in the lower gears. Save your brakes so you will be able to slow or stop as required by road and traffic conditions. Shift your transmission to a low gear before starting down the grade and use the proper braking techniques. Please read carefully the section on going down long, steep downgrades safely in "Mountain Driving." 2.6.5 Speed and Traffic Flow When you're driving in heavy traffic, the safest speed is the speed of other vehicles. Vehicles going the same direction at the same speed are not likely to run into one another. In many states, speed limits are lower for trucks and buses than for cars. It can vary as much as 15 mph. Use extra caution when you change lanes or pass on these roadways. Drive at the speed of the traffic, if you can without going at 2-20 Subsections 2.4, 2.5, and 2.6 Test Your Knowledge 1. How far ahead does the manual say you should look? 2. What are two main things to look for ahead? 3. What's your most important way to see the sides and rear of your vehicle? 4. What does "communicating" mean in safe driving? 5. Where should you place reflectors when stopped on a divided highway? 6. What three things add up to total stopping distance? 7. If you go twice as fast, will your stopping distance increase by two or four times? 8. Empty trucks have the best braking. True or False? 9. What is hydroplaning? 10. What is "black ice”? These questions may be on the test. If you can't answer them all, re-read subsections 2.4, 2.5, and 2.6. 2.6.7 Roadway Work Zones Speeding traffic is the number one cause of injury and death in roadway work zones. Observe the posted speed limits at all times when approaching and driving through a work zone. Watch your speedometer, and don’t allow your speed to creep up as you drive through long sections of road construction. Decrease your speed for adverse weather or road conditions. Decrease your speed even further when a worker is close to the roadway. To have space available when something goes wrong, you need to manage space. While this is true for all drivers, it is very important for large vehicles. They take up more space and they require more space for stopping and turning.
2.7.1 Space Ahead
Of all the space around your vehicle, it is the area ahead of the vehicle--the space you're driving into - -that is most important.
The Need for Space Ahead: You need space ahead in case you must suddenly stop. According to accident reports, the vehicle that trucks and buses most often run into is the one in front of them. The most frequent cause is following too closely. Remember, if the vehicle ahead of you is smaller than yours, it can probably stop faster than you can. You may crash if you are following too closely.
How Much Space? How much space should you keep in front of you? One good rule says you need at least one second for each 10 feet of vehicle length at speeds below 40 mph. At greater speeds, you must add 1 second for safety. For example, if you are driving a 40-foot vehicle, you should leave 4 seconds between you and the vehicle ahead. In a 60-foot rig, you'll need 6 seconds. Over 40 mph, you'd need 5 seconds for a 40-foot vehicle and 7 seconds for a 60-foot vehicle. See Figure 2.12.
To know how much space you have, wait until the vehicle ahead passes a shadow on the road, a pavement marking, or some other clear landmark. Then count off the seconds like this: "one thousand-and-one, one thousand-and-two" and so on, until you reach the same spot. Compare your count with the rule of one second for every ten feet of length.
If you are driving a 40-foot truck and only counted up to 2 seconds, you're too close. Drop back a little and count again until you have 4 seconds of following distance (or 5 seconds, if you're going over 40 mph). After a little practice, you will know how far back you should be. Remember to add 1 second for speeds above 40 mph. Also remember that when 2.7 Managing Space To be a safe driver, you need space all around your vehicle. When things go wrong, space gives you time to think and to take action. 2-21
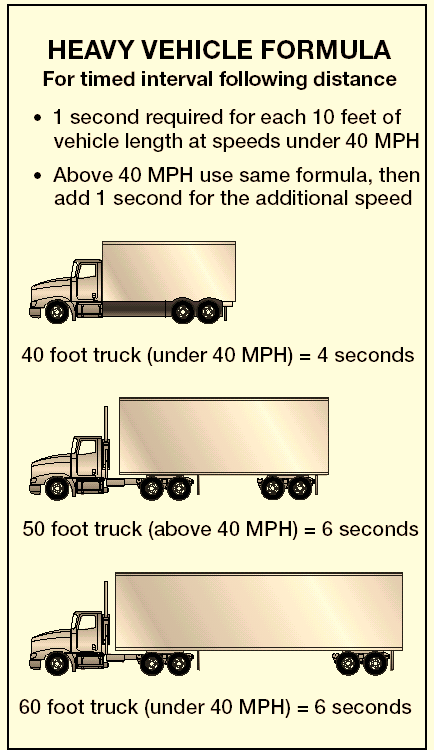
Figure 2.12 Following Distance
2.7.2 Space Behind
You can't stop others from following you too closely. But there are things you can do to make it safer.
Stay to the Right: Heavy vehicles are often tailgated when they can't keep up with the speed of traffic. This often happens when you're going uphill. If a heavy load is slowing you down, stay in the right lane if you can. Going uphill, you should not pass another slow vehicle unless you can get around quickly and safely.
Dealing with Tailgaters Safely: In a large vehicle, it's often hard to see whether a vehicle is close behind you. You may be tailgated:
When you are traveling slowly. Drivers
If you find yourself being tailgated, here are some things you can do to reduce the chances of a crash: Avoid quick changes: If you have to slow
down or turn, signal early, and reduce speed very gradually. Increase your following distance: Opening
up room in front of you will help you to avoid having to make sudden speed or direction changes. It also makes it easier for the tailgater to get around you. Don't speed up: It's safer to be tailgated at
a low speed than a high speed. Avoid tricks: Don't turn on your taillights or
flash your brake lights. Follow the suggestions above.
2.7.3 Space to the Sides
Commercial vehicles are often wide and take up most of a lane. Safe drivers will manage what little space they have. You can do this by keeping your vehicle centered in your lane, and avoid driving alongside others.
Staying Centered in a Lane: You need to keep your vehicle centered in the lane to keep safe clearance on either side. If your vehicle is wide, you have little room to spare.
Traveling Next to Others: There are two dangers in traveling alongside other vehicles: Another driver may change lanes suddenly
and turn into you. You may be trapped when you need to
In bad weather. Many car drivers follow
the road is slippery, you need much more space to stop. large vehicles closely during bad weather, especially when it is hard to see the road ahead.
change lanes. Find an open spot where you aren't near other traffic. When traffic is heavy, it may be hard to find an open spot. If you must travel near other vehicles, try to keep as much space as possible between you and them. Also, drop back or pull forward so that you are sure the other driver can see you. trapped behind slow vehicles often follow closely. 2-22 2.7.4 Space Overhead Hitting overhead objects is a danger. Make sure you always have overhead clearance.
Don't assume that the heights posted at bridges and overpasses are correct. Re-paving or packed snow may have reduced the clearances since the heights were posted.
The weight of a cargo van changes its height. An empty van is higher than a loaded one. That you got under a bridge when you were loaded does not mean that you can do it when you are empty. If you doubt you have safe space to pass under an object, go slowly. If you aren't sure you can make it, take another route. Warnings are often posted on low bridges or underpasses, but sometimes they are not.
Some roads can cause a vehicle to tilt. There can be a problem clearing objects along the edge of the road, such as signs, trees, or bridge supports. Where this is a problem, drive a little closer to the center of the road.
Before you back into an area, get out and check for overhanging objects such as trees, branches, or electric wires. It's easy to miss seeing them while you are backing. (Also check for other hazards at the same time.) 2.7.6 Space for Turns The space around a truck or bus is important in turns. Because of wide turning and off-tracking, large vehicles can hit other vehicles or objects during turns.
Right Turns: Here are some rules to help prevent right-turn crashes:
Turn slowly to give yourself and others more
time to avoid problems. If you are driving a truck or bus that cannot
make the right turn without swinging into another lane, turn wide as you complete the turn. Keep the rear of your vehicle close to the curb. This will stop other drivers from passing you on the right.
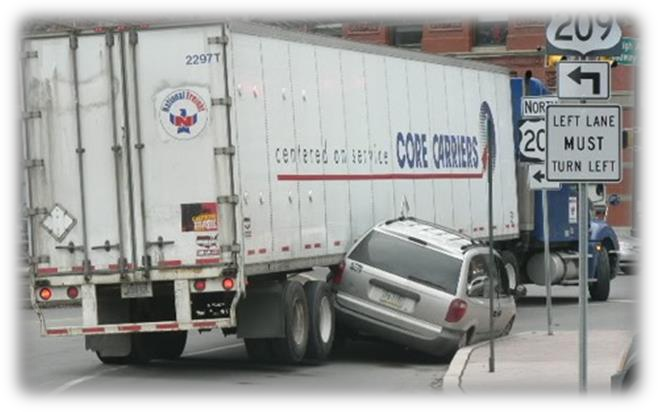
Don't turn wide to the left as you start the
turn. A following driver may think you are turning left and try to pass you on the right. You may crash into the other vehicle as you complete your turn. 2.7.5 Space Below Many drivers forget about the space under their vehicles. That space can be very small when a vehicle is heavily loaded. This is often a problem on dirt roads and in unpaved yards. Don't take a chance on getting hung up. Drainage channels across roads can cause the ends of some vehicles to drag. Cross such depressions carefully. If you must cross into the oncoming lane to
make a turn, watch out for vehicles coming toward you. Give them room to go by or to stop. However, don't back up for them, because you might hit someone behind you. See Figure 2.13. Strong Winds: Strong winds make it difficult to stay in your lane. The problem is usually worse for lighter vehicles. This problem can be especially bad coming out of tunnels. Don't drive alongside others if you can avoid it. Railroad tracks can also cause problems, particularly when pulling trailers with a low underneath clearance. Don’t take a chance on getting hung up halfway across.
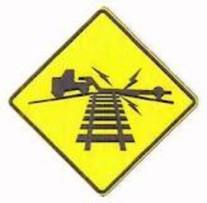
2-23 Because of slow acceleration and the space
large vehicles require, you may need a much larger gap to enter traffic than you would in a car. Acceleration varies with the load. Allow
more room if your vehicle is heavily loaded. Before you start across a road, make sure
you can get all the way across before traffic reaches you.
2.8 Seeing Hazards
Figure 2.13 Correct Execution of Right Turn
Left Turns. On a left turn, make sure you have reached the center of the intersection before you start the left turn. If you turn too soon, the left side 2.8.1 Importance of Seeing Hazards
What Is a Hazard? A hazard is any road condition or other road user (driver, bicyclist, pedestrian) that is a possible danger. For example, a car in front of you is headed toward the freeway exit, but his brake lights come on and he begins braking hard. This could mean that the driver is uncertain about taking the off ramp. He might suddenly return to the highway. This car is a hazard. If the driver of the car cuts in front of you, it is no longer just a hazard; it is an emergency.
Seeing Hazards Lets You Be Prepared: You will have more time to act if you see hazards before they become emergencies. In the example above, you might make a lane change or slow down to prevent a crash if the car suddenly cuts in front of you. Seeing this hazard gives you time to check your mirrors and signal a lane change. Being prepared reduces the danger. A driver who did not see the hazard until the slow car pulled back on the highway in front of him would have to do something very suddenly. Sudden braking or a quick lane change is much more likely to lead to a crash.
Learning to See Hazards: There are often clues that will help you see hazards. The more you drive, the better you can learn to see hazards. This section will talk about hazards that you should be aware of.
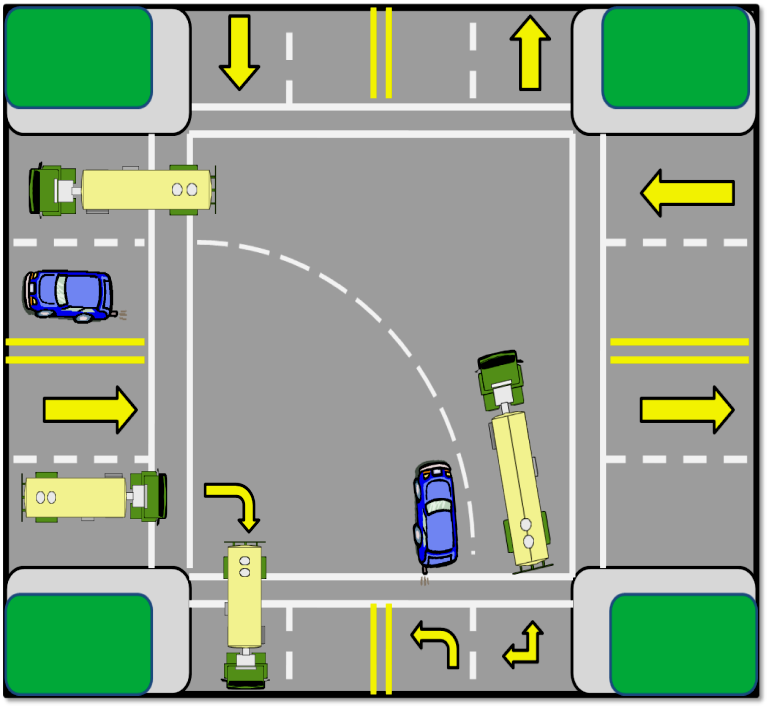
2.7.7 Space Needed to Cross or Enter Traffic
Be aware of the size and weight of your vehicle when you cross or enter traffic. Here are some important things to keep in mind.
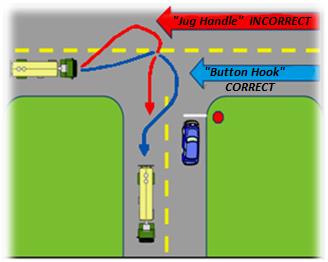
Figure 2.14 Correct Execution of Left Turn
of your vehicle may hit another vehicle because of off-tracking. If there are two turning lanes, always take the right turn lane. Don't start in the inside lane because you may have to swing right to make the turn. Drivers on your left can be more readily seen. See Figure 2.14.
2-24
| Signs are posted on roadways
in states that have such laws. Idaho is a Move-Over |
state. |
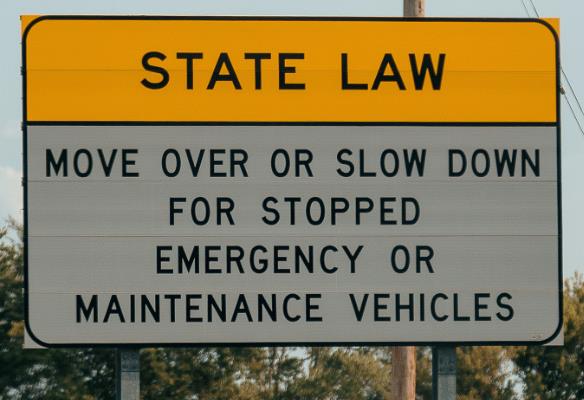
2.8.2 Hazardous Roads
Move-Over Laws: The incidents of law enforcement officers, emergency medical services, fire department personnel and people working on the road are being struck while performing duties at the roadside are increasing at a frightening pace. To lessen the problem, move-over laws have been enacted, which require drivers to slow and change lanes when approaching a roadside incident or emergency vehicle. Signs are posted on roadways in states that have such laws. Idaho is a Move-Over state. (2) If the driver is traveling on a highway with one (1) lane for each direction of travel, immediately reduce the speed of his vehicle below the posted speed limit and maintain a safe speed for the road, weather, and traffic conditions until completely past the stationary police vehicle, authorized emergency vehicle, stationary tow truck, or highway incident response vehicle.
Slow down and be very careful if you see any of the following road hazards:
Work Zones: When people are working on the road, it is a hazard. There may be narrower lanes, sharp turns, or uneven surfaces. Other drivers are often distracted and drive unsafely. Workers and construction vehicles may get in the way. Drive slowly and carefully near work zones. Use your four-way flashers or brake lights to warn drivers behind you.”
Drop Off: Sometimes the pavement drops off sharply near the edge of the road. Driving too near the edge can tilt your vehicle toward the side of the road. This can cause the top of your vehicle to hit roadside objects (signs, tree limbs). Also, it can be hard to steer as you cross the drop off, going off the road, or coming back on.
Foreign Objects: Things that have fallen on the road can be hazards. They can be a danger to your tires and wheel rims. They can damage electrical and brake lines. They can be caught between dual tires and cause severe damage. Some obstacles that appear to be harmless can be very dangerous. For example, cardboard boxes may be empty, but they may also contain some solid or heavy material capable of causing damage. The same is true of paper and cloth sacks. It is important to remain alert for objects of all sorts, so you can see them early enough to avoid them without making sudden, unsafe moves.
Off Ramps/On Ramps: Freeway and turnpike exits can be particularly dangerous for commercial vehicles. Off ramps and on ramps often have speed limit signs posted. Remember, these speeds may be safe for automobiles, but may not be safe for larger IDAHO CODE 49-624 STATES: “DRIVER DUTY UPON APPROACHING A STATIONARY VEHICLE DISPLAYING FLASHING LIGHTS. The driver of a motor vehicle, upon approaching a stationary police vehicle displaying flashing lights, an authorized emergency vehicle displaying flashing lights, a stationary tow truck displaying flashing lights, or a stationary highway incident response vehicle displaying flashing lights, shall:
(1) If the driver is traveling on a highway with two (2) or more lanes carrying traffic in the same direction, immediately reduce the speed of his vehicle below the posted speed limit, proceed with due caution and, if traveling in a lane adjacent to a stationary police vehicle displaying flashing lights, an authorized emergency vehicle displaying flashing lights, a stationary tow truck displaying flashing lights, or a highway incident response vehicle displaying flashing lights, change lanes into a lane that is not adjacent to such vehicle as soon as it is possible to do so in a manner that is reasonable and prudent under the conditions then existing, with regard to actual and potential hazards.
2-25

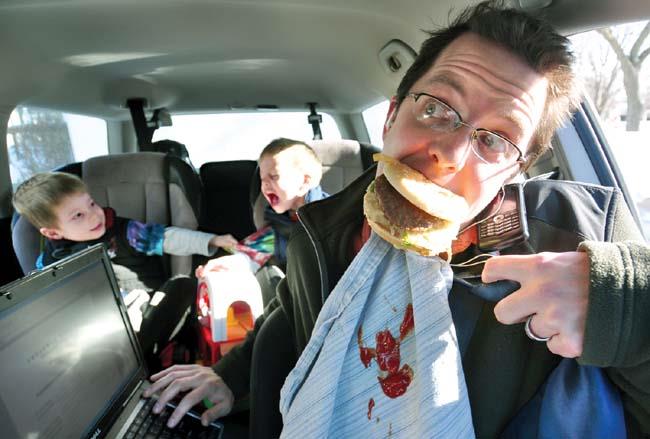
vehicles or heavily loaded vehicles. Exits that go downhill and turn at the same time can be especially dangerous. The downgrade makes it difficult to reduce speed. Braking and turning at the same time can be a dangerous practice. Make sure you are going slowly enough before you get on the curved part of an off ramp or on ramp. Pedestrians and Bicyclists Can Also Be Hazards: Walkers, joggers, and bicyclists may be on the road with their back to the traffic, so they can't see you. Sometimes they wear portable stereos with headsets, so they can't hear you either. This can be dangerous. On rainy days, pedestrians may not see you because of hats or umbrellas. They may be hurrying to get out of the rain and may not pay attention to the traffic.
Distractions: People who are distracted are hazards. Watch for where they are looking. If they are looking elsewhere, they can't see you. But be alert even when they are looking at you. They may believe that they have the right of way. 2.8.3 Drivers Who Are Hazards In order to protect yourself and others, you must know when other drivers may do something hazardous. Some clues to this type of hazard are discussed below.
Blocked Vision: People who can't see others are a very dangerous hazard. Be alert for drivers whose vision is blocked. Vans, loaded station wagons, and cars with the rear window blocked are examples. Rental trucks should be watched carefully. Their drivers are often not used to the limited vision they have to the sides and rear of the truck. In winter, vehicles with frosted, ice-covered, or snow-covered windows are hazards.
Vehicles may be partly hidden by blind intersections or alleys. If you only can see the rear or front end of a vehicle but not the driver, then he or she can't see you. Be alert because he/she may back out or enter into your lane. Always be prepared to stop.
Delivery Trucks Can Present a Hazard: Packages or vehicle doors often block the driver’s vision. Drivers of step vans, postal vehicles, and local delivery vehicles often are in a hurry and may suddenly step out of their vehicle or drive their vehicle into the traffic lane.
Parked Vehicles: Can Be Hazards, especially when people start to get out of them. Or, they may suddenly start up and drive into your way. Watch for movement inside the vehicle or movement of the vehicle itself that shows people are inside. Watch for brake lights or backup lights, exhaust, and other clues that a driver is about to move.
Be careful of a stopped bus: Passengers may cross in front of or behind the bus, and they often can't see you. Children: Children tend to act quickly without checking traffic. Children playing with one another may not look for traffic and are a serious hazard. Talkers: Drivers or pedestrians talking to one another may not be paying close attention to the traffic.
Workers: People working on or near the roadway are a hazard clue. The work creates a distraction for other drivers and the workers themselves may not see you.
Ice Cream Trucks: Someone selling ice cream is a hazard clue. Children may be nearby and may not see you.
Disabled Vehicles: Drivers changing a tire or fixing an engine often do not pay attention to the danger that roadway traffic is to them. They are often
2-26 Impaired Drivers: Drivers who are sleepy, have had too much to drink, are on drugs, or who are ill are hazards. Some clues to these drivers are:
Weaving across the road or drifting from one
side to another.
Leaving the road (dropping right wheels onto
the shoulder, or bumping across a curb in a turn).
Stopping at the wrong time (stopping at a
green light, or waiting for too long at a stop).
Open window in cold weather.
Speeding up or slowing down suddenly,
driving too fast or too slow.
Be alert for drunk drivers and sleepy drivers late at night.
Driver Body Movement as a Clue: Drivers look in the direction they are going to turn. You may sometimes get a clue from a driver's head and body movements that a driver may be going to make a turn, even though the turn signals aren't on. Drivers making over-the-shoulder checks may be going to change lanes. These clues are most easily seen in motorcyclists and bicyclists. Watch other road users and try to tell whether they might do something hazardous.
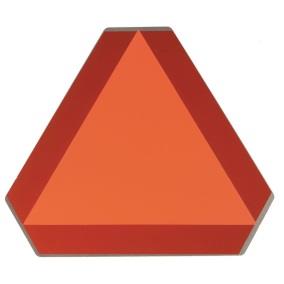
careless. Jacked up wheels or raised hoods are hazard clues.
Accidents: Accidents are particularly hazardous. People involved in the accident may not look for traffic. Passing drivers tend to look at the accident. People often run across the road without looking. Vehicles may slow or stop suddenly.
Shoppers: People in and around shopping areas are often not watching traffic because they are looking for stores or looking into store windows.
Confused Drivers: Confused drivers often change direction suddenly or stop without warning. Confusion is common near freeway or turnpike interchanges and major intersections. Tourists unfamiliar with the area can be very hazardous. Clues to tourists include car-top luggage and out-of-state license plates. Unexpected actions (stopping in the middle of a block, changing lanes for no apparent reason, backup lights suddenly going on) are clues to confusion. Hesitation is another clue, including driving very slowly, using brakes often, or stopping in the middle of an intersection. You may also see drivers who are looking at street signs, maps, and house numbers. These drivers may not be paying attention to you.
Slow Drivers: Motorists who fail to maintain normal speed are hazards. Seeing slow moving vehicles early can prevent a crash. Some vehicles, by their nature, are slow and seeing them is a hazard clue (mopeds, farm machinery, construction machinery, tractors, etc.). Some of these will have the "slow moving vehicle" symbol to warn you. This is a red triangle with an orange center- watch for it.
Drivers Signaling a Turn May Be a Hazard: Drivers signaling a turn may slow more than expected or stop. If they are making a tight turn into an alley or driveway, they may go very slowly. If pedestrians or other vehicles block them, they may have to stop on the roadway. Vehicles turning left may have to stop for oncoming vehicles. Drivers in a Hurry: Drivers may feel your commercial vehicle is preventing them from getting where they want to go on time. Such drivers may pass you without a safe gap in the oncoming traffic, cutting too close in front of you. Drivers entering the road may pull in front of you in order to avoid being stuck behind you, causing you to brake. Be aware of this and watch for drivers who are in a hurry.
2-27 Subsections 2.7 and 2.8 Test Your Knowledge
1. How do you find out how many seconds of following distance space you have? 2. If you are driving a 30-foot vehicle at 55 mph, how many seconds of following distance should you allow? 3. You should decrease your following distance if somebody is following you too 2.8.4 Always Have a Plan You should always be looking for hazards. Continue to learn to see hazards on the road. However, don't forget why you are looking for the hazards--they may turn into emergencies. You look for the hazards in order to have time to plan a way out of any emergency.
When you see a hazard, think about the emergencies that could develop and figure out what you would do. Always be prepared to take action based on your plans. In this way, you will be a prepared, defensive driver who will improve your own safety as well as the safety of all road users. closely. True or False? 4. If you swing wide to the left before turning right, another driver may try to pass you on the right. True or False? 5. What is a hazard? 6. Why make emergency plans when you see a hazard? These questions may be on the test. If you can’t answer them all, re-read subsections 2.7 and 2.8
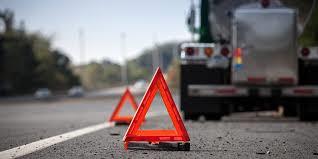
Conflicts: You are in conflict when you have to change speed and/or direction to avoid hitting someone. Conflicts occur at intersections where vehicles meet, at merges (such as turnpike on ramps) and where there are needed lane changes (such as the end of a lane, forcing a move to another lane of traffic).
Other situations include slow moving or stalled traffic in a traffic lane, and accident scenes. Watch for other drivers who are in conflict because they are a hazard to you. When they react to this conflict, they may do something that will put them in conflict with you.
2.9 Distracted Driving
A driver distraction is anything that takes your attention away from driving. Whenever you are driving a vehicle and your full attention is not on the driving task, you are putting yourself, your passengers, other vehicles, and pedestrians in danger. Distracted driving can cause collisions, resulting in injury, death or property damage.
Activities inside of the vehicle that can distract your attention include: talking to passengers; adjusting the radio, CD player or climate controls; eating, drinking or smoking; reading maps or other literature; picking up something that fell; talking on a cell phone or CB radio; reading or sending text messages; using any type of telematic or electronic devices (such as cell phone, navigation systems, computers, etc.); daydreaming or being occupied with other mental distractions; and many others. 2-28 2.9.3 Types of Distractions There are many causes of distraction, all with the potential to increase risk. Physical distraction: One that causes you to take your hands off the wheel or eyes off the road, such as reaching for an object. Mental distraction: Activities that take your mind away from the road, such as engaging in conversation with a passenger or thinking about something that happened during the day. 2.9.1 The Distracted Driving Crash Problem The Large Truck Crash Causation Study (LTCCS) reported that 8 percent of large-truck crashes occurred when Commercial Motor Vehicle (CMV) drivers were externally distracted and 2 percent of large truck crashes occurred when the driver was internally distracted.
Approximately 5,500 people are killed each year on U.S. roadways and an estimated 448,000 are injured in motor vehicle crashes involving distracted driving (NHTSA Traffic Safety Facts: Distracted Driving).
Research indicates that the burden of talking on a cell phone - even if it's hands-free - saps the brain of 39% of the energy it would ordinarily devote to safe driving. Drivers who use a hand-held device are more likely to get into a crash serious enough to cause injury. (NHTSA distracted driving website, www.distraction.gov). Both physical and mental distraction – even greater chance a crash could happen, such as talking on a cell phone; or sending or reading text messages.
2.9.4 Cell/Mobile Phones
Idaho Code, 49 CFR Part 383, 384, 390, 391 and 392 of the Federal Motor Carrier Safety Regulations, (FMCSRs) and the Hazardous Materials Regulations (HMR) all restrict the use of hand-held mobile telephones by drivers of commercial motor vehicles (CMVs). The FMCSRs outline driver disqualification sanctions for drivers of CMVs who fail to comply with the Federal restrictions, or who have multiple convictions for violating a State or local law or ordinance on motor vehicle traffic control that restricts the use of hand-held mobile telephones.

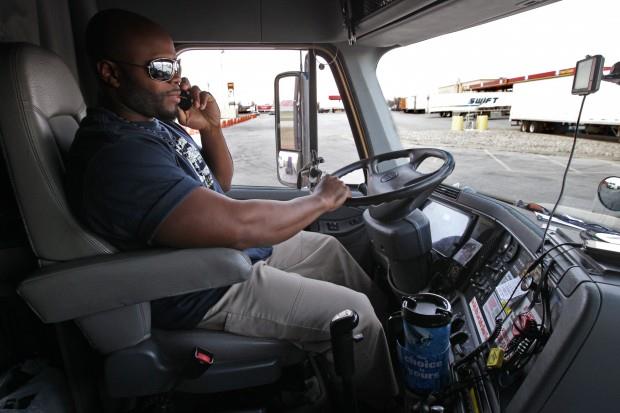
Possible distractions that could occur outside a moving vehicle: outside traffic, vehicles or pedestrians; outside events such as police pulling someone over or a crash scene; sunlight/sunset; objects in roadway; road construction; reading billboards or other road advertisements; and many others. incorrect inputs to the steering, accelerator or brakes.
2.9.2 Effects of Distracted Driving
Effects of distracted driving include slowed perception, which may cause you to be delayed in perceiving or completely fail to perceive an important traffic event; delayed decision making and improper action, which can cause you to be delayed in taking the proper action or make Using a hand-held mobile phone while driving a CMV can result in driver disqualification. Penalties can be up to $2,750 for drivers and up to $11,000 for employers who allow or require drivers to use a hand-held communications device while driving.
2-29
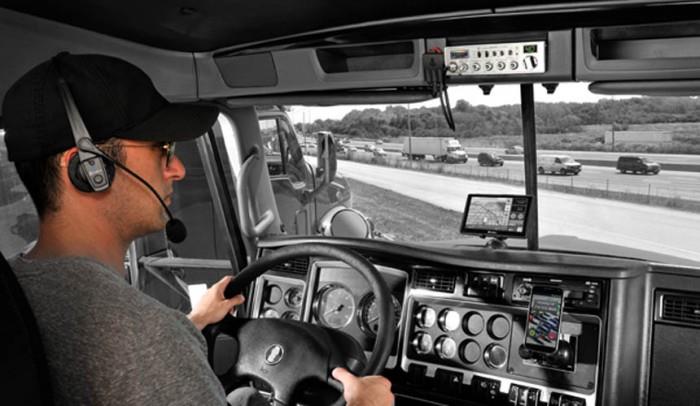
Driver using a wireless Bluetooth headset The use of hand-held mobile telephones means, ‘‘using at least one hand to hold a mobile telephone to conduct a voice communication; “dialing a mobile telephone by pressing more than a single button”; or “moving from a seated driving position while restrained by a seat belt to reach for a mobile telephone”. If you choose to use a mobile phone while operating a CMV, you may only use a hands free mobile phone that is located close to you and that can be operated in compliance with the rule to conduct a voice communication. (or 80.7 feet per second), this equates to a driver traveling 306 feet, the approximate length of a football field, without looking at the roadway.
Your primary responsibility is to operate a motor vehicle safely. To do this, you must focus your full attention on the driving task.
Note that hands-free devices are no less likely than hand-held cell phones to cause you to become distracted. Attention is diverted from the driving task while using either device.
2.9.5 Texting
49 CFR Part 383, 384, 390, 391, 392, the Federal Motor Carrier Safety Regulations (FMCSR) prohibits texting by commercial motor vehicle (CMV) drivers while operating in interstate commerce; and implements new driver disqualification sanctions for drivers of CMVs who fail to comply with this Federal prohibition; or who have multiple convictions for violating a State or local law or ordinance on motor vehicle traffic control that prohibits texting while driving. Additionally, motor carriers are prohibited from requiring or allowing their drivers to engage in texting while driving.
Texting means manually entering text into, or reading text from, an electronic device. This includes, but is not limited to, short message service, e-mailing, instant messaging, a command or request to access an internet web page, or engaging in any other form of electronic text retrieval or entry, for present or future communication.
Electronic device includes, but is not limited to, a cellular telephone; personal digital assistant; pager; computer; or any other device used to enter, write, send, receive, or read text.
Your CDL will be disqualified after two or more convictions of any state law on texting while operating a CMV. Disqualification is 60 days for the second offense within 3 years and 120 days for three or more offenses within 3 years. In addition, the first and each subsequent violation of such a prohibition are subject to civil penalties imposed on such drivers, in an amount up to $2,750. No motor carrier Your CDL will be disqualified after two or more convictions of any state law on hand-held mobile telephone use while operating a CMV. Disqualification is 60 days for the second offense within 3 years and 120 days for three or more offenses within 3 years. In addition, the first and each subsequent violation of such a prohibition are subject to civil penalties imposed on such drivers, in an amount up to $2,750. Motor carriers must not allow nor require drivers to use a hand-held mobile telephone while driving. Employers may also be subject to civil penalties in an amount up to $11,000. There is an emergency exception that allows you to use your hand-held mobile telephones if necessary to communicate with law enforcement officials or other emergency services.
Research shows that the odds of being involved in a safety-critical event (e.g., crash, near-crash, unintentional lane deviation) is 6 times greater for CMV drivers who engage in dialing a mobile telephone while driving than for those who do not. Dialing drivers took their eyes off the forward roadway for an average of 3.8 seconds. At 55 mph 2-30 Research shows that the odds of being involved in a safety-critical event (e.g., crash, near-crash, unintentional lane deviation) is 23.2 times greater for CMV drivers who engage in texting while driving than for those who do not. Sending or receiving text takes your eyes from the road for an average of 4.6 seconds. At 55 mph, you would travel 371 feet, or the length of an entire football field – without looking at the roadway.
2.9.6 Don’t Drive Distracted

Your goal should be to eliminate ALL in-vehicle distractions BEFORE driving begins.
Accomplishing this goal can be done by: Assessing and eliminating all potential in-
vehicle distractions before driving
Developing a preventative plan to reduce/eliminate possible distractions
Expecting distractions to occur
Discussing possible scenarios before getting
Turn off all communication devices if
possible. If you must use a mobile phone, make sure it
is within close proximity and securely mounted in a stable phone mount or holder Ensure your phone is operable while you are
restrained Use a headset or speaker phone - a good
wireless noise cancelling headset is best Use voice-activated dialing or use the hands-
free feature. Drivers are not in compliance if they unsafely reach for a mobile phone, even if they intend to use the hands-free function.
Do not type or read a text message on a
mobile device while driving.
Familiarize yourself with your vehicle’s
features and equipment, before you get behind the wheel.
Adjust all vehicle controls and mirrors to
your preferences prior to driving.
Pre-program radio stations or playlists on
your phone or device. Connect Bluetooth, route cables, obtain CD’s etc. before driving.
Clear the vehicle of any unnecessary objects
and secure cargo. Review maps, program the GPS and plan
your route before you begin driving. Don’t attempt to read or write while you
drive. Avoid smoking, eating and drinking while
you drive. Leave early to allow yourself time to stop to eat. Don’t engage in complex or emotionally
intense conversations with other occupants. Secure commitment from other occupants
shall allow or require its drivers to engage in texting while driving. There is an emergency exception that allows you text if necessary to communicate with law enforcement officials or other emergency services. Evidence suggests that text messaging is even riskier than talking on a cell phone because it requires you to look at a small screen and manipulate the keypad with one’s hands. Texting is the most alarming distraction because it involves both physical and mental distraction simultaneously. Some tips to follow so you won’t become distracted:
behind the wheel
Based on the assessment of potential distractions, you can formulate a preventative plan to reduce/eliminate possible distractions. If drivers react a half-second slower because of distractions, crashes double. to behave responsibly and to support the driver in reducing distractions.
2-31
Vehicles that may drift over the lane divider
lines or within their own lane. Vehicles traveling at inconsistent speeds.
Drivers who are preoccupied with maps,
food, cigarettes, cell phones, or other objects. Drivers who appear to be involved in
conversations with their passengers.
Give a distracted driver plenty of room and maintain your safe following distance. Be very careful when passing a driver who seems to be distracted. The other driver may not be aware of your presence, and they may drift in front of you.
2.10 Aggressive Drivers/Road Rage
| no person shall operate a vehicle in
the extreme left-hand lane of a controlled- |
access highway for a period of time that |
impedes the flow of other traffic traveling |
at a lawful rate of speed |
2.9.7 - Watch for Other Distracted Drivers
You need to be able to recognize other drivers who are engaged in any form of driving distraction. Not recognizing other distracted drivers can prevent you from perceiving or reacting correctly in time to prevent a crash.
Watch for: SPECIAL NOTE: Nothing is more maddening to the travelling public than two trucks “drag racing” in slow speed-governed trucks side by side down the freeway for miles, blocking faster traffic.
Don’t be that driver.
When passing, make sure you can pass the truck ahead in a matter of seconds. If you can’t, wait to pass until you can- or just back off a little and stay behind the truck in front of you.
When being passed by another truck, bump off your cruise control and let the passing vehicle come around. You will lose nothing, and help improve the public’s perception of the professional truck driver.
Idaho Code 49-655: MINIMUM SPEED REGULATION. No person shall drive a motor vehicle at such a slow speed as to impede the normal and reasonable movement of traffic except when reduced speed is necessary for safe operation or in compliance with the law. Notwithstanding any minimum speed that may be authorized and posted pursuant to this section, no person shall operate a vehicle in the extreme left-hand lane of a controlled-access highway for a period of time that impedes the flow of other traffic traveling at a lawful rate of speed.
Many other states have similar laws. Save yourself a ticket and only pass when you can do so quickly and safely. 2.10.1 What Is It? Aggressive driving and road rage is not a new problem. However, in today’s world, where heavy and slow-moving traffic and tight schedules are the norm, more and more drivers are taking out their anger and frustration in their vehicles.
Crowded roads leave little room for error, leading to suspicion and hostility among drivers and encouraging them to take personally the mistakes of other drivers.
Aggressive driving is the act of operating a motor vehicle in a selfish, bold, or pushy manner, without regard for the rights or safety of others. For example, changing lanes frequently and abruptly without signaling could be aggressive driving.
Road rage is operating a motor vehicle with the intent of doing harm to others or physically assaulting a driver or their vehicle.
2-32 Reduce your stress before and while you
drive. Listen to “easy listening” music.
Give the drive your full attention. Don’t
allow yourself to become distracted by talking on your cell phone, eating, etc.
Be realistic about your travel time. Expect
delays because of traffic, construction, or bad weather and make allowances.
If you’re going to be later than you expected
- – deal with it. Take a deep breath and accept the delay. Give other drivers the benefit of the doubt.
Try to imagine why he or she is driving that way. Whatever their reason, it has nothing to do with you.
Slow down and keep your following distance
reasonable.
Don’t drive slowly in the left lane of traffic.
Avoid gestures. Keep your hands on the
wheel. Avoid making any gestures that might anger another driver, even seemingly harmless expressions of irritation like shaking your head.
Be a cautious and courteous driver. If
another driver seems eager to get in front of you, say, “Be my guest.” This response will soon become a habit and you won’t be as offended by other drivers’ actions. Avoid eye contact.
Ignore gestures and refuse to react to them.
Report aggressive drivers to the appropriate
authorities by providing a vehicle description, license number, location and, if possible, direction of travel. If you have a cell phone, and can do it safely,
call the police.
If an aggressive driver is involved in a crash farther down the road, stop a safe distance from the crash scene, wait for the police to arrive, and report the driving behavior that you witnessed.
Subsections 2.9 and 2.10 Test Your Knowledge 1. What are some tips to follow so you won’t become a distracted driver? 2. How do you use in-vehicle communications equipment cautiously? 3. How do you recognize a distracted driver? 4. What is the difference between aggressive driving and road rage? 5. What should you do when confronted with an aggressive driver? 6. What are some things you can do to reduce your stress before and while you drive? These questions may be on the test. If you can’t answer them all, re-read subsections 2.9 and 2.10. 2.10.2 Don’t Be an Aggressive Driver How you feel before you even start your vehicle has a lot to do with how stress will affect you while driving. 2.10.3 What You Should Do When Confronted by an Aggressive Driver
First and foremost, make every attempt to get out of their way. Put your pride in the back seat. Do not challenge them by speeding up or attempting to hold-your-own in your travel lane.
2-33 2.11.1 It Is More Dangerous You are at greater risk when you drive at night. Drivers can't see hazards as quickly as in daylight, so they have less time to respond. Drivers caught by surprise are less able to avoid a crash. The problems of night driving involve the driver, the roadway, and the vehicle.
2.11.2 Driver Factors
Vision: Good vision is critical for safe driving. Your control of the brake, accelerator, and steering wheel is based on what you see. If you cannot see clearly, you will have trouble identifying traffic and roadway conditions, spotting potential trouble or responding to problems in a timely manner.
Because seeing well is so critical to safe driving, you should have your eyes checked regularly by an eye specialist. You may never know you have poor vision unless your eyes are tested. If you need to wear glasses or contact lenses for driving, remember to:
Always wear them when driving, even if
driving short distances. If your driver license says corrective lenses are required, it is illegal to move a vehicle without using corrective lenses. Keep an extra set of corrective lenses in your
vehicle. If your normal corrective lenses are broken or lost, you can use the spare lenses to drive safely. Avoid using dark or tinted corrective lenses
2.11 Driving at Night
Fatigue and Lack of Alertness: Fatigue is physical or mental tiredness that can be caused by physical or mental strain, repetitive tasks, illness or lack of sleep. Just like alcohol and drugs, it impairs your vision and judgment.
Fatigue causes errors related to speed and distance, increases your risk of being in a crash, causes you to not see and react to hazards as quickly, and affects your ability to make critical decisions. When you are fatigued, you could fall asleep behind the wheel and crash, injuring or killing yourself or others.
Fatigued or drowsy driving is one of the leading causes of traffic collisions. NHTSA estimates that 100,000 police-reported crashes a year are the result of drowsy driving. According to the National Sleep Foundation’s Sleep in America poll, 60% of Americans have driven while feeling sleepy and more than one third (36 percent or 103 million people) admit to having actually fallen asleep at the wheel. Drivers may experience short bursts of sleep lasting only a few seconds or fall asleep for longer periods of time. Either way, the chance of a collision increases dramatically.
At-Risk Groups: The risk of having a crash due to drowsy driving is not uniformly distributed across the population. Crashes tend to occur at times when sleepiness is most pronounced, for example, during the night and in the mid-afternoon. Most people are less alert at night, especially after midnight. This is particularly true if you have been driving for a long time. Thus individuals who drive at night are much more likely to have fall-asleep crashes.
Research has identified young males, shift workers, commercial drivers, especially long-haul drivers and people with untreated sleep disorders or with short-term or chronic sleep deprivation as being at increased risk for having a fall-asleep crash. At least 15% of all heavy truck crashes involve fatigue.
A congressionally mandated study of 80 long-haul truck drivers in the United States and Canada found that drivers averaged less than 5 hours of sleep per day. (Federal Motor Carrier Safety Administration, 1996) It is no surprise then that the National at night, even if you think they help with glare. Tinted lenses cut downthe light that you need to see clearly under night driving conditions.
Glare: Drivers can be blinded for a short time by bright light. It can take several seconds to recover from glare. Even two seconds of glare blindness can be dangerous. A vehicle going 55 mph will travel more than half the distance of a football field during that time.
2-34 Difficulty focusing, frequent blinking or heavy eyelids
Yawning repeatedly or rubbing eyes
Day-dreaming; or wandering/disconnected thoughts
Trouble remembering the last few miles driven; missing exits or traffic signs
Trouble keeping head up
Drifting from your lane, following too closely or hitting a shoulder rumble strip
Feeling restless and irritable
WHEN YOU ARE TIRED-- TRYING
TO “PUSH ON” IS FAR MORE DANGEROUS THAN MOST DRIVERS THINK
It is a major cause of fatal accidents. If you notice any signs of fatigue, stop driving and go to sleep for the night or take a short nap. Even a 15-20 minute nap can benefit you greatly and takes little away from your driving day.
Are You At Risk? Before you drive, consider whether you are: Sleep-deprived or fatigued (6 hours of sleep or less triples your risk)
Driving long distances without proper rest breaks
Driving through the night, mid-afternoon or when you would normally be asleep. Many heavy motor vehicle accidents occur between midnight and 6 a.m.
Taking sedating medications such as antidepressants, cold tablets, antihistamines, etc.
Working more than 60 hours a week (increases your risk by 40%)
Working more than one job, and your main job involves shift work
Driving alone or on a long, rural, dark or boring road
Flying, changing time zone
Preventing drowsiness before a trip:
Get adequate sleep – adults need 8 to 9 hours to maintain alertness
Prepare route carefully to identify total distance, stopping points and other logistic considerations
Schedule trips for the hours you are normally awake, not the middle of the night
Drive with a passenger
Avoid medications that cause drowsiness
Consult your physician if you suffer from daytime sleepiness, have difficulty sleeping at night or take frequent naps
Incorporate exercise into your daily life to give you more energy
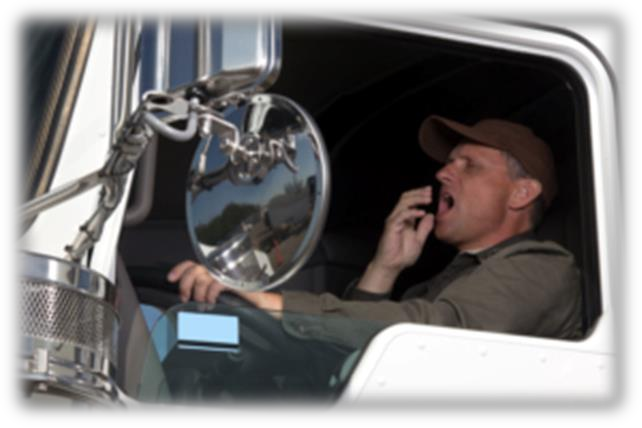
No deadline is more important Suffering from sleep loss (insomnia), poor quality sleep, or a sleep debt
Transportation Safety Board (NTSB) reported that drowsy driving was probably the cause of more than half of crashes leading to a truck driver’s death. (NTSB, 1990) For each truck driver fatality, another three to four people are killed. (NHTSA, 1994)
Warning Signs of Fatigue According to the National Sleep Foundation’s Sleep in America poll, 60% of Americans have driven while feeling sleepy and 36% admit to actually having fallen asleep at the wheel in the past year. However, many people cannot tell if or when they are about to fall asleep.
Here are some signs that should tell you to stop and rest:
than arriving safely! 2-35 Keep cool by opening the window or using the air conditioner
Avoid heavy foods
Be aware of down time during the day
Have another person ride with you, and take turns driving
Take periodic breaks – about every 100 miles or 2 hours during long trips
Stop driving and get some rest or take a nap
Caffeine consumption can increase awareness for a few hours, but do not drink too much. It will eventually wear off. Do not rely on caffeine to prevent fatigue
Avoid drugs. While they may keep you awake for a while, they won’t make you alert.
If you are drowsy, the only safe cure is to get off the road and get some sleep. If you don't, you risk your life and the lives of others.
2.11.3 Roadway Factors
Poor Lighting: In the daytime there is usually enough light to see well. This is not true at night. Some areas may have bright street lights, but many areas will have poor lighting. On most roads you will probably have to depend entirely on your headlights.
Less light means you will not be able to see hazards as well as in daytime. Road users who do not have lights are hard to see. There are many accidents at night involving pedestrians, joggers, bicyclists, and animals.
Even when there are lights, the road scene can be confusing. Traffic signals and hazards can be hard to see against a background of signs, shop windows, and other lights.
Drive slower when lighting is poor or confusing.
2.11.4 Vehicle Factors
Headlights: At night your headlights will usually be the main source of light for you to see by and for others to see you. You can't see nearly as much with your headlights as you see in the daytime. With low beams you can see ahead about 250 feet and with high beams about 350-500 feet. You must adjust your speed to keep your stopping distance within your sight distance. This means going slowly enough to be able to stop within the range of your headlights. Otherwise, by the time you see a hazard, you will not have time to stop.
Night driving can be more dangerous if you have problems with your headlights. Dirty headlights may give only half the light they should. This cuts down your ability to see, and makes it harder for others to see you. Make sure your lights are clean and working. Headlights can be out of adjustment. If they don't point in the right direction, they won't give you a good view and they can blind other drivers. Have a qualified person make sure they are adjusted properly.
Other Lights: In order for you to be seen easily, the following must be clean and working properly:
Reflectors.
Marker lights.
Clearance lights.
Taillights.
Maintaining alertness while driving: Drunk Drivers: Drunk drivers and drivers under the influence of drugs are a hazard to themselves and to you. Be especially alert around the closing times for bars and taverns. Watch for drivers who have trouble staying in their lane or maintaining speed, who stop without reason, or show other signs of being under the influence of alcohol or drugs. Protect yourself from glare and eyestrain with sunglasses
Identification lights.
Turn Signals and Brake Lights: At night your turn signals and brake lights are even more important for telling other drivers what you intend to do. Make sure you have clean, working turn signals and stop lights. Drive slowly enough to be sure you can stop in the distance you can see ahead.
2-36 2.12 Driving in Fog Fog can occur at any time. Fog on highways can be extremely dangerous. Fog is often unexpected, and visibility can deteriorate rapidly. You should watch for foggy conditions and be ready to reduce your speed. Do not assume that the fog will thin out after you enter it.
The best advice for driving in fog is don’t. It is preferable that you pull off the road into a rest area or truck stop until visibility is better. If you must drive, be sure to consider the following: Obey all fog-related warning signs.
Slow down before you enter fog.
Use low-beam headlights and fog lights for best visibility even in daytime, and be alert for other drivers who may have forgotten to turn on their lights.
Turn on your 4-way flashers. This will give vehicles approaching you from behind a quicker opportunity to notice your vehicle.
Watch for vehicles on the side of the roadway. Seeing taillights or headlights in front of you may not be a true indication of where the road is ahead of you. The vehicle may not be on the road at all.
Use roadside highway reflectors as guides to determine how the road may curve ahead of you.
Listen for traffic you cannot see.
Avoid passing other vehicles.
Don’t stop along the side of the road, unless absolutely necessary.
Windshield and Mirrors: It is more important at night than in the daytime to have a clean windshield and clean mirrors. Bright lights at night can cause dirt on your windshield or mirrors to create a glare of its own, blocking your view. Most people have experienced driving toward the sun just as it has risen or is about to set, and found that they can barely see through a windshield that seemed to look OK in the middle of the day. Clean your windshield on the inside and outside for safe driving at night. instrument lights as low as you can to still be able to read the gauges.
If You Get Sleepy, Stop at the Nearest Safe Place. People often don't realize how close they are to falling asleep even when their eyelids are falling shut. If you can safely do so, look at yourself in a mirror. If you look sleepy, or you just feel sleepy, stop driving! You are in a very dangerous condition. The only safe cure is to sleep.
2.11.5 Night Driving Procedures
Vehicle Procedures: Make sure you are rested and alert. If you are drowsy, sleep before you drive! Even a nap can save your life or the lives of others. If you wear eyeglasses, make sure they are clean and unscratched. Don't wear sunglasses at night. Do a complete Vehicle inspection of your vehicle. Pay attention to checking all lights and reflectors, and cleaning those you can reach.
Avoid Blinding Others: Glare from your headlights can cause problems for drivers coming toward you. They can also bother drivers going in the same direction you are, when your lights shine in their rearview mirrors. Dim your lights before they cause glare for other drivers. Dim your lights within 500 feet of an oncoming vehicle and when following another vehicle within 500 feet.
Avoid Glare from Oncoming Vehicles: Do not look directly at lights of oncoming vehicles. Look slightly to the right at a right lane or edge marking, if available. If other drivers don't put their low beams on, don't try to "get back at them" by putting your own high beams on. This increases glare for oncoming drivers and increases the chance of a crash.
Use High Beams When You Can: Some drivers make the mistake of always using low beams. This seriously cuts down on their ability to see ahead. Use high beams when it is safe and legal to do so. Use them when you are not within 500 feet of an approaching vehicle. Also, don't let the inside of your cab get too bright. This makes it harder to see outside. Keep the interior light off, and adjust your 2-37
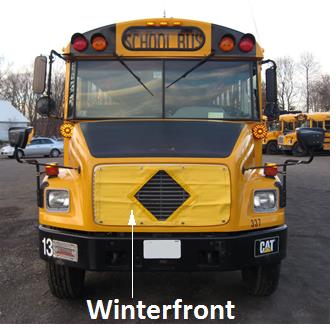
2.13 Driving in Winter
and extra cross-links. Make sure they will fit your drive tires. Check the chains for broken hooks, worn or broken cross-links, and bent or broken side chains. Learn how to put the chains on before you need to do it in snow and ice.
Lights and Reflectors: Make sure the lights and reflectors are clean. Lights and reflectors are especially important during bad weather. Check from time to time during bad weather to make sure they are clean and working properly.
Windows and Mirrors: Remove any ice, snow, etc., from the windshield, windows, and mirrors before starting. Use a windshield scraper, snow brush, and windshield defroster as necessary.
Hand Holds, Steps, and Deck Plates: Remove all ice and snow from hand holds, steps, and deck plates. This will reduce the danger of slipping.
Radiator Shutters and Winterfront: Remove ice from the radiator shutters. Make sure the winterfront is not closed too tightly. If the shutters freeze shut or the winterfront is closed too much, the engine may overheat and stop. 2.13.1 Vehicle Checks Make sure your vehicle is ready before driving in winter weather. You should make a regular Vehicle inspection, paying extra attention to the following items.
Coolant Level and Antifreeze Amount: Make sure the cooling system is full and there is enough antifreeze in the system to protect against freezing. This can be checked with a special coolant tester.
Defrosting and Heating Equipment: Make sure the defrosters work. They are needed for safe driving. Make sure the heater is working, and that you know how to operate it. If you use other heaters and expect to need them (e.g., mirror heaters, battery box heaters, fuel tank heaters), check their operation.
Wipers and Washers: Make sure the windshield wiper blades are in good condition. Make sure the wiper blades press against the window hard enough to wipe the windshield clean, otherwise they may not sweep off snow properly. Make sure the windshield washer works and there is washing fluid in the washer reservoir.
Use windshield washer antifreeze to prevent freezing of the washer liquid. If you can't see well enough while driving (for example, if your wipers fail), stop safely and fix the problem.
Tires: Make sure you have enough tread on your tires. The drive tires must provide traction to push the rig over wet pavement and through snow. The steering tires must have traction to steer the vehicle. Enough tread is especially important in winter conditions. You must have at least 4/32 inch tread depth in every major groove on front tires and at least 2/32 inch on other tires. More would be better. Use a gauge to determine if you have enough tread for safe driving.
Tire Chains: You may find yourself in conditions where you can't drive without chains, even to get to a place of safety. Carry the right number of chains Exhaust System: Exhaust system leaks are especially dangerous when cab ventilation may be poor (windows rolled up, etc.). Loose connections could permit poisonous carbon monoxide to leak 2-38 Slow down and place transmission in a low gear.
2.13.2 Driving Tips for Winter
Gently put on the brakes. This presses linings against brake drums or discs and keeps mud, silt, sand, and water from getting in.
Increase engine rpm and cross the water while keeping light pressure on the brakes.
When out of the water, maintain light pressure on the brakes for a short distance to heat them up and dry them out.
Make a test stop when safe to do so. Check behind to make sure no one is following, then apply the brakes to be sure they work well. If not, dry them out further as described above. (CAUTION: Do not apply too much brake pressure and accelerator at the same time, or you can overheat brake drums and linings.)
2.14 Driving in Very Hot Weather
into your vehicle. Carbon monoxide gas will cause you to be sleepy. In large enough amounts it can kill you. Check the exhaust system for loose parts and for sounds and signs of leaks. Avoid driving through deep puddles or flowing water if possible. If not, you should:
Slippery Surfaces: Drive slowly and smoothly on slippery roads. If it is very slippery, you shouldn't drive at all. Stop at the first safe place. Start Gently and Slowly: When first starting, get the feel of the road. Don't hurry.
Check for Ice: Check for ice on the road, especially bridges and overpasses. A lack of spray from other vehicles indicates ice has formed on the road. Also, check your mirrors and wiper blades for ice. If they have ice, the road most likely will be icy as well.
Adjust Turning and Braking to Conditions: Make turns as gently as possible. Don't brake any harder than necessary, and don't use the engine brake or speed retarder. (They can cause the driving wheels to skid on slippery surfaces.)
Adjust Speed to Conditions: Don't pass slower vehicles unless necessary. Go slowly and watch far enough ahead to keep a steady speed. Avoid having to slow down and speed up. Take curves at slower speeds and don't brake while in curves. Be aware that as the temperature rises to the point where ice begins to melt, the road becomes even more slippery. Slow down more.
Adjust Space to Conditions: Don't drive alongside other vehicles. Keep a longer following distance. When you see a traffic jam ahead, slow down or stop to wait for it to clear. Try hard to anticipate stops early and slow down gradually. Watch for snowplows, as well as salt and sand trucks, and give them plenty of room.
Wet Brakes: When driving in heavy rain or deep standing water, your brakes will get wet. Water in the brakes can cause the brakes to be weak, to apply unevenly, or to grab. This can cause lack of braking power, wheel lockups, pulling to one side or the other, and jackknife if you pull a trailer. 2.14.1 Vehicle Checks Do a normal Vehicle inspection, but pay special attention to the following items:
Tires: Check the tire mounting and air pressure. Inspect the tires every two hours or every 100 miles when driving in very hot weather. Air pressure increases with temperature. Do not let air out or the pressure will be too low when the tires cool off. If a tire is too hot to touch, remain stopped until the tire cools off. Otherwise the tire may blow out or catch fire.
Engine Oil: The engine oil helps keep the engine cool, as well as lubricating it. Make sure there is enough engine oil. If you have an oil temperature gauge, make sure the temperature is within the proper range while you are driving.
Engine Coolant: Before starting out, make sure the engine cooling system has enough water and antifreeze according to the engine manufacturer's directions. (Antifreeze helps the engine under hot 2-39 2.14.2 Driving Tips for Hot Weather
Watch for Bleeding Tar: Tar in the road pavement frequently rises to the surface in very hot weather. Spots where tar "bleeds" to the surface are very slippery.
Go Slowly Enough to Prevent Overheating: High speeds create more heat for tires and the engine. In desert conditions the heat may build up to the point where it is dangerous. The heat will increase chances of tire failure or even fire, and engine failure.
Subsections 2.11, 2.12, 2.13, and 2.14 Test Your Knowledge 1. You should use low beams whenever you can. True or False? 2. What should you do before you drive if you are drowsy? 3. What effects can wet brakes cause? How can you avoid these problems? 4. You should let air out of hot tires so the pressure goes back to normal. True or False? 5. You can safely remove the radiator cap as long as the engine isn't overheated. True or False? These questions may be on the test. If you can’t answer all of them, re-read subsections 2.11, 2.12, 2.13, and 2.14. conditions as well as cold conditions.) When driving, check the water temperature or coolant temperature gauge from time to time. Make sure that it remains in the normal range. If the gauge goes above the highest safe temperature, there may be something wrong that could lead to engine failure and possibly fire. Stop driving as soon as safely possible and try to find out what is wrong.
Some vehicles have sight glasses, see-through coolant overflow containers, or coolant recovery containers. These permit you to check the coolant level while the engine is hot. If the container is not part of the pressurized system, the cap can be safely removed and coolant added even when the engine is at operating temperature.
Never remove the radiator cap or any part of the pressurized system until the system has cooled. Steam and boiling water can spray under pressure and cause severe burns. If you can touch the radiator cap with your bare hand, it is probably cool enough to open.
If coolant has to be added to a system without a recovery tank or overflow tank, follow these steps: will not turn the water pump and/or fan properly. This will result in overheating. Also, check belts for cracking or other signs of wear.
Hoses: Make sure coolant hoses are in good condition. A broken hose while driving can lead to engine failure and even fire.
1.Shut engine off. 2.Wait until engine has cooled. 3.Protect hands (use gloves or a thick cloth). 4.Turn radiator cap slowly to the first stop, which releases the pressure seal. 5.Step back while pressure is released from cooling system. 6.When all pressure has been released, press down on the cap and turn it further to remove it. 7.Visually check level of coolant and add more coolant if necessary. 8.Replace cap and turn all the way to the closed position.
Engine Belts: Learn how to check v-belt tightness on your vehicle by pressing on the belts. Loose belts
2-40 Railroad-highway grade crossings are a special kind of intersection where the roadway crosses train tracks. These crossings are always dangerous. Every such crossing must be approached with the expectation that a train is coming. It is extremely difficult to judge the distance of the train from the crossing as well as the speed of an approaching train.
2.15.1 Types of Crossings
Passive Crossings: This type of crossing does not have any type of traffic control device. The decision to stop or proceed rests entirely in your hands. Passive crossings require you to recognize the crossing, search for any train using the tracks and decide if there is sufficient clear space to cross safely. Active Crossings: This type of crossing has a traffic control device installed at the crossing to regulate traffic at the crossing. These active devices include flashing red lights, with or without bells and flashing red lights with bells and gates.
2.15.2 Warning Signs and Devices
Advance Warning Signs: The round, black-on-yellow warning sign is placed ahead of a public railroad-highway crossing. The advance warning sign tells you to slow down, look and listen for the train, and be prepared to stop at the tracks if a train is coming. All passenger and hazmat carrying vehicles are required to stop. See Figure 2.15.

Figure 2.15: Advance Warning Railroad Sign
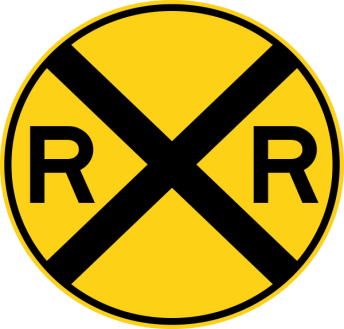

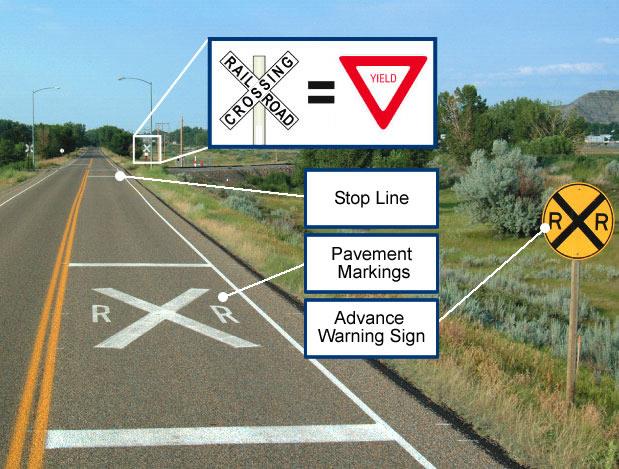
Figure 2.16 Railroad Crossing Pavement Markings
There is also a no passing zone sign on two-lane roads. There may be a white stop line painted on the pavement before the railroad tracks. The front of the truck or bus must remain behind this line while stopped at the crossing.
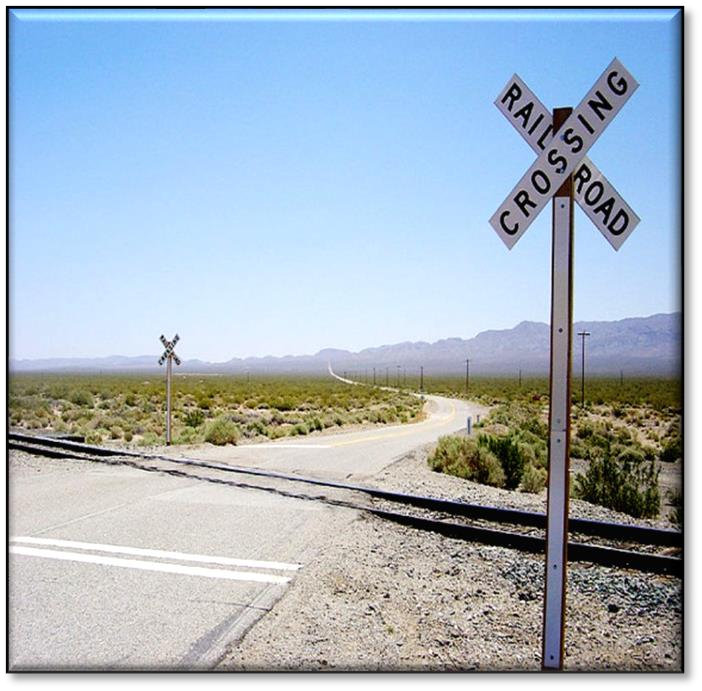
2.15 Railroad-highway Crossings
an “X” with the letters “”RR” and a no-passing marking on two-lane roads. See Figure 2.16.
Pavement Markings. Pavement markings mean the same as the advance warning sign. They consist of 2-41
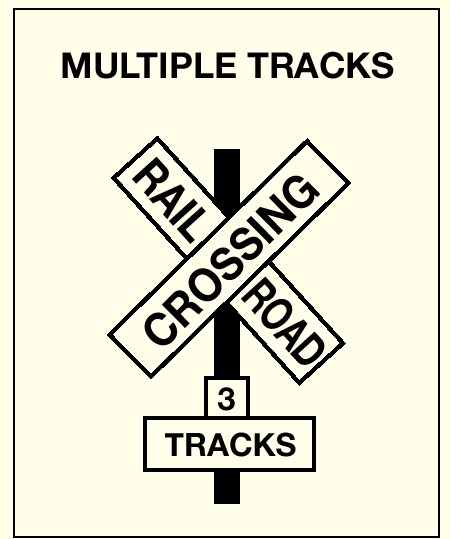
Figure 2.18 Railroad Gates/Lights
2.15.3 Driving Procedures
Never Race a Train to a Crossing: Never attempt to race a train to a crossing. It is extremely difficult to judge the speed of an approaching train.
Reduce Speed: Speed must be reduced in accordance with your ability to see approaching trains in any direction, and speed must be held to a point which will permit you to stop short of the tracks in case a stop is necessary. Note: This law applies to ALL Commercial Vehicles- not just those carrying passengers or hazardous materials! Figure 2.17 Cross-buck Signs
Flashing Red Light Signals: At many highway-rail grade crossings, the cross-buck sign has flashing red lights and bells. When the lights begin to flash, stop! A train is approaching. You are required to yield the right-of-way to the train. If there is more than one track, make sure all tracks are clear before crossing. See Figure 2.18.
Gates: Many railroad-highway crossings have gates with flashing red lights and bells. Stop when the lights begin to flash and before the gate lowers across the road lane. Remain stopped until the gates go up and the lights have stopped flashing. Proceed when it is safe. See Figure 2.18.
| Note: This law
applies to ALL Commercial Vehicles- not just those |
carrying passengers or hazardous materials! |
| Be
especially alert at crossings that do not have gates |
or flashing red light signals. |

Cross-buck Signs: This sign marks the grade crossing. It requires you to yield the right-of-way to the train. If there is no white stop line painted on the pavement, vehicles that are required to stop must stop no closer than 15 feet or more than 50 feet from the nearest rail of the nearest track. When the road crosses over more than one track, a sign below the cross-buck indicates the number of tracks. See Figure 2.17.
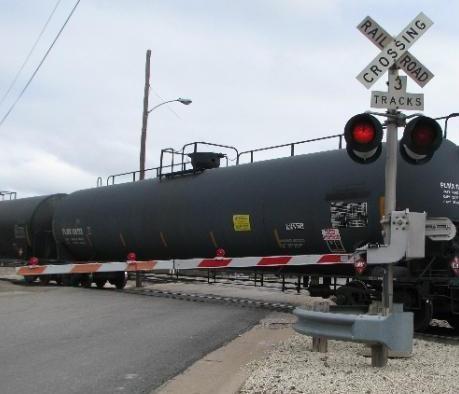
Don't Expect to Hear a Train: Trains may not or are prohibited from sounding horns when approaching some crossings. Public crossings where trains do not sound horns should be identified by signs.Noise inside your vehicle may also prevent you from hearing the train horn until the train is dangerously close to the crossing.
Don't Rely on Signals: You should not rely solely upon the presence of warning signals, gates, or flagmen to warn of the approach of trains. Be especially alert at crossings that do not have gates or flashing red light signals.
2-42 2.15.4 Stopping Safely at Railroad- highway Crossings
A full stop is required at grade crossings whenever: The nature of the cargo makes a stop
mandatory under state or federal regulations. Such a stop is otherwise required by law. When stopping be sure to:
Check for traffic behind you while stopping
gradually. Use a pullout lane, if available. Turn on your four-way emergency flashers.
2.15.5 Crossing the Tracks
Railroad crossings with steep approaches can cause your unit to hang up on the tracks. Never permit traffic conditions to trap you in
a position where you have to stop on the tracks. Be sure you can get all the way across the
tracks before you start across. It takes a typical tractor-trailer unit at least
14 seconds to clear a single track and more than 15 seconds to clear a double track.
With a manual transmission vehicle, do not shift gears while crossing railroad tracks. This is not only unsafe; it is illegal and is a serious offense that can result in the loss of your CDL! Be Aware! These trailers can get stuck on raised crossings:
Low slung units (lowboy, car carrier, moving
van, possum-belly livestock trailer).
Single-axle tractor pulling a long trailer with
its landing gear set to accommodate a tandem-axle tractor.
If for any reason you get stuck on the tracks,
get out of the vehicle and away from the tracks.
Check signposts or signal housing at the
crossing for emergency notification information.
Call 911 or other emergency number. Give
the location of the crossing using all identifiable landmarks, especially the DOT number, if posted. 2.15.6 Special Situations Double Tracks Require a Double Check: Remember that a train on one track may hide a train on the other track. Look both ways before crossing. After one train has cleared a crossing, be sure no other trains are near before starting across the tracks.
Yard Areas and Grade Crossings in Cities and Towns: Yard areas and grade crossings in cities and towns are just as dangerous as rural grade crossings. Approach them with as much caution.
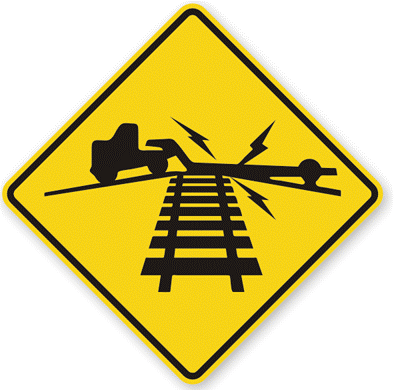
2.16 Mountain Driving
In mountain driving, gravity plays a major role. On any upgrade, gravity slows you down. The steeper the grade, the longer the grade, and/or the heavier the load--the more you will have to use lower gears to climb hills or mountains. In coming down long, steep downgrades, gravity causes the speed of your vehicle to increase. You must select an appropriate safe speed, then use a low gear and proper braking techniques. You should plan ahead and obtain information about any long, steep grades along your
2-43
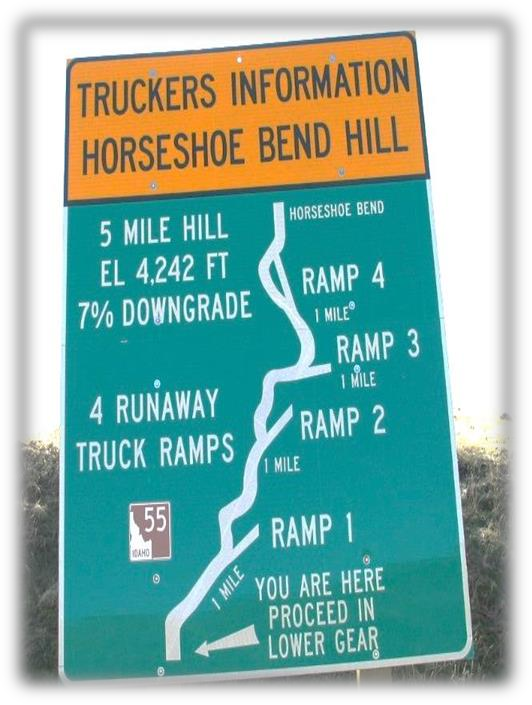
2.16.2 Select the Right Gear before Starting
Down the Grade Shift the transmission to a low gear before starting down the grade. Do not try to downshift after your speed has already built up. You will not be able to shift into a lower gear. You may not even be able to get back into any gear and all engine braking effect will be lost. Forcing an automatic transmission into a lower gear at high speed could damage the transmission and also lead to loss of all engine braking effect.
With older trucks, a rule for choosing gears is to use the same gear going down a hill that you would need to climb the hill. However, new trucks have low friction parts and streamlined shapes for fuel economy. They may also have more powerful engines. This means they can go up hills in higher gears and have less friction and air drag to hold them back going down hills.
For that reason, drivers of modern trucks may have to use lower gears going down a hill than would be required to go up the hill. You should know what is right for your vehicle. You must go slowly enough so your brakes can hold you back without getting too hot. If the brakes become too hot, they may start to "fade." This means you have to apply them harder and harder to get the same stopping power. If you continue to use the brakes hard, they can keep fading until you cannot slow down or stop at all.
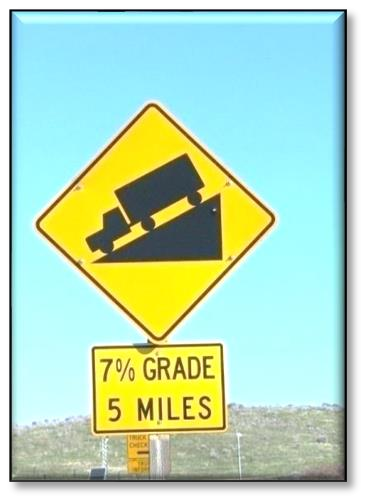
2.16.1 Select a "Safe" Speed
Your most important consideration is to select a speed that is not too fast for the:
Total weight of the vehicle and cargo.
Length of the grade.
Steepness of the grade.
Road conditions.
planned route of travel. If possible, talk to other drivers who are familiar with the grades to find out what speeds are safe. If a speed limit is posted, or there is a sign indicating "Maximum Safe Speed," never exceed the speed shown. Also, look for and heed warning signs indicating the length and steepness of the grade.
You must use the braking effect of the engine as the principal way of controlling your speed. The braking effect of the engine is greatest when it is near the governed rpms and the transmission is in the lower gears. Save your brakes so you will be able to slow or stop as required by road and traffic conditions.
2.16.3 Brake Fading or Failure
Brakes are designed so brake shoes or pads rub against the brake drum or disks to slow the vehicle. Braking creates heat, but brakes are designed to take a lot of heat. However, brakes can fade or fail from excessive heat caused by using them too much and not relying on the engine braking effect. Weather.
2-44 2.16.4 Proper Braking Technique
Remember: The use of brakes on a long and/or steep downgrade is only a supplement to the braking effect of the engine. Once the vehicle is in the proper low gear, the following are the proper braking techniques:
Apply the brakes just hard enough to feel a
definite slowdown.
When your speed has been reduced to
approximately five mph below your "safe" speed, release the brakes. (This brake application should last for about three seconds.)
When your speed has increased to your
If you don’t use it, your chances of having a serious crash may be much greater. Know escape ramp locations on your route.
Signs show drivers where ramps are located. Escape ramps save lives, equipment and
cargo.
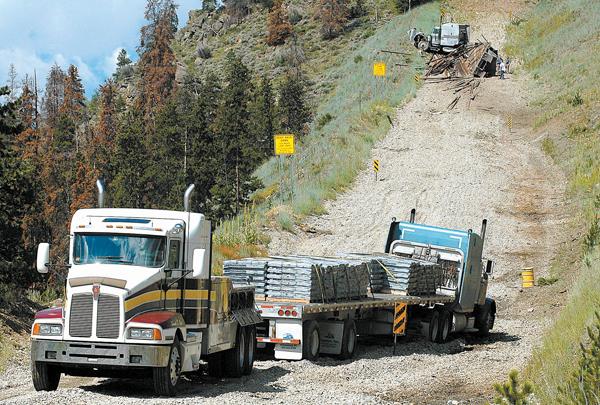
Subsections 2.15 and 2.16 Test Your Knowledge
1. What factors determine your selection of a "safe" speed when going down a long, steep downgrade? 2. Why should you be in the proper gear before starting down a hill? 3. Describe the proper braking technique when going down a long, steep downgrade. 4. What type of vehicles can get stuck on a railroad-highway crossing? 5. How long does it take for a typical tractor-trailer unit to clear a double track?
These questions may be on the test. If you can’t answer them all, re-read subsections 2.15 and 2.16. Brake fade is also affected by adjustment. To safely control a vehicle, every brake must do its share of the work. Brakes out of adjustment will stop doing their share before those that are in adjustment. The other brakes can then overheat and fade, and there will not be enough braking available to control the vehicle.
Brakes can get out of adjustment quickly, especially when they are used a lot; also, brake linings wear faster when they are hot. Therefore, brake adjustment must be checked frequently. Any driver who loses brakes going downhill should use an escape ramp if it’s available. There is no fine or penalty for using an escape ramp!
"safe" speed, repeat steps 1 and 2.
For example, if your "safe" speed is 40 mph, you would not apply the brakes until your speed reaches 40 mph. You now apply the brakes hard enough to gradually reduce your speed to 35 mph and then release the brakes. Repeat this as often as necessary until you have reached the end of the downgrade.
Escape ramps have been built on many steep mountain downgrades. Escape ramps are made to stop runaway vehicles safely without injuring drivers and passengers. Escape ramps use a long bed of loose, soft material to slow a runaway vehicle, sometimes in combination with an upgrade.
2-45 2.17.1 Steering to Avoid a Crash Stopping is not always the safest thing to do in an emergency. When you don't have enough room to stop, you may have to steer away from what's ahead. Remember, you can almost always turn to miss an obstacle more quickly than you can stop. (However, top-heavy vehicles and tractors with multiple trailers may flip over.)
Keep Both Hands on the Steering Wheel: In order to turn quickly, you must have a firm grip on the steering wheel with both hands. The best way to have both hands on the wheel, if there is an emergency, is to keep them there all the time.
How to Turn Quickly and Safely: A quick turn can be made safely, if it's done the right way. Here are some points that safe drivers use:
Do not apply the brake while you are
turning. It's very easy to lock your wheels while turning. If that happens, you may skid out of control. Do not turn any more than needed to clear
whatever is in your way. The more sharply you turn, the greater the chances of a skid or rollover. Be prepared to "counter-steer," that is, to
turn the wheel back in the other direction, once you've passed whatever was in your path. Unless you are prepared to counter-steer, you won't be able to do it quickly enough. You should think of emergency steering and counter-steering as two parts of one driving action. If something is blocking your path, the best
direction to steer will depend on the situation. If you have been using your mirrors, you'll
know which lane is empty and can be safely used. If the shoulder is clear, going right may be
best. No one is likely to be driving on the shoulder but someone may be passing you on the left. You will know if you have been using your mirrors. If you are blocked on both sides, a move to
the right may be best. At least you won't force anyone into an opposing traffic lane and a possible head-on collision.
Leaving the Road: In some emergencies, you may have to drive off the road. It may be less risky than facing a collision with another vehicle.
Most shoulders are strong enough to support the weight of a large vehicle and, therefore, offer an available escape route. Here are some guidelines, if you do leave the road:
Avoid Braking- If possible, avoid using the
brakes until your speed has dropped to about 20 mph. Then brake very gently to avoid skidding on a loose surface.
Keep One Set of Wheels on the Pavement,
if Possible. This helps to maintain control.
Stay on the Shoulder. If the shoulder is clear,
stay on it until your vehicle has come to a stop. Signal and check your mirrors before pulling back onto the road.
Returning to the Road: If you are forced to return to the road before you can stop, use the following procedure: 2.17 Driving Emergencies Traffic emergencies occur when two vehicles are about to collide. Vehicle emergencies occur when tires, brakes, or other critical parts fail. Following the safety practices in this manual can help prevent emergencies. But if an emergency does happen, your chances of avoiding a crash depend upon how well you take action. Actions you can take are discussed below. Where to Steer: If an oncoming driver has drifted into your lane, a move to your right is best. If that driver realizes what has happened, the natural response will be to return to his or her own lane.
2-46 Don't try to edge gradually back on the road.
If you do, your tires might grab unexpectedly and you could lose control. Downshift: Putting the vehicle into a lower gear will help to slow the vehicle. When both front tires are on the paved
Pump the Brakes: Sometimes pumping the brake pedal will generate enough hydraulic pressure to stop the vehicle. surface, counter-steer immediately. The two turns should be made as a single "steer-counter-steer" move.
2.17.2 How to Stop Quickly and Safely
If somebody suddenly pulls out in front of you, your natural response is to hit the brakes. This is a good response if there's enough distance to stop, and you use the brakes correctly. You should brake in a way that will keep your vehicle in a straight line and allow you to turn if itbecomes necessary. You can use the "controlled braking" method or the "stab braking" method. Controlled Braking: With this method, you apply the brakes as hard as you can without locking the wheels. Keep steering wheel movements very small while doing this. If you need to make a larger steering adjustment or if the wheels lock, release the brakes. Re-apply the brakes as soon as you can. Stab Braking: With this method, you apply your brakes all the way and release brakes when wheels lock up. As soon as the wheels start rolling, apply the brakes fully again. (It can take up to one second for the wheels to start rolling after you release the brakes. If you re-apply the brakes before the wheels start rolling, the vehicle won't straighten out.)
Don't “Jam on the brakes”: Emergency braking does not mean pushing down on the brake pedal as hard as you can. That will only keep the wheels locked up and cause a skid. If the wheels are skidding, you cannot control the vehicle.
2.17.3 Brake Failure
Brakes kept in good condition rarely fail. Most hydraulic brake failures occur for one of two reasons: Loss of hydraulic pressure.
Brake fade on long hills.
Hold the wheel tightly and turn sharply
Loss of Hydraulic Pressure: When the system won't build up pressure, the brake pedal will feel spongy or go to the floor. Here are some things you can do. enough to get right back on the road safely.
Use the Parking Brake: The parking or emergency brake is separate from the hydraulic brake system. Therefore, it can be used to slow the vehicle. However, be sure to press the release button or pull the release lever at the same time you use the emergency brake so you can adjust the brake pressure and keep the wheels from locking up.
Find an Escape Route: While slowing the vehicle, look for an escape route--an open field, side-street, or escape ramp. Turning uphill is a good way to slow and stop the vehicle. Make sure the vehicle does not start rolling backward after you stop. Put it in low gear, apply the parking brake, and, if necessary, roll back into some obstacle that will stop the vehicle.
Brake Failure on Downgrades: Going slow enough and braking properly will almost always prevent brake failure on long downgrades. Once the brakes have failed, however, you are going to have to look outside your vehicle for something to stop it.
Your best hope is an escape ramp. If there is one, there'll be signs telling you about it. Use it. Ramps are usually located a few miles from the top of the downgrade. Every year, hundreds of drivers avoid injury to themselves or damage to their vehicles by using escape ramps. Some escape ramps use soft gravel that resists the motion of the vehicle and brings it to a stop. Others turn uphill, using the hill to stop the vehicle and soft gravel to hold it in place.
Any driver who loses brakes going downhill should use an escape ramp if it's available. If you don't use it, your chances of having a serious crash may be much greater.
(Air brakes are discussed in Section 5.) 2-47 2.17.4 Tire Failure Recognize Tire Failure: Quickly knowing you have a tire failure will let you have more time to react. Having just a few extra seconds to remember what it is you're supposed to do can help you. The major signs of tire failure are: Sound: The loud "bang" of a blowout is an easily recognized sign. Because it can take a few seconds for your vehicle to react, you might think it was some other vehicle. But any time you hear a tire blow, you'd be safest to assume it is yours. Vibration: If the vehicle thumps or vibrates heavily, it may be a sign that one of the tires has gone flat. With a rear tire, that may be the only sign you get. Feel: If the steering feels "heavy," it is probably a sign that one of the front tires has failed. Sometimes, failure of a rear tire will cause the vehicle to slide back and forth or "fishtail." However, dual rear tires usually prevent this. Respond to Tire Failure When a tire fails, your vehicle is in danger. You must immediately: Hold the Steering Wheel Firmly- If a front tire fails, it can twist the steering wheel out of your hand. The only way to prevent this is to keep a firm grip on the steering wheel with both hands at all times. A blowout may cause damage to your vehicle as well.
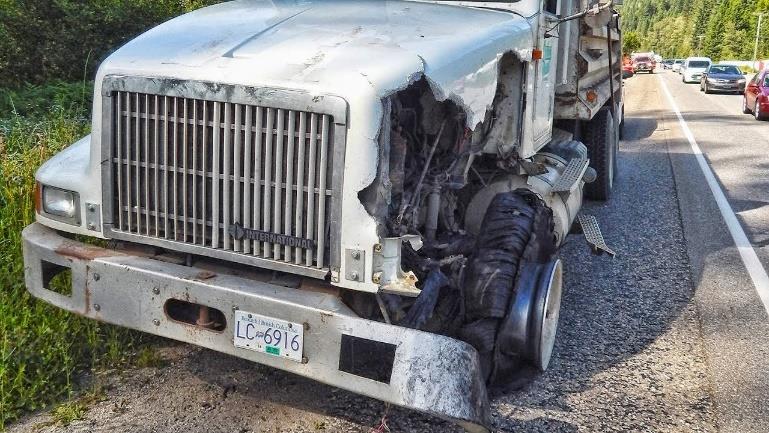
2.18 Antilock Braking Systems (ABS)
ABS is a computerized system that keeps your wheels from locking up during hard brake applications.
ABS is an addition to your normal brakes. It does not decrease or increase your normal braking capability. ABS only activates when wheels are about to lock up. ABS does not necessarily shorten your stopping distance, but it does help you keep the vehicle under control during hard braking.
2.18.1 How Antilock Braking Systems Work
Sensors detect potential wheel lock up. An electronic control unit (ECU) will then decrease brake pressure to avoid wheel lockup.
Brake pressure is adjusted to provide the maximum braking without danger of lockup.
ABS works far faster than the driver can respond to potential wheel lockup. At all other times the brake system will operate normally.
2.18.2 Vehicles Required to Have Antilock
Braking Systems The Department of Transportation requires that ABS be on:
Truck tractors with air brakes built on or
after March 1, 1997.
Other air brake vehicles, (trucks, buses,
If no escape ramp is available, take the least hazardous escape route you can--such as an open field or a side road that flattens out or turns uphill. Make the move as soon as you know your brakes don't work. The longer you wait, the faster the vehicle will go, and the harder it will be to stop. Stay off the Brake- It's natural to want to brake in an emergency. However, braking when a tire has failed could cause loss of control. Unless you're about to run into something, stay off the brakes until the vehicle has slowed down. Then brake very gently, pull off the road, and stop.
Check the Tires- After you've come to a stop, get out and check all the tires. Do this even if the vehicle seems to be handling all right. If one of your dual tires goes, the only way you may know it is by getting out and looking at it.
trailers, and converter dollies) built on or after March 1, 1998. 2-48 gross vehicle weight rating of 10,000 pounds or more built on or after March 1, 1999. Many commercial vehicles built before these dates have been voluntarily equipped with ABS.
2.18.3 How to Know If Your Vehicle Is
Equipped with ABS
Tractors, trucks, and buses will have yellow ABS malfunction lamps on the instrument panel.

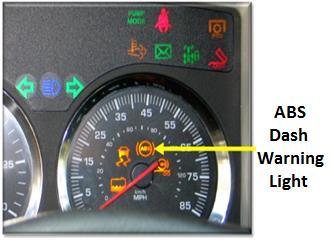
Trailers will have yellow ABS malfunction lamps on the left side, either on the front or rear corner.
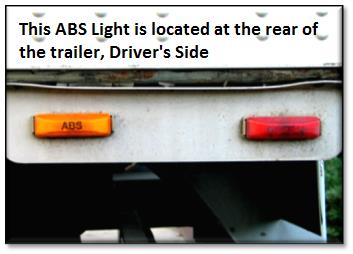
Dollies manufactured on or after March 1, 1998, are required to have a lamp on the left side.

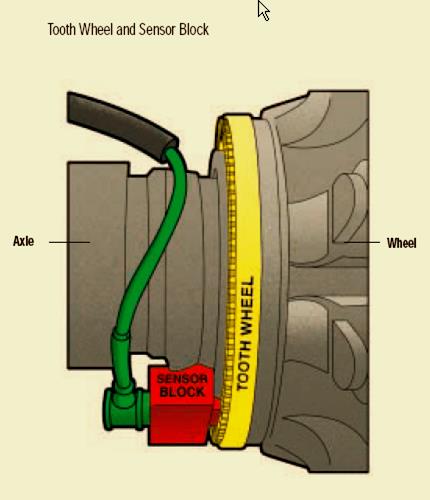
2.18.4 How ABS Helps You
When you brake hard on slippery surfaces in a vehicle without ABS, your wheels may lock up. When your steering wheels lock up, you lose steering control. When your other wheels lock up, you may skid, jackknife, or even spin the vehicle.
ABS helps you avoid wheel lock up and maintain control. You may or may not be able to stop faster with ABS, but you should be able to steer around an obstacle while braking, and avoid skids caused by over braking. As a system check on newer vehicles, the malfunction lamp comes on at start-up for a bulb check, and then goes out quickly. On older systems, the lamp could stay on until you are driving over five mph. If the lamp stays on after the bulb check, or goes on once you are under way, you may have lost ABS control.
In the case of towed units manufactured before it was required by the Department of Transportation, it may be difficult to tell if the unit is equipped with ABS. Look under the vehicle for the ECU and wheel speed sensor wires coming from the back of the brakes. Hydraulically braked trucks and buses with a
2.18.5 ABS on the Tractor Only or Only on the
Trailer Having ABS on only the tractor, only the trailer, or even on only one axle, still gives you more control over the vehicle during braking. Brake normally. 2-49 allow you to drive faster, follow more
closely, or drive less carefully. prevent power or turning skids–ABS should
prevent brake-induced skids or jackknifes, but not those caused by spinning the drive wheels or going too fast in a turn. necessarily shorten stopping distance. ABS
2.18.6 Braking with ABS
When you drive a vehicle with ABS, you should brake as you always have. In other words: Use only the braking force necessary to stop safely and stay in control. Brake the same way, regardless of whether you have ABS on the bus, tractor, the trailer, or both. As you slow down, monitor your tractor and trailer and back off the brakes (if it is safe to do so) to stay in control. There is only one exception to this procedure. If you drive a straight truck or combination with working ABS on all axles, in an emergency stop, you can fully apply the brakes. will help maintain vehicle control, but not always shorten stopping distance. increase or decrease ultimate stopping
power–ABS is an “add-on” to your normal brakes, not a replacement for them. change the way you normally brake. Under
normal brake conditions, your vehicle will stop as it always stopped. ABS only comes into play when a wheel would normally have locked up because of over braking. compensate for bad brakes or poor brake
maintenance.
Remember: The best vehicle safety feature is still a safe driver. Drive so you never need to use your ABS.
If you need it, ABS could help to prevent a
serious crash. 2.18.8 Safety Reminders When only the tractor has ABS, you should be able to maintain steering control, and there is less chance of jackknifing. But keep your eye on the trailer and let up on the brakes (if you can safely do so) if it begins to swing out.
When only the trailer has ABS, the trailer is less likely to swing out, but if you lose steering control or start a tractor jackknife, let up on the brakes (if you can safely do so) until you regain control. ABS Will NOT:
2.18.7 Braking If ABS Is Not Working
Without ABS you still have normal brake functions. Drive and brake as you always have.
Vehicles with ABS have yellow malfunction lamps to tell you if something isn’t working.
As a system check on newer vehicles, the malfunction lamp comes on at start-up for a bulb check and then goes out quickly. On older systems, the lamp could stay on until you are driving over five mph.
If the lamp stays on after the bulb check, or goes on once you are under way, you may have lost ABS control on one or more wheels.
Remember, if your ABS malfunctions, you still have regular brakes. Drive normally, but get the system serviced soon. 2.19 Skid Control and Recovery A skid happens whenever the tires lose their grip on the road. This is caused in one of four ways:
Over-braking: Braking too hard and locking up the wheels. Skids also can occur when using the speed retarder when the road is slippery.
Over-steering: Turning the wheels more sharply than the vehicle can turn.
Over-acceleration: Supplying too much power to the drive wheels, causing them to spin.
Driving Too Fast: Most serious skids result from driving too fast for road conditions. Drivers who 2-50 2.19.1 Drive-wheel Skids By far the most common skid is one in which the rear wheels lose traction through excessive braking or acceleration. Skids caused by acceleration usually happen on ice or snow. Taking your foot off the accelerator can easily stop them. (If it is very slippery, push the clutch in. Otherwise, the engine can keep the wheels from rolling freely and regaining traction.) 2.19.2 Correcting a Drive-wheel Braking Skid Do the following to correct a drive-wheel braking skid:
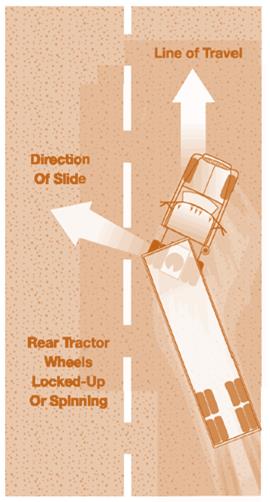
•Stop Braking: This will let the rear wheels roll again, and keep the rear wheels from sliding.
•Counter-steer: As a vehicle turns back on course, it has a tendency to keep on turning. Unless you turn the steering wheel quickly the other way, you may find yourself skidding in the opposite direction.
Learning to stay off the brake, turn the steering wheel quickly, push in the clutch, and counter-steer in a skid takes a lot of practice. The best place to get this practice is on a large driving range or "skid pad."
2.19.3 Front-wheel Skids
Driving too fast for conditions causes most front-wheel skids. Other causes include lack of tread on the front tires and cargo loaded so not enough weight is on the front axle. In a front-wheel skid, the front end tends to go in a straight line regardless of how much you turn the steering wheel. On a very slippery surface, you may not be able to steer around a curve or turn.
When a front-wheel skid occurs, the only way to stop the skid is to let the vehicle slow down. Stop turning and/or braking so hard. Slow down as quickly as possible without skidding. Figure 2.19 Tractor Jackknife
Rear wheel braking skids occur when the rear drive wheels lock. Because locked wheels have less traction than rolling wheels, the rear wheels usually slide sideways in an attempt to "catch up" with the front wheels. In a bus or straight truck, the vehicle will slide sideways in a "spin out." With vehicles towing trailers, a drive-wheel skid can let the trailer push the towing vehicle sideways, causing a sudden jackknife. See Figure 2.19. adjust their driving to conditions don't over-accelerate and don't have to over-brake or over-steer from too much speed.
2-51 Subsections 2.17, 2.18, and 2.19 Test Your Knowledge
1. Stopping is not always the safest thing to do in an emergency. True or False? 2. What are some advantages of going right instead of left around an obstacle? 3. What is an "escape ramp?" 4. If a tire blows out, you should put the brakes on hard to stop quickly. True or False? 5. How do you know if your vehicle has antilock brakes? 6. What is the proper braking technique when driving a vehicle with antilock brakes? 7. How do antilock brakes help you?
These questions may be on the test. If you can’t answer them all, re-read subsections 2.17, 2.18, and 2.19.
2.20 Accident Procedures
When you're in an accident and not seriously hurt, you need to act to prevent further damage or injury. The basic steps to be taken at any accident are to:

1.Protect the area.
2.Notify authorities.
3.Care for the injured.
If you're stopping to help, park away from
the accident. The area immediately around the accident will be needed for emergency vehicles. Put on your flashers.
Set out reflective triangles to warn other
traffic. Make sure other drivers can see them in time to avoid the accident.
2.20.2 Notify Authorities
If you have a cell phone or CB, call for assistance before you get out of your vehicle. If not, wait until after the accident scene has been properly protected, then phone or send someone to phone the police. Try to determine where you are so you can give the exact location.
2.20.3 Care for the Injured
If a qualified person is at the accident and helping the injured, stay out of the way unless asked to assist. Otherwise, do the best you can to help any injured parties. Here are some simple steps to follow in giving assistance:
Don't move a severely injured person unless
the danger of fire or passing traffic makes it necessary. Stop heavy bleeding by applying direct
pressure to the wound. Keep the injured person warm.
2.21 Fires
Truck fires can cause damage and injury. Learn the causes of fires and how to prevent them. Know what to do to extinguish fires.
2.21.1 Causes of Fire
The following are some causes of vehicle fires:
After Accidents: Spilled fuel, improper use of
flares. Tires: Under-inflated tires and duals that
If your vehicle is involved in the accident,
try to get it to the side of the road. This will help prevent another accident and allow traffic to move.
2.20.1 Protect the Area
The first thing to do at an accident scene is to keep another accident from happening in the same spot. To protect the accident area: touch.
2-52 Fuel: Driver smoking, improper fueling,
loose fuel connections. Cargo: Flammable cargo, improperly sealed
or loaded cargo, poor ventilation.
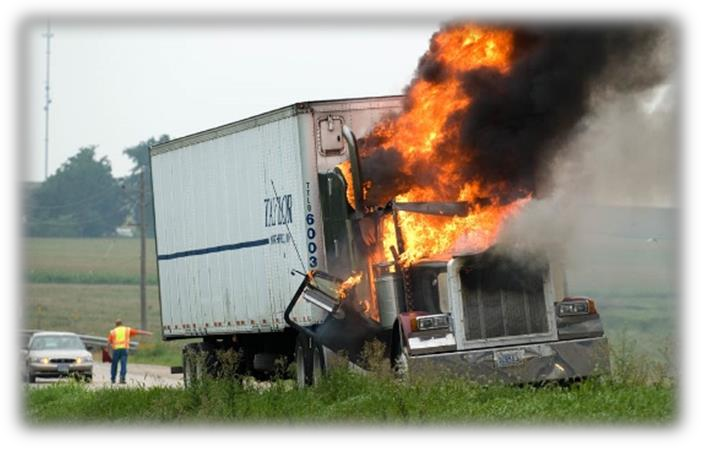
2.21.2 Fire Prevention
Pay attention to the following: Vehicle Inspection: Make a complete inspection of the electrical, fuel, and exhaust systems, tires, and cargo. Be sure to check that the fire extinguisher is charged. Enroute Inspection: Check the tires, wheels, and truck body for signs of heat whenever you stop during a trip. Follow Safe Procedures: Follow correct safety procedures for fueling the vehicle, using brakes, handling flares, and other activities that can cause a fire. Monitoring: Check the instruments and gauges often for signs of overheating and use the mirrors to look for signs of smoke from tires or the vehicle. Caution: Use normal caution in handling anything flammable. Park in an open area, away from buildings,
trees, brush, other vehicles, or anything that might catch fire. Don't pull into a service station!
Notify emergency services of your problem
and your location.
Keep the Fire from Spreading: Before trying to put out the fire, make sure that it doesn't spread any further.
With an engine fire, turn off the engine as soon as you can. Don't open the hood if you can avoid it. Shoot foam through louvers, radiator, or from the vehicle’s underside.
For a cargo fire in a van or box trailer, keep the doors shut, especially if your cargo contains hazardous materials. Opening the van doors will supply the fire with oxygen and can cause it to burn very fast.
Extinguish the Fire: Here are some rules to follow in putting out a fire:
When using the extinguisher, stay as far
away from the fire as possible.
Aim at the source or base of the fire, not up
in the flames.
Use the Right Fire Extinguisher Electrical System: Short circuits due to
Pull off the Road: The first step is to get the vehicle off the road and stop. In doing so: damaged insulation, loose connections.
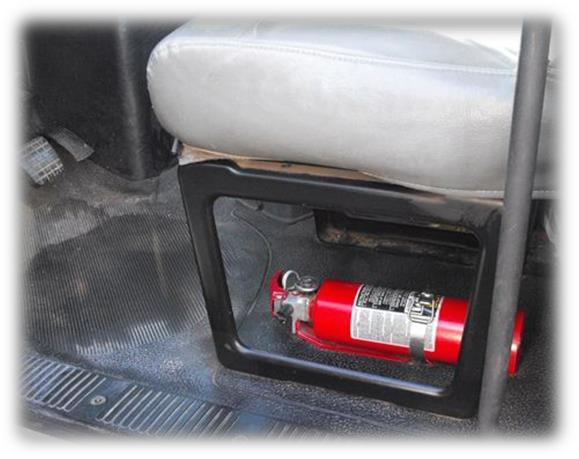
2.21.3 Fire Fighting
Knowing how to fight fires is important. Drivers who didn’t know what to do have made fires worse. Know how the fire extinguisher works. Study the instructions printed on the extinguisher before you need it. Here are some procedures to follow in case of fire.
2-53
Figure 2.21 Class of Fire/Type of Extinguisher |
Class of Fire | Fire Extinguisher Type
B or C | Regular Dry Chemical
A, B, C, or D | Multi-Purpose Dry Chemical
D | Purple K Dry Chemical
B or C | KCL Dry Chemical
D | Dry Powder Special Compound
B or C | Carbon Dioxide (Dry)
B or C | Halogenated Agent (Gas)
A | Water
A | Water With Anti-Freeze
A or B | Water, Loaded Steam Style
B, Some A | Foam
The B:C type fire extinguisher is designed to
work on electrical fires and burning liquids.
The A:B:C type is designed to work on
burning wood, paper, and cloth as well.
Water can be used on wood, paper, or cloth,
but don't use water on an electrical fire (can cause shock) or a gasoline fire (it will spread the flames).
A burning tire must be cooled. Lots of water
may be required.
If you're not sure what to use, especially on
a hazardous materials fire, wait for firefighters.
Position yourself upwind. Let the wind carry
the extinguisher to the fire.
Continue until whatever was burning has been cooled. Absence of smoke or flame does not mean the fire cannot restart. Subsections 2.20 and 2.21 Test Your Knowledge 1. What are some things to do at an accident scene to prevent another accident? 2. Name two causes of tire fires. 3. What kinds of fires is a B:C extinguisher not good for? 4. When using your extinguisher, should you get as close as possible to the fire? 5. Name some causes of vehicle fires.
These questions may be on the test. If you can't answer them all, re-read subsections 2.20 and 2.21. Figures 2.20 and 2.21 explain the type of fire extinguisher to use by class of fire. Figure 2.21 Class of Fire/Type of Extinguisher
| Figure 2.20 Class/Type of Fires | |
Class | | Type |
A | | Wood, Paper, Ordinary Combustibles Extinguish by Cooling and Quenching Using Water or Dry Chemicals |
B | | Gasoline, Oil, Grease, Other Greasy Liquids Extinguish by Smothering, Cooling or Heat Shielding using carbon Dioxide or Dry Chemicals |
C | | Electrical Equipment Fires Extinguish with Non-conducting Agents such as Carbon Dioxide or Dry Chemicals. DO NOT USE WATER. |
D | | Fires in Combustible Metals Extinguish by Using Specialized Extinguishing Powders |
2-54 2.22.1 Alcohol and Driving Drinking alcohol and then driving is very dangerous and a serious problem. People who drink alcohol are involved in traffic accidents resulting in over 20,000 deaths every year. Alcohol impairs muscle coordination, reaction time, depth perception, and night vision. It also affects the parts of the brain that control judgment and inhibition. For some people, one drink is all it takes to show signs of impairment.
How Alcohol Works: Alcohol goes directly into the blood stream and is carried to the brain. After passing through the brain, a small percentage is removed in urine, perspiration, and by breathing, while the rest is carried to the liver. The liver can only process one-third an ounce of alcohol per hour, which is considerably less than the alcohol in a standard drink. This is a fixed rate, so only time, not black coffee or a cold shower, will sober you up. If you have drinks faster than your body can get rid of them, you will have more alcohol in your body, and your driving will be more affected. The Blood Alcohol Concentration (BAC) commonly measures the amount of alcohol in your body. See Figure 2.22.
All of the following drinks contain the same amount of alcohol:
Body Weight in Pounds |
1 | 2
0 | 4
0 | 0
A 12-ounce glass of 5% beer.
A 5-ounce glass of 12% wine.
A 1 1/2-ounce shot of 80 proof liquor.
2.22 Alcohol, Other Drugs, and Driving
| What Is A Drink? | | | | | | | | | | | | | | |
| | | | | | | | | | | | | | | |
| It is the alcohol in drinks that affects human | | | | | | | | | | | | | | |
| performance. It doesn't make any difference | | | | | | | | | | | | | | |
| whether that alcohol comes from "a couple of | | | | | | | | | | | | | | |
| beers,” or from two glasses of wine, or two shots of | | | | | | | | | | | | | | |
| hard liquor. | | | | | | | | | | | | | | |
| | | | | | | | | | | | | | | |
| This chart shows Approximate Blood Alcohol | | | | | | | | | | | | | | |
| Content after drinking: | | | | | | | | | | | | | | |
| Drinks | | | Body Weight in Pounds | | | | | | | | Effects | Effects | | |
| | | | 1 0 0 | 1 2 0 | 1 4 0 | 1 6 0 | 1 8 0 | 2 0 0 | 2 2 0 | 2 4 0 | | | | |
0 | | | | .00 | .00 | .00 | .00 | .00 | .00 | .00 | .00 | Limit | | Driving | Only Safe |
1 | | | | .04 | .03 | .03 | .02 | .02 | .02 | .02 | .02 | Begins | | ment | Impair- |
2 | | | | .08 | .06 | .05 | .05 | .04 | .04 | .03 | .03 | Criminal Penalties | | Affected | Driving Skills Significantly |
3 | | | | .11 | .09 | .08 | .07 | .06 | .06 | .05 | .05 | | | | |
4 | | | | .15 | .12 | .11 | .09 | .08 | .08 | .07 | .06 | | | | |
5 | | | | .19 | .16 | .13 | .12 | .11 | .09 | .09 | .08 | | | | |
6 | | | | .23 | .19 | .16 | .14 | .13 | .11 | .10 | .09 | | | | |
7 | | | | .26 | .22 | .19 | .16 | .15 | .13 | .12 | .11 | | | Criminal Penalties | Legally Intoxicated |
8 | | | | .30 | .25 | .21 | .19 | .17 | .15 | .14 | .13 | | | | |
9 | | | | .34 | .28 | .24 | .21 | .19 | .17 | .15 | .14 | | | | |
10 | | | | .38 | .31 | .27 | .23 | .21 | .19 | .17 | .16 | | | | |
| Subtract .01% for each 40 minutes of drinking. One drink is 1.25 oz. | | | | | | | | | | | | | | |
| of 80 proof liquor, 12 oz. of beer, or 5 oz. of table wine. | | | | | | | | | | | | | | |
| FIGURE 2.22 | | | | | | | | | | | | | | |
What Determines Blood Alcohol Concentration? BAC is determined by the amount of alcohol you drink (more alcohol means higher BAC), how fast you drink (faster drinking means higher BAC), and your weight (a small person doesn't have to drink as much to reach the same BAC).
Alcohol and the Brain. Alcohol affects more and more of the brain as BAC builds up. The first part of the brain affected controls judgment and self-control. One of the bad things about this is it can keep drinkers from knowing they are getting drunk.
2-55 Straddling lanes.
Quick, jerky starts.
Not signaling, failure to use lights.
Running stop signs and red lights.
Improper passing (See Figure 2.23).
These effects mean increased chances of a crash and chances of losing your driver's license. Accident statistics show that the chance of a crash is much greater for drivers who have been drinking than for drivers who have not.
How Alcohol Affects Driving. All drivers are affected by drinking alcohol. Alcohol affects judgment, vision, coordination, and reaction time. It causes serious driving errors, such as:
Increased reaction time to hazards.
Driving too fast or too slow.
Driving in the wrong lane.
Running over the curb.
Weaving.
And, of course, good judgment and self-control are absolutely necessary for safe driving.
As BAC continues to build up, muscle control, vision, and coordination are affected more and more. Effects on driving may include:
| Figure 2.23 Effects Of Increasing | | | | | |
| Blood Alcohol Content | | | | | |
| Blood Alcohol Content is the amount of | | | | | |
| alcohol in your blood recorded in | | | | | |
| milligrams of alcohol per 100 milliliters of | | | | | |
| blood. Your BAC depends on the amount of | | | | | |
| blood (which increases with weight) and | | | | | |
| the amount of alcohol you consume over | | | | | |
| time (how fast you drink). The faster you | | | | | |
| drink, the higher your BAC, as the liver can | | | | | |
| only handle about one drink per hour—the | | | | | |
| rest builds up in your blood. | | | | | |
BAC | BAC | Effects on Body | | | | Effects on |
| | | | | | Driving |
| | | | | | Condition |
.02 | | | Mellow feeling, | | Less inhibited. | Less inhibited. |
| | | slight body | | | |
| | | warmth. | | | |
.05 | | Noticeable relaxation. | Noticeable | | | Less alert, less |
| | | relaxation. | | | self-focused, |
| | | | | | coordination |
| | | | | | impairment |
| | | | | | begins. |
.08 | | | Definite | | | Drunk driving |
| | | impairment in | | | limit, impaired |
| | | coordination & | | | coordination & |
| | | judgment | | | judgment. |
.10* | | | Noisy, possible | | Reduction in reaction time. | Reduction in |
| | | embarrassing | | | reaction time. |
| | | behavior, mood | | | |
| | | swings. | | | |
.15 | | | Impaired | | Unable to drive. | |
| | | balance & | | | |
| | | movement, | | | |
| | | clearly drunk. | | | |
.30 | | | Many lose | | | |
| | | consciousness. | | | |
.40 | | | Most lose | | | |
| | | consciousness, | | | |
| | | some die. | | | |
.50 | | | Breathing stops, | | | |
| | | many die. | | | |
| BAC of .10 means that 1/10 of 1 % (or | | | | | |
| 1/1000) of your total blood content is | | | | | |
| alcohol. | | | | | |
2-56 2.23.1 What Are Hazardous Materials? Hazardous materials are products that pose a risk to health, safety, and property during transportation. See Figure 2.24.
2.23.2 Why Are There Rules?
You must follow the many rules about transporting hazardous materials. The intent of the rules is to: Contain the product.
Communicate the risk.
Ensure safe drivers and equipment.
To Contain the Product: Many hazardous products can injure or kill on contact. To protect drivers and others from contact, the rules tell shippers how to package safely. Similar rules tell drivers how to load, transport, and unload bulk tanks. These are containment rules.
To Communicate the Risk: The shipper uses a shipping paper and diamond shaped hazard labels to warn dockworkers and drivers of the risk.
After an accident or hazardous material spill or leak, you may be injured and unable to communicate the hazards of the materials you are transporting. Firefighters and police can prevent or reduce the amount of damage or injury at the scene if they know what hazardous materials are being transported. Your life, and the lives of others, may depend on quickly locating the hazardous materials shipping papers.
For that reason, you must identify shipping papers related to hazardous materials or keep them on top of other shipping papers. You must also keep shipping papers: 2.22.3 Illness Once in a while, you may become so ill that you cannot operate a motor vehicle safely. If this happens to you, you must not drive. However, in case of an emergency, you may drive to the nearest place where you can safely stop.
2.23 Hazardous Materials Rules for All
Commercial Drivers
All drivers should know something about hazardous materials. You must be able to recognize hazardous cargo, and you must know whether or not you can haul it without having a hazardous materials endorsement on your CDL license. In a pouch on the driver's door, or
In clear view within reach while driving, or
On the driver's seat when out of the vehicle.
2.22.2 Other Drugs
Besides alcohol, other legal and illegal drugs are being used more often. Laws prohibit possession or use of many drugs while on duty. They prohibit being under the influence of any "controlled substance," amphetamines (including "pep pills," “uppers,” and "bennies"), narcotics, or any other substance, which can make the driver unsafe. This could include a variety of prescription and over-the-counter drugs (cold medicines), which may make the driver drowsy or otherwise affect safe driving ability. However, possession and use of a drug given to a driver by a doctor is permitted if the doctor informs the driver that it will not affect safe driving ability.
Pay attention to warning labels for legitimate drugs and medicines, and to doctor's orders regarding possible effects. Stay away from illegal drugs. Don't use any drug that hides fatigue--the only cure for fatigue is rest. Alcohol can make the effects of other drugs much worse. The safest rule is don't mix drugs with driving at all.
Use of drugs can lead to traffic accidents resulting in death, injury, and property damage. Furthermore, it can lead to arrest, fines, and jail sentences. It can also mean the end of a person's driving career.
2-57



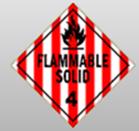
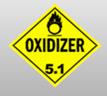
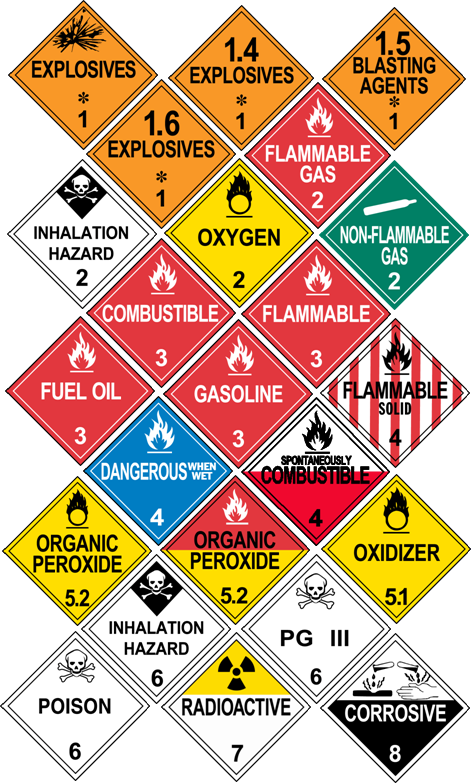



2.23.3 Lists of Regulated Products
Placards are used to warn others of hazardous materials. Placards are signs put on the outside of a vehicle that identify the hazard class of the cargo. A placarded vehicle must have at least four identical placards. They are put on the front, rear, and both sides. Placards must be readable from all four directions. They must be at least 9.84 inches (250mm) square, turned upright on a point, in a diamond shape. Cargo tanks and other bulk packaging display the identification number of their contents on placards or orange panels.
Identification Numbers are a four digit code used by first responders to identify hazardous materials. An identification number may be used to identify more than one chemical on shipping papers. The identification number will be preceded by the letters “NA” or “UN”. The US DOT Emergency Response Guidebook (ERG) lists the chemicals and the identification numbers assigned to them.
| Hazard Class Definitions | | |
Class | | Class Name | Example |
1 | | Explosives | Ammunition, Dynamite, Fireworks |
2 | | Gases | Propane, Oxygen, Helium |
3 | | Flammable | Gasoline, Acetone |
4 | | Flammable Solids | Matches, Fuses |
5 | | Oxidizers | Ammonium Nitrate, Hydrogen Peroxide |
6 | | Poisons | Pesticides, Arsenic |
7 | | Radioactive | Uranium, Plutonium |
8 | | Corrosives | Hydrochloric Acid, Battery Fluid |
9 | | Miscellaneous Hazardous Materials | Formaldehyde, Asbestos |
| | ORM-D (Other Regulated Material- Domestic) | Hair Spray Charcoal Small arms ammunition |
| | Combustible Liquids | Fuel Oils, Lighter Fluid |
| Figure 2.24 Hazardous Materials | | |
Figure 2.25 Hazardous Materials Placards
2-58
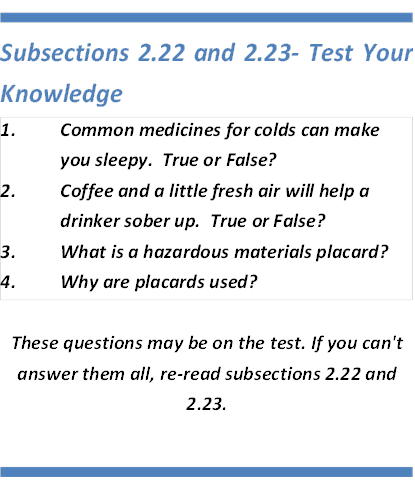
Not all vehicles carrying hazardous materials need to have placards. The rules about placards are given in Section 9 of this manual. You can drive a vehicle that carries hazardous materials if it does not require placards. If it requires placards, you cannot drive it unless your driver license has the hazardous materials endorsement. See Figure 2.25.
The rules require all drivers of placarded vehicles to learn how to safely load and transport hazardous products. They must have a commercial driver license with the hazardous materials endorsement. To get the required endorsement, you must pass a written test on material found in Section 9 of this manual. A tank endorsement is required for any commercial vehicle that is designed to transport any liquid or gaseous materials in a tank or tanks having an individual rated capacity of more than 119 gallons and an aggregate capacity of 1,000 gallons or more that is either permanently or temporarily attached to the vehicle or chassis. The liquid or gas does not have to be a hazardous material.
Drivers who need the hazardous materials endorsement must learn the placard rules. If you do not know if your vehicle needs placards, ask your employer. Never drive a vehicle needing placards unless you have the hazardous materials endorsement. To do so is a crime. When stopped, you will be cited, and you will not be allowed to drive your truck. It will cost you time and money. A failure to placard when needed may risk your life and others if you have an accident. Emergency help will not know of your hazardous cargo. Hazardous materials drivers must also know which products they can load together, and which they cannot. These rules are also in Section 9. Before loading a truck with more than one type of product, you must know if it is safe to load them together. If you do not know ask your employer and consult the regulations.
2-59 Inspecting Cargo
Cargo Weight and Balance
Securing Cargo
Cargo Needing Special Attention
This chapter tells you about hauling cargo safely. You must understand basic cargo safety rules to get a CDL. If you load cargo wrong or do not secure it, it can be a danger to others and yourself. Loose cargo that falls off a vehicle can cause traffic problems and others could be hurt or killed. Loose cargo could hurt or kill you during a quick stop or crash. Your vehicle could be damaged by an overload. Steering could be affected by how a vehicle is loaded, making it more difficult to control the vehicle. Whether or not you load and secure the cargo yourself, you are responsible for: Inspecting your cargo.

Recognizing overloads and poorly balanced
weight. Knowing your cargo is properly secured and
does not obscure your view ahead or to the sides. Knowing your cargo does not restrict your
3.1 Inspecting Cargo
As part of your pre-trip inspection, make sure the truck is not overloaded and the cargo is balanced and secured properly. After Starting the Trip: Inspect the cargo and its securing devices again within the first 50 miles after beginning a trip. Make any adjustments needed. Re-check: Re-check the cargo and securing devices as often as necessary during a trip to keep the load secure. You need to inspect again: After you have driven for 3 hours or 150 miles.
After every break you take during driving.
Federal, state, and local regulations for commercial vehicle weight, securing cargo, covering loads, and where you can drive large vehicles vary from place to place. Know the rules where you will be driving.
3.2 Weight and Balance
You are responsible for not being overloaded. The following are some definitions of weight you should know.
3.2.1 Definitions You Should Know
to have a hazardous materials endorsement. Chapter 9 of this manual has the information you need to pass the hazardous materials test. Chapter 3: Transporting Cargo Safely
This Chapter Covers:
Gross Vehicle Weight Rating (GVWR): The value specified by the manufacturer as the loaded weight of a single vehicle.
Gross Combination Weight Rating (GCWR): The value specified by the manufacturer of the power unit, if the value is displayed on the Federal Motor Vehicle Safety Standard (FMVSS) certification label; or the sum of the gross vehicle weight ratings (GVWRs) or the gross vehicle weights (GVWs) of the power unit and the towed unit(s), or any combination thereof, that produces the highest value. (The underlined and italicized text above is for use by roadside enforcement only to determine whether the driver/vehicle is subject to CDL access to emergency equipment.
Exception to the inspection rule: Per Federal Motor Carrier Rule 392.9 (b) (4) you are not responsible for inspecting the cargo of a commercial motor vehicle and/or trailer, if it bears a “Seal” and you are ordered not to open the unit and inspect the cargo. You are also not responsible for inspecting the cargo of a commercial motor vehicle and/or trailer if the cargo is loaded in such a manner that makes an inspection impracticable (such as a container).
If you intend to carry hazardous material that requires placards on your vehicle, you will also need 3-1 Axle Weight: The weight transmitted to the ground by one axle or one set of axles. Tire Load: The maximum safe weight a tire can carry at a specified pressure. This rating is stated on the side of each tire. Suspension Systems: Suspension systems have a manufacturer's weight capacity rating. Coupling Device Capacity: Coupling devices are rated for the maximum weight they can pull and/or carry.
3.2.2 Legal Weight Limits
You must keep weights within legal limits. States have maximums for GVWs, GCWs, and axle weights. Often, maximum axle weights are set by a bridge formula. A bridge formula permits less maximum axle weight for axles that are closer together. This is to prevent overloading bridges and roadways. Overloading can have bad effects on steering, braking, and speed control. Overloaded trucks have to go very slowly on upgrades. Worse, they may gain too much speed on downgrades. Stopping distance increases and brakes can fail when forced to work too hard.
During bad weather or in mountains, it may not be safe to operate at legal maximum weights. Take this into account before driving.
3.2.3 Don’t Be Top-heavy
The height of the vehicle’s center of gravity is very important for safe handling. A high center of gravity (cargo piled up high or heavy cargo on top) means you are more likely to tip over. It is most dangerous in curves, or if you have to swerve to avoid a hazard. It is very important to distribute the cargo so it is as low as possible. Put the heaviest parts of the cargo under the lightest parts.
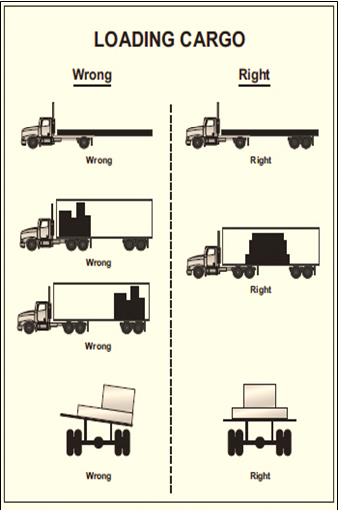
Figure 3.1 Loading Cargo Correctly
3.3 Securing Cargo
3.3.1 Blocking and Bracing
regulations.It is not used to determine whether a vehicle is representative for the purposes of Skills testing). cause hard steering. It can damage the steering axle and tires. Under-loaded front axles (caused by shifting weight too far to the rear) can make the steering axle weight too light to steer safely. Too little weight on the driving axles can cause poor traction and cause the drive wheels to spin more easily. During bad weather, the truck may not be able to keep going. Weight that is loaded so there is a high center of gravity causes a greater chance of rollover. On flat bed vehicles, there is also a greater chance that the load will shift to the side or fall off (See Figure 3.1).
3.2.4 Balance the Weight
Poor weight balance can make vehicle handling unsafe. Too much weight on the steering axle can Blocking is used in the front, back, and/or sides of a piece of cargo to keep it from sliding. Blocking is shaped to fit snugly against cargo. It is secured to
3-2
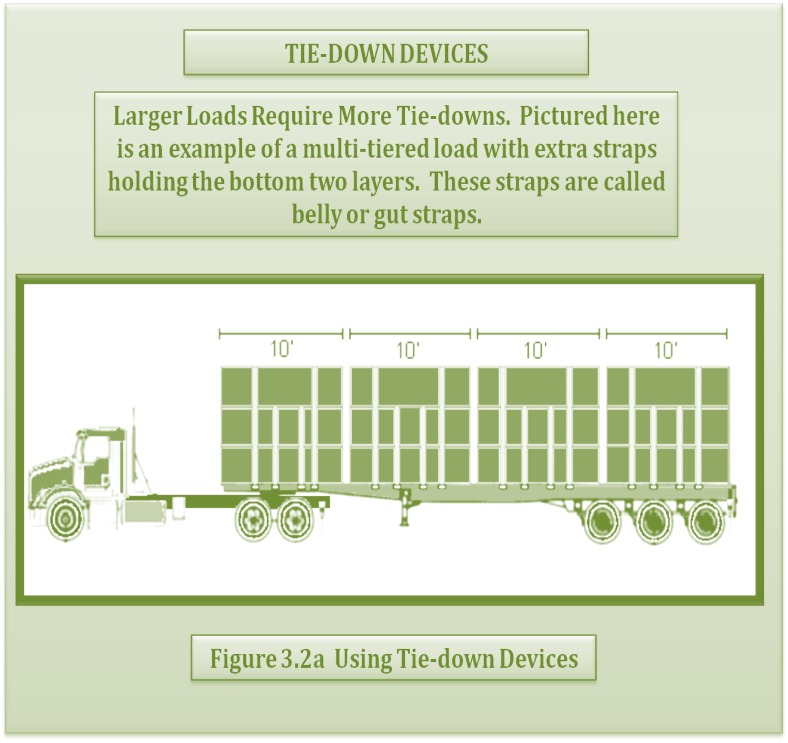
3.3.2 Cargo Tie-down
On flatbed trailers or trailers without sides, cargo must be secured to keep it from shifting or falling off.
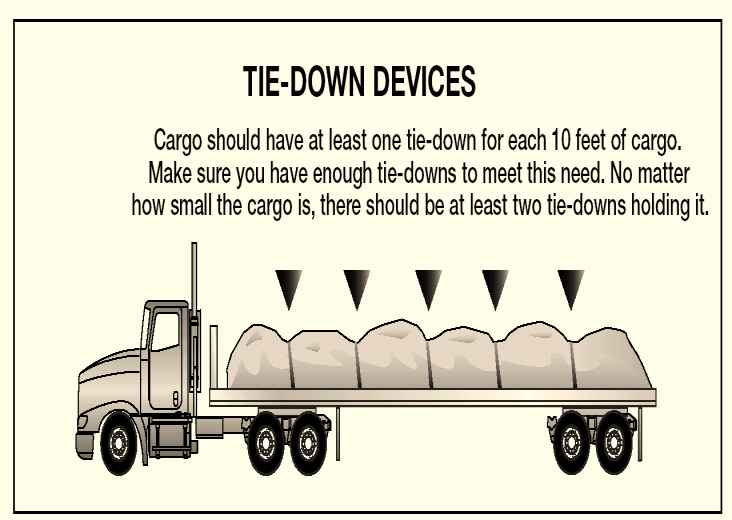
Figure 3.2 Tie Down Devices Figure 3.2.A Using Tie Down Devices
Cargo should have at least one tie-down for each ten feet of cargo. Make sure you have enough tie-downs to meet this need. No matter how small the cargo, it should have at least two tie-downs.
There are special requirements for securing heavy pieces of metal, pipe, and coiled steel, to name a few. Find out what they are if you are to carry such loads. Failure to properly secure these loads can be very dangerous.
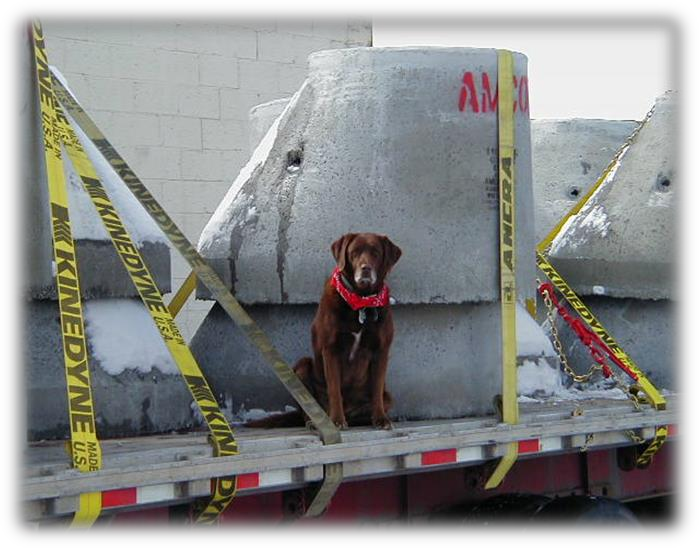
the cargo deck to prevent cargo movement. Bracing is also used to prevent movement of cargo. Bracing goes from the upper part of the cargo to the floor and/or walls of the cargo compartment. (winches, ratchets, clinching components). Tie-downs must be attached to the vehicle correctly (hooks, bolts, rails, rings). See Figure 3.2 and 3.2a.
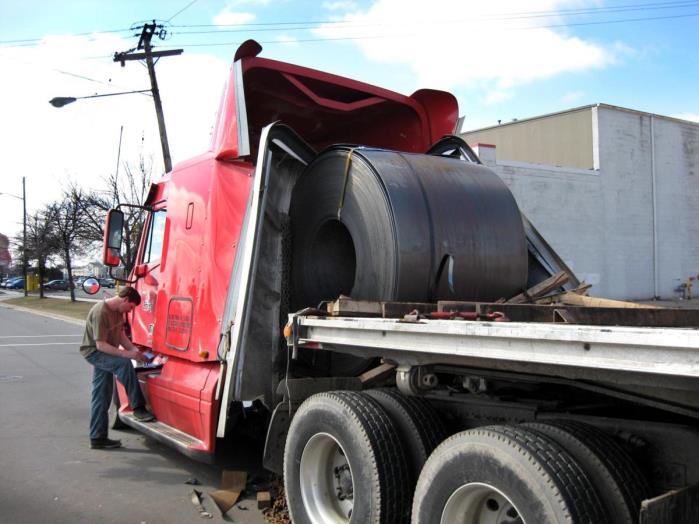
In closed vans, tie-downs can also be important to prevent cargo shifting that may affect the handling of the vehicle. Tie-downs must be of the proper type and proper strength.
Federal regulations require the aggregate working load limit of any securement system used to secure an article or group of articles against movement must be at least one and one-half times the weight of the article or group of articles.
Proper tie-down equipment must be used, including ropes, straps, chains, and tensioning devices
3-3
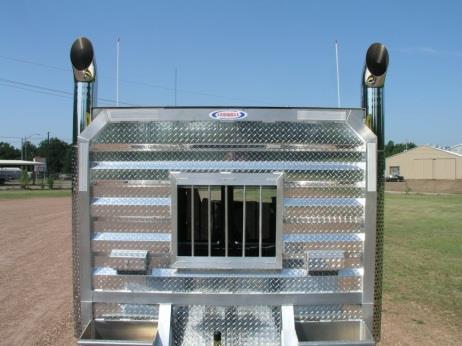
Figure 3.3 Header Board
3.3.4 Covering Cargo
There are two basic reasons for covering cargo:
1.To protect people from spilled cargo. 2.To protect the cargo from weather.
Spill protection is a safety requirement in many states. Be familiar with the laws in the states in which you drive.
You should look at your cargo covers in the mirrors from time to time while driving. A flapping cover can tear loose, uncovering the cargo, and possibly block your view or someone else’s. If you accept a sealed load, you should make sure the bill of lading states something to the effect of: “Shipper loaded & secured-sealed load”. Police can break a seal on a load in an emergency, but you should not open a sealed load without the express permission of the shipper and your company.
3.4 Cargo Needing Special Attention
3.4.1 Dry Bulk
Dry bulk tanks require special care because they have a high center of gravity, and the load can shift. Be extremely cautious (slow and careful) going around curves and making sharp turns.
3.4.2 Hanging Meat
Hanging meat (suspended beef, pork, lamb) in a refrigerated truck can be a very unstable load with a high center of gravity. Particular caution is needed on sharp curves such as off ramps and on ramps. Go slowly. 3.3.3 Header Boards
Front-end header boards (“headache racks”) help protect you from your cargo in case of a crash or emergency stop. (See Figure 3.3) Make sure the front-end structure is in good condition. The front-end structure should block the forward movement of any cargo you carry. You cannot inspect sealed loads, but you can and should check that you don't exceed gross weight and axle weight limits, because you are still responsible for an over loaded vehicle.
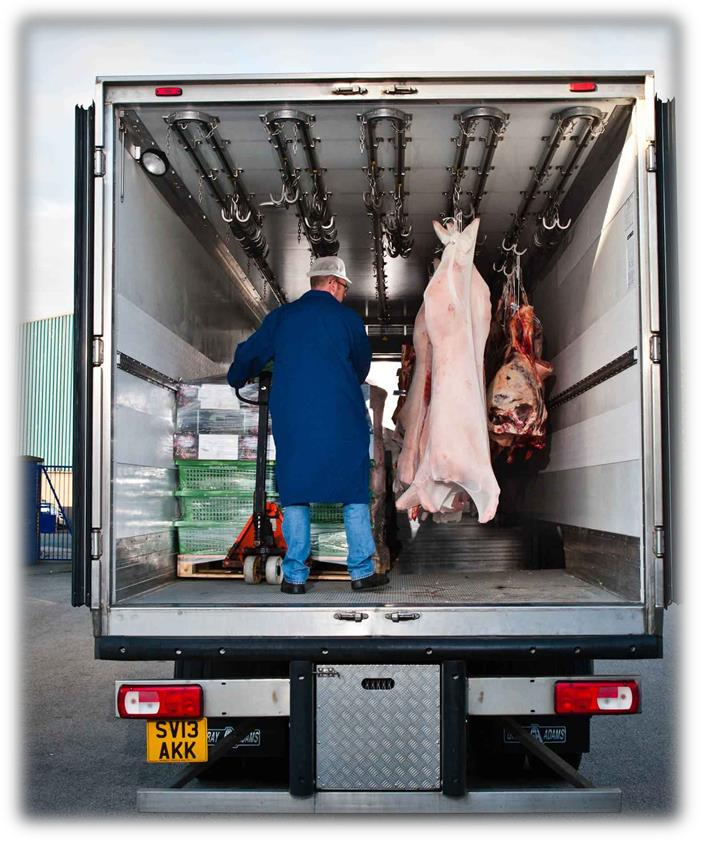
3.3.5 Sealed and Containerized Loads
Containerized loads generally are used when freight is carried part way by rail or ship. Delivery by truck occurs at the beginning and/or end of the journey. Some containers have their own tie-down devices or locks that attach directly to a special frame. Others have to be loaded onto flatbed trailers and must be properly secured just like any other cargo.
3-4
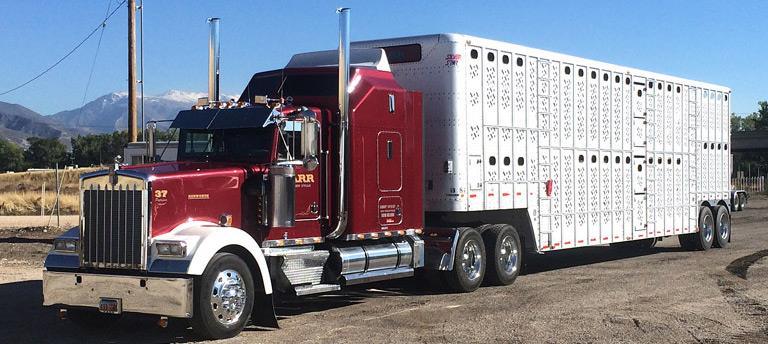
3.4.4 Oversized Loads
Over-length, over-width, and/or overweight loads require special transit permits. Driving is usually limited to certain times. Special equipment may be necessary such as “wide load” signs, flashing lights, flags, etc. Such loads may require a police escort or pilot vehicles bearing warning signs and/or flashing lights. These special loads require special driving care.
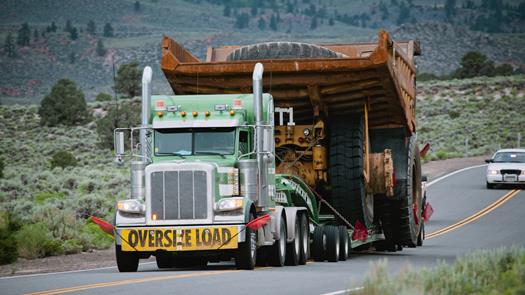
Section 3- Test Your Knowledge
1.What four things related to cargo are drivers
responsible for?
- 2. How often must you stop while on the road to check your cargo?
- 3. How is Gross Combination Weight Rating different from Gross Combination Weight?
- 4. Name two situations where legal maximum weights may not be safe.
- 5. What can happen if you don’t have enough weight on the front axle?
- 6. What is the minimum number of tie-downs for any flatbed load?
- 7. What is the minimum number of tie-downs for a 20 foot load?
- 8. Name the two basic reasons for covering cargo on an open bed.
- 9. What must you check before transporting a sealed load? These questions may be on your test. If you can’t answer them all, re-read Chapter 3. 3.4.3 Livestock Livestock can move around in a trailer, causing unsafe handling characteristics. With less than a full load, use false bulkheads to keep livestock bunched together. Even when bunched, special care is necessary because livestock can lean on curves. This shifts the center of gravity and makes rollover more likely. 3-5 Vehicle Inspection

Loading
On the Road
Post-trip Vehicle Inspection
Prohibited Practices
Use of Brake-Door Interlocks
Bus drivers must have a commercial driver license if they drive a vehicle designed to seat 16 or more people, including the driver.
Bus drivers must have a passenger endorsement on their commercial driver’s license. To get the endorsement, you must pass a knowledge test on Chapters 2 and 4 of this manual. If your bus has air brakes, you must also pass a knowledge test on Chapter 5. You must also pass the skills tests in a passenger vehicle of the license class you wish to drive.
If you operate a vehicle that requires a passenger (P) endorsement you will only be authorized to operate the class of vehicle that you used in your passenger endorsement skills test (i.e., if you skills test in a Class C bus you cannot drive a Class B bus, but if tested in a Class B bus, you can drive both Class B and C buses).
If you test in a Class B bus, you will receive an (M) restriction on your CDL; this is normal. It means you cannot operate a Class A bus. Class A busses are very rare in the United States, but there are some, so Federal rules require this restriction. See Figure 4.0.
If you test in a Class C bus, you will receive an (N) restriction on your CDL: No Class A or B bus Figure 4.0 Class A Passenger Bus
4.1 Vehicle Inspection
Before driving your bus, you must be sure it is safe. You must review the inspection report made by the previous driver. Only if defects reported earlier have been certified as repaired or not needed to be repaired, should you sign the previous driver's report. This is your certification that the defects reported earlier have been fixed.
4.1.1 Vehicle Systems
Make sure these things are in good working order before driving:
Service brakes, including air hose couplings (if your bus has a trailer or semitrailer).
Parking brake.
Steering mechanism.
Lights and reflectors.
Tires (front wheels must not have recapped or re-grooved tires).
Horn.
Windshield wipers.
Rear-vision mirror or mirrors.
Coupling devices (if present).
Wheels and rims.
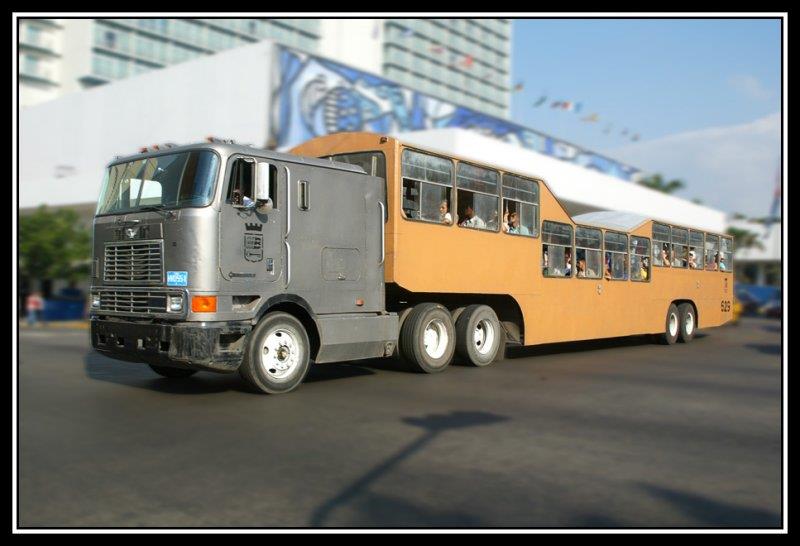
Chapter 4: Transporting Passengers Safely
This Chapter Covers:
Emergency equipment.
Make sure your bus has the fire extinguisher and emergency reflectors required by law. The bus must also have spare electrical fuses, unless equipped with circuit breakers.
4-1 4.1.3 Bus Interior
People sometimes damage unattended buses. Always check the interior of the bus before driving to ensure rider safety. Aisles and stairwells should always be clear. The following parts of your bus must be in safe working condition:
Each handhold and railing.
Floor covering.
Signaling devices, including the restroom
emergency buzzer, if the bus has a restroom. Emergency exit handles.
The seats must be safe for riders. All seats must be securely fastened to the bus.
Never drive with an open emergency exit door or window. The “Emergency Exit” sign on an emergency door must be clearly visible. If there is a red emergency door light, it must work. Turn it on at night or any other time you use your outside lights.
4.1.4 Roof Hatches
You may lock some emergency roof hatches in a partly open position for fresh air. Do not leave them open as a regular practice. Keep in mind the bus’s higher clearance while driving with them open.
4.1.5 Use Your Seatbelt!
The driver’s seat should have a seat belt in good working order. Always use it for safety.
4.2 Loading and Trip Start
Allows the driver to move freely and easily.
Allows riders to exit by any window or door in an emergency.
Protects riders from injury if carry-on baggage falls or shifts.
4.2.1 Hazardous Materials
Watch for cargo or baggage containing hazardous materials. Most hazardous materials cannot be carried on a bus.
The Federal Hazardous Materials Table shows which materials are hazardous. They pose a risk to health, safety, and property during transportation. The rules require shippers to mark containers of hazardous material with the material’s name, identification number, and hazard label. There are nine different four inch, diamond-shaped hazard labels (See Table 4.1). Watch for the diamond-shaped labels and do not transport any hazardous material unless you are sure the rules allow it.
4.2.2 Forbidden Hazardous Materials
Buses may carry small-arms ammunition labeled ORM-D, emergency hospital supplies, and drugs. You can carry small amounts of some other hazardous materials if the shipper cannot send them any other way. Buses must never carry the following: Division 2.3 poison gas, liquid Class 6 poison, tear gas, irritating material.
More than 100 pounds of solid Class 6 poisons.
Explosives in the space occupied by people, 4.1.2 Access Doors and Panels
As you check the outside of the bus, close any open emergency exits. Also, close any open access panels (for baggage, battery, restroom service, engine, etc.) before driving. Do not allow riders to leave carry-on baggage in a doorway or aisle. There should be nothing in the aisle that might trip other riders. Secure baggage and freight in ways that avoid damage and that:
except small arms ammunition.
4-2 More than 500 pounds total of allowed hazardous materials, and no more than 100 pounds of any one class.
Riders sometimes board a bus with an unlabeled hazardous material. Do not allow riders to carry on common hazards such as car batteries or gasoline.

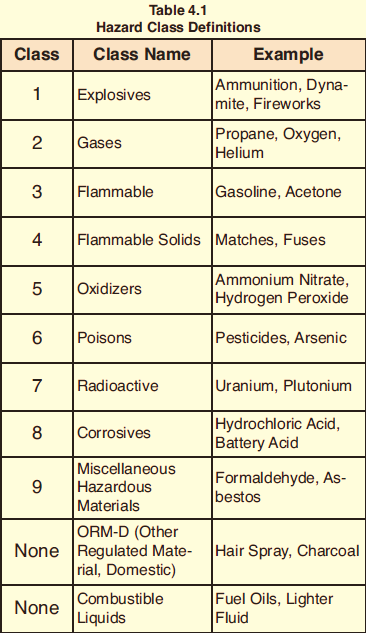
Table 4.1 Hazard Class Definitions
4.2.3 Standee Line
No rider may stand forward of the rear of the driver’s seat. Buses designed to allow standing must have a two inch line on the floor or some other means of showing riders where they cannot stand. 4.2.4 At Your Destination
When arriving at the destination or intermediate stops, announce in a clear voice:
1.The location.
2.Reason for Stopping.
3.Next departure time.
4.Bus number.
Remind riders to take carry-on baggage with them if they get off the bus. If the aisle is on a lower level than the seats, remind riders of the step-down. It is best to tell them before coming to a complete stop.
Charter bus drivers should not allow riders on the bus until departure time. This will help prevent theft or vandalism of the bus.
4.3 On the Road
4.3.1 Passenger Supervision
Many charter and intercity carriers have passenger comfort and safety rules. Mention rules about smoking, drinking, or use of radio and tape players at the start of the trip. Explaining the rules at the start will help to avoid trouble later on.
While driving, scan the interior of your bus as well as the road ahead, to the sides, and to the rear. You may have to remind riders about the rules, or to keep their arms and heads inside the bus.
4.3.2 Stops
Riders can stumble when getting on or off the bus, and when the bus starts or stops. Caution riders to watch their step when leaving the bus. Wait for them to sit down or brace themselves before starting. Starting and stopping should be as smooth as possible to avoid rider injury. Labeled radioactive materials in the space This is called the standee line. All standing riders must stay behind it. occupied by people.
4-3 make sure there isn’t another train coming in the other direction on other tracks.
If your bus has a manual transmission,
never change gears while crossing the tracks.
You do not have to stop, but must slow down and carefully check for other vehicles in the following situations: 4.3.3 Common Accidents
The Most Common Bus Accidents: Bus accidents often happen at intersections. Use caution, even if a signal or stop sign controls other traffic. School and mass transit buses sometimes scrape off mirrors or hit passing vehicles when pulling out from a bus stop. Remember the clearance your bus needs, and watch for poles and tree limbs at stops. Know the size of the gap your bus needs to accelerate and merge with traffic and wait for the gap to open before leaving the stop. Never assume other drivers will brake to give you room when you signal or start to pull out. • At streetcar crossings. • Where a policeman or flagman is directing traffic. • If a traffic signal is green. • At crossings marked as “exempt” or “abandoned.”
4.3.6 Drawbridges
Stop at Drawbridges. Stop at drawbridges that do not have a signal light or traffic control attendant. Stop at least 50 feet before the draw of the bridge and look to make sure the draw is completely closed before crossing. You do not need to stop, but you must slow down and make sure it’s safe, when: 4.3.4 Speed on Curves
Crashes on curves that kill people and destroy buses are the result of excessive speed, often when rain or snow has made the road slippery. Every banked curve has a safe “design speed.” In good weather, the posted speed is safe for cars, but it may be too high for many buses. With good traction, the bus may roll over; with poor traction, it might slide off the curve. Reduce speed for curves! If your bus leans toward the outside on a banked curve, you are driving too fast. •There is a traffic light showing green.
•The bridge has an attendant or traffic officer who controls traffic whenever the bridge opens.
4.3.5 Railroad-highway Crossings
Stop at Railroad Crossings:
Stop your bus between 15 and 50 feet
before railroad crossings.
Listen and look in both directions for trains.
Occasionally, you may have a drunk or disruptive rider. You must ensure this rider’s safety as well as that of others. Don’t discharge such riders where it would be unsafe for them. It may be safer at the next scheduled stop or a well-lighted area where there are other people. Many carriers have guidelines for handling disruptive riders. Before crossing after a train has passed,
4.4 Post-Trip (After Trip) Vehicle
Inspection
Inspect your bus at the end of each shift. If you work for an interstate carrier, you must complete a written inspection report for each bus driven. The report must specify each bus and list any defect that would affect safety or result in a breakdown. If there are no defects, the report should say so.
Riders sometimes damage safety-related parts such as handholds, seats, emergency exits, and windows. You should open your forward door if it improves your ability to see or hear an approaching train. 4-4 Test Your Knowledge
4.5 Prohibited Practices
Avoid fueling your bus with riders on board unless it is absolutely necessary. Never refuel in a closed building with riders on board.
Don’t talk with riders, or engage in any other distracting activity, while driving.
Do not tow or push a disabled bus with riders aboard the vehicle, unless getting off would be unsafe. Only tow or push the bus to the nearest safe spot to discharge passengers. Follow your employer’s guidelines on towing or pushing disabled buses. 1.Name some things to check in the interior of a bus during a Vehicle inspection. 2.What are some hazardous materials you can transport by bus? 3.What are some hazardous materials you can’t transport by bus? 4.What is a standee line? 5.Does it matter where you make a disruptive passenger get off the bus? 6.How far from a railroad crossing should you stop? 7.When must you stop before crossing a 4.6 Use of Brake-Door Interlocks Urban mass transit coaches may have a brake and accelerator interlock system. The interlock applies the brakes and holds the throttle in idle position when the rear door is open. The interlock releases when you close the rear door. Do not use this safety feature in place of the parking brake. drawbridge? 8.Describe from memory the “prohibited practices” listed in the manual. 9.The rear door of a transit bus has to be open to put on the parking brake. True or False?
These questions may be on your test. If you can’t answer them all, re-read Chapter 4. SPECIAL NOTE: Recreational Vehicles are exempt from the Commercial Driver’s License requirements. However, any person who operates a CUSTOM MOTORCOACHfor commercial purposes, with a gross vehicle weight rating or gross vehicle weight greater than 26,001 pounds, is required to have a Commercial Driver’s License with a passenger endorsement. This rule applies even if the vehicle is designed or used to transport less than 16 passengers, including the driver.
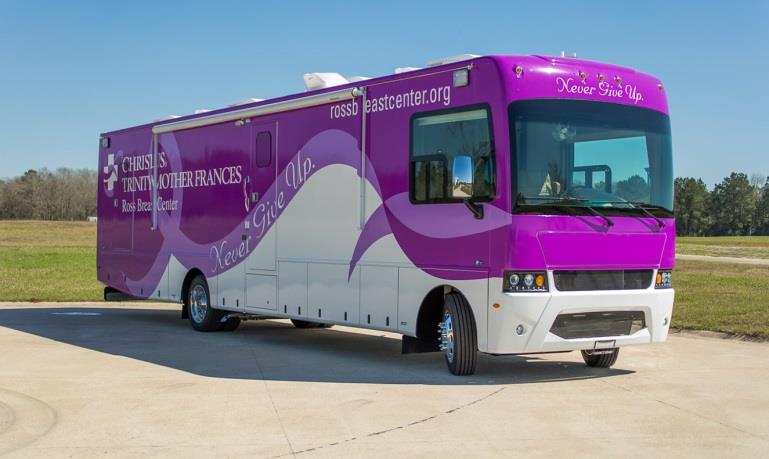
If you report this damage at the end of a shift, mechanics can make repairs before the bus goes out again. Mass transit drivers should also make sure passenger signaling devices and brake-door interlocks work properly. Chapter 4
4-5 Air Brake System Parts
Dual Air Brake Systems
Inspecting Air Brakes
Using Air Brakes
This chapter tells you about air brakes. If you want to drive a truck or bus with air brakes, or pull a trailer with air brakes, you need to read this section. If you want to pull a trailer with air brakes, you also need to read Chapter 6, Combination Vehicles.
NOTE: You only need to take a written and skills test on the air brake system if the vehicle you intend to drive has an air brake system and requires that you have a CDL to operate it. If you do not pass the air brake written test, or if you test in a vehicle without air brakes, you will have a restriction (L) placed on your CDL.
If you later wish to remove the restriction, you need to pass the written test and complete a new skills test in a commercial vehicle with air brakes. Once you have passed a test in a vehicle with air brakes, the restriction is permanently lifted.
Air brakes use compressed air to make the brakes work. Air brakes are a good and safe way of stopping large, heavy vehicles; however, the brakes must be well maintained and used properly.
Air brakes are really three different braking systems: service brake, parking brake, and emergency brake.
➢The service brake system applies and releases the brakes when you use the brake pedal during normal driving.
➢The parking brake system applies and ➢The emergency brake system uses parts of the service and parking brake systems to stop the vehicle in a brake system failure.
The parts of these systems are discussed in greater detail below.
5.1 The Parts of an Air Brake System
There are many parts to an air brake system. You should know about the parts discussed here.
5.1.1 Air Compressor
The air compressor pumps air into the air storage tanks (reservoirs). The air compressor is connected to the engine through gears or a v-belt. The compressor may be air cooled or may be cooled by the engine cooling system. It may have its own oil supply or be lubricated by engine oil. If the compressor has its own oil supply, check the oil level before driving.
5.1.2 Air Compressor Governor
The governor controls when the air compressor will pump air into the air storage tanks. When air tank pressure rises to the “cut-out” level (around 125 pounds per square-inch or "psi"), the governor stops the compressor from pumping air. When the tank pressure falls to the “cut-in” pressure (around 100 psi), the governor allows the compressor to start pumping again.
5.1.3 Air Storage Tanks
Air storage tanks are used to hold compressed air. The number and size of air tanks varies among vehicles. The tanks will hold enough air to allow the brakes to be used several times, even if the compressor stops working. Chapter 5: Air Brakes
This Chapter Covers:
releases the parking brakes when you use the parking brake control.
5-1 1.Manually operated by turning a quarter turn or by pulling a cable. You must drain the tanks yourself at the end of each day of driving (See Figure 5.1).
2.Automatic - the water and oil are automatically expelled. These tanks may be equipped for manual draining as well.
Automatic air tanks are available with electric heating devices. These help prevent freezing of the automatic drain in cold weather. Check the alcohol container and fill up as necessary, every day during cold weather. Daily air tank drainage is still needed to get rid of water and oil (unless the system has automatic drain valves).
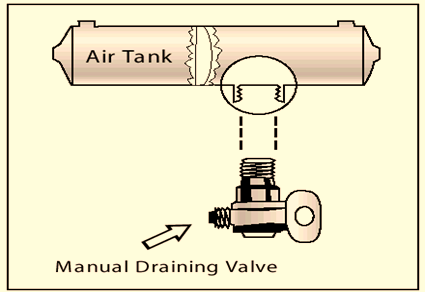
5.1.6 Safety Valve
A safety relief valve is installed in the first tank the air compressor pumps air to. The safety valve protects the tank and the rest of the system from too much pressure. The valve is usually set to open at 150 psi. If the safety valve releases air, something is wrong. Have the fault fixed by a mechanic.
Figure 5.1 Air Tank Drain
5.1.5 Alcohol Evaporator
Some air brake systems have an alcohol evaporator to put alcohol into the air system. This helps to reduce the risk of ice in air brake valves and other parts during cold weather. Ice inside the system can make the brakes stop working.

5.1.4 Air Tank Drains
Compressed air usually has some water and some compressor oil in it, which is bad for the air brake system. For example, the water can freeze in cold weather and cause brake failure. The water and oil tend to collect in the bottom of the air tank. Be sure that you drain the air tanks completely.
Each air tank is equipped with a drain valve in the bottom. There are two types:
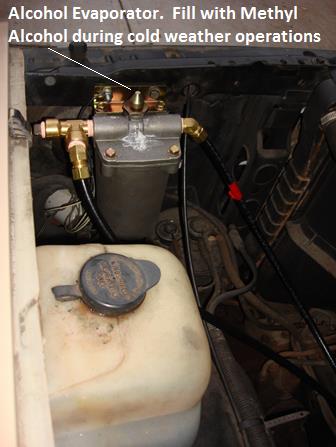
5.1.7 The Brake Pedal
You put on the brakes by pushing down the brake pedal (also called the foot valve or treadle valve). Pushing the pedal down harder applies more air pressure. Letting up on the brake pedal reduces the air pressure and releases the brakes. Releasing the brakes lets some compressed air go out of the system, so the air pressure in the tanks is reduced. It must be made up by the air compressor. Pressing and releasing the pedal unnecessarily can let air out 5-2 5.1.8 Foundation Brakes
Foundation brakes are used at each wheel. The most common type is the S-cam drum brake. The parts of the brake are discussed below.
Brake Drums, Shoes, and Linings: Brake drums are located on each end of the vehicle’s axles. The wheels are bolted to the drums. The braking mechanism is inside the drum. To stop, the brake shoes and linings are pushed against the inside of the drum. This causes friction, which slows the vehicle (and creates heat). The heat a drum can take without damage depends on how hard and how long the brakes are used. Too much heat can make the brakes stop working.
S-cam Brakes: When you push the brake pedal, air
is let into each brake chamber. Air pressure pushes Figure 5.2 Drum Brake
Wedge Brakes: In this type of brake, the brake chamber push rod pushes a wedge directly between the ends of two brake shoes. This shoves them apart and against the inside of the brake drum. Wedge brakes may have a single brake chamber, or two-brake chambers pushing wedges in at both ends of the brake shoes. Wedge type brakes may be self-adjusting or may require manual adjustment (See Figure 5.2a).
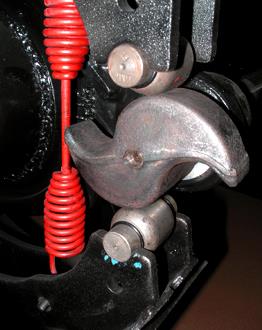
the rod out, moving the slack adjuster, thus twisting the brake camshaft. This turns the S-cam (so called because it is shaped like the letter “S”). The S-cam forces the brake shoes away from one another and presses them against the inside of the brake drum. When you release the brake pedal, the S-cam rotates back and a spring pulls the brake shoes away from the drum, letting the wheels roll freely again (See Figure 5.2).
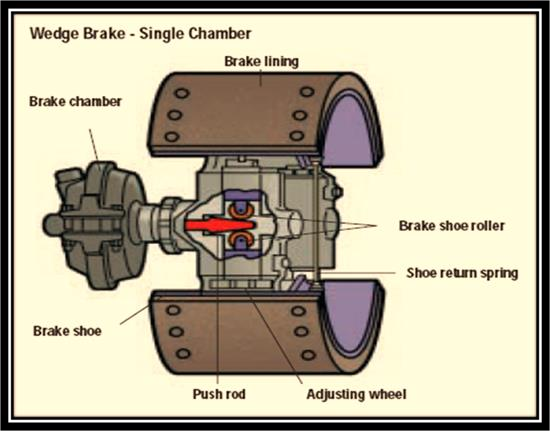
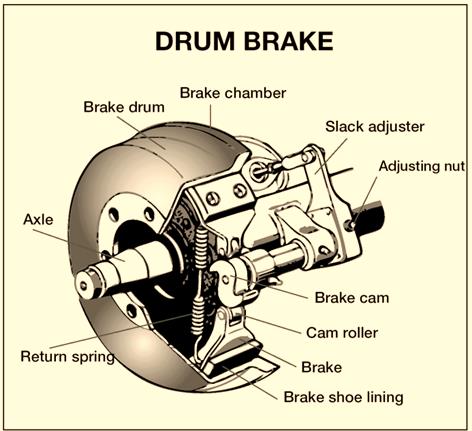
faster than the compressor can replace it. If the pressure gets too low, the brakes won’t work.
Figure 5.2a Wedge Brake
5-3
Figure 5.2b Disk Brake
Wedge brakes and disc brakes are less common than S-cam brakes.
5.1.9 Supply Pressure Gauges
All vehicles with air brakes have a pressure gauge connected to the air tank. If the vehicle has a dual air brake system, there will be a gauge for each half of the system, or a single gauge with two needles. Dual systems will be discussed later. These gauges tell you how much pressure is in the air tanks.
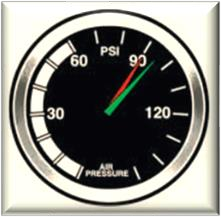
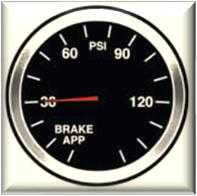
5.1.11 Low Air Pressure Warning
A low air pressure warning signal is required on vehicles with air brakes. A warning signal you can see must come on before the air pressure in the tanks falls below 60 psi (or one half the compressor governor cutout air pressure on older vehicles).
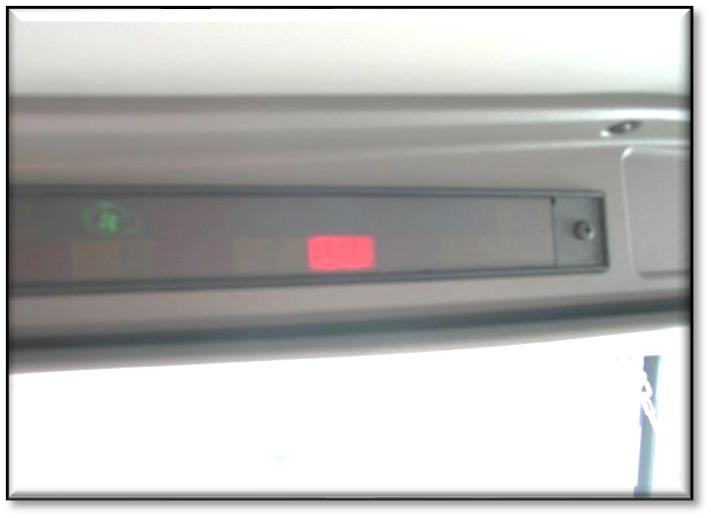
The warning is usually a red light- it may be on the dash or near the visor overhead. A buzzer may also come on.
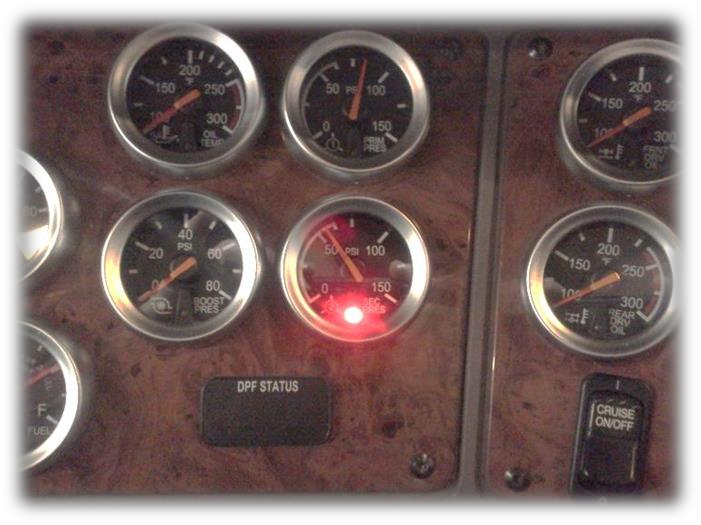
Another type of warning found on some very old trucks and busses is the “wig wag.” This device drops a mechanical arm into your view when the pressure in the system drops below about 55 psi. An Disc Brakes: In air-operated disc brakes, air pressure acts on a brake chamber and slack adjuster like S-cam brakes. But instead of the S-cam, a “power screw” is used. When the brakes are applied, the pressure of the brake chamber on the slack adjuster turns the power screw. This causes the caliper to clamp two brake pads against a rotor (like a C-clamp). See Figure 5.2b use a lower gear. The need for increased pressure can also be caused by brakes out of adjustment, air leaks, or mechanical problems.
5.1.10 Application Pressure
Gauge
This gauge shows how much air pressure you are applying to the brakes (This gauge is not on all vehicles). Increasing application pressure to hold the same speed means the brakes are fading. You should slow down and 5-4

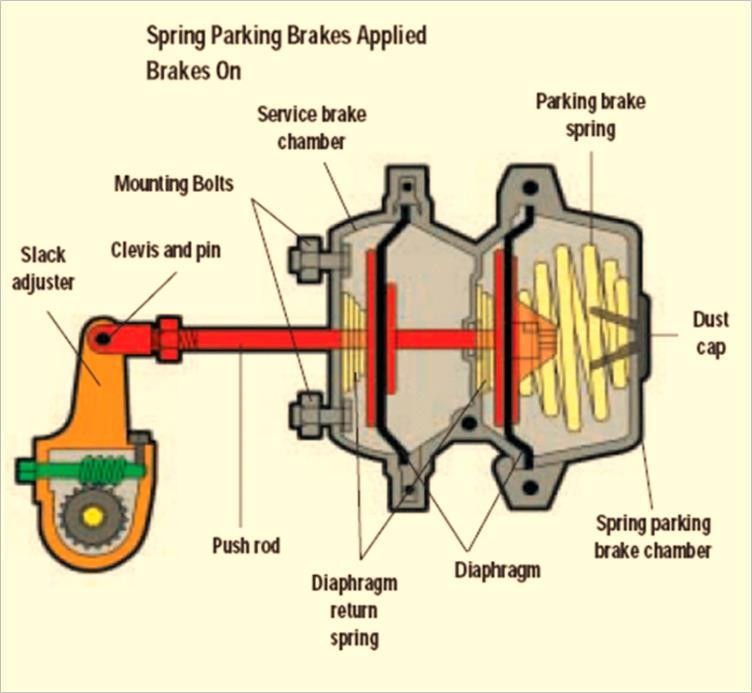
5.1.12 Stop Light Switch
Drivers behind you must be warned when you put your brakes on. The air brake system does this with an electric switch that works by air pressure. The switch turns on the brake lights when you put on the air brakes.
A parking brake control in the cab allows the driver to let the air out of the brake chamber, which results in the spring applying the brakes (the linings will be forced against the drums). A leak in the air brake system, which causes all the air to be lost, will also cause the springs to put on the brakes.
Tractor and straight truck spring brakes will come fully on when air pressure drops to a range of 20 to 45 psi(typically 20 to 30 psi). Do not wait for the brakes to come on automatically. When the low air pressure warning light and buzzer first come on, bring the vehicle to a safe stop right away, while you can still control the brakes.
The braking power of spring brakes depends on the brakes being in adjustment. If the brakes are not 5.1.14 Spring Brakes All trucks, truck tractors, and buses must be equipped with emergency brakes and parking brakes. They must be held on by mechanical force, (because air pressure can eventually leak away). Spring brakes are usually used to meet these needs. When driving, powerful springs are held back by air pressure. If the air pressure is removed, the springs put on the brakes. See the Diagram below- the spring brakes are a part of the brake chamber. automatic wig wag will rise out of your view when the pressure in the system goes above 55 psi. The manual reset type must be placed in the “out of view” position manually, and it will not stay in place until the pressure in the system is above 55 psi.
On large buses it is common for the low pressure warning devices to signal at 80-85 psi.
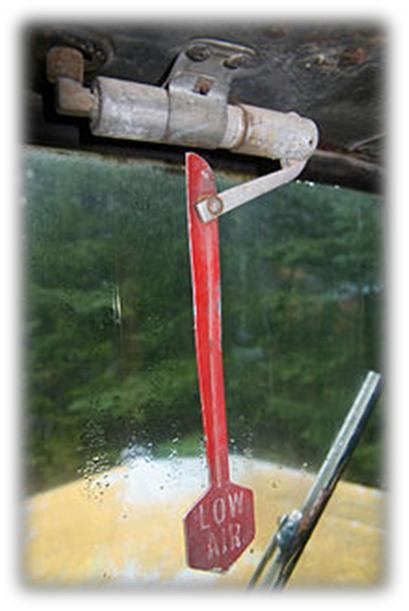
5.1.13 Front Brake Limiting Valve
Some older vehicles (made before 1975) have a front brake limiting valve and a control in the cab. The control is usually marked “normal” and “slippery.” When you put the control in the “slippery” position, the limiting valve cuts the “normal” air pressure to the front brakes by half. Limiting valves were used to reduce the chance of the front wheels skidding on slippery surfaces. However, they actually reduce the stopping power of the vehicle. Front wheel braking is good under all conditions. Tests have shown front wheel skids from braking are not likely even on ice. Make sure the control is in the “normal” position to have normal stopping power. Many vehicles have automatic front wheel limiting valves. They reduce the air to the front brakes except when the brakes are put on very hard (55 psi or more application pressure). These valves cannot be controlled by the driver. 5-5 5.1.15 Parking Brake Controls
In newer vehicles with air brakes, you put on the parking brakes using a diamond-shaped, yellow, push-pull control knob.
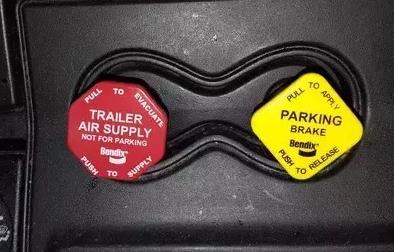
You pull the knob out to evacuate the air from the brake chamber and put the parking brakes (spring brakes) on, and push it in to release them. On older vehicles, the parking brakes may be controlled by a lever. Use the parking brakes whenever you park.
Caution! Never push the brake pedal down when the spring brakes are on. If you do, the brakes could be damaged by the combined forces of the springs and the air pressure. Many brake systems are designed so this will not happen. But not all systems are set up that way, and those that are may not always work. It is much better to develop the habit of not pushing the brake pedal down when the spring brakes are on.
Trailer Brake Control Valves:
In some vehicles a control handle on the steering column or dash board may be used to apply the trailer brakesonly, gradually. This brake is known by different names. It is sometimes called a Modulating Valve, Trolley Valve, Johnson Bar, etc. It may be spring-loaded so you have a feel for the braking action. The more you move the control lever, the harder the trailer brakes come on. Do not use the modulating control valve to park a vehicle. Use the parking brake(s). Trailer Brake Handle
Dual Parking Control Valves: When main air pressure is lost, the spring brakes come on. Some vehicles, such as buses, have a separate air tank which can be used to release the spring brakes. This is so you can move the vehicle in an emergency. One of the valves is a push-pull type and is used to put on the spring brakes for parking. The other valve is spring loaded in the “out” position. When you push the control in, air from the separate air tank releases the spring brakes so you can move the vehicle.
When you release the button, the spring brakes come on again. There is only enough air in the separate tank to do this a few times. Therefore, plan carefully when moving, otherwise, you may be adjusted properly, neither the regular brakes nor the emergency/parking brakes will work right.

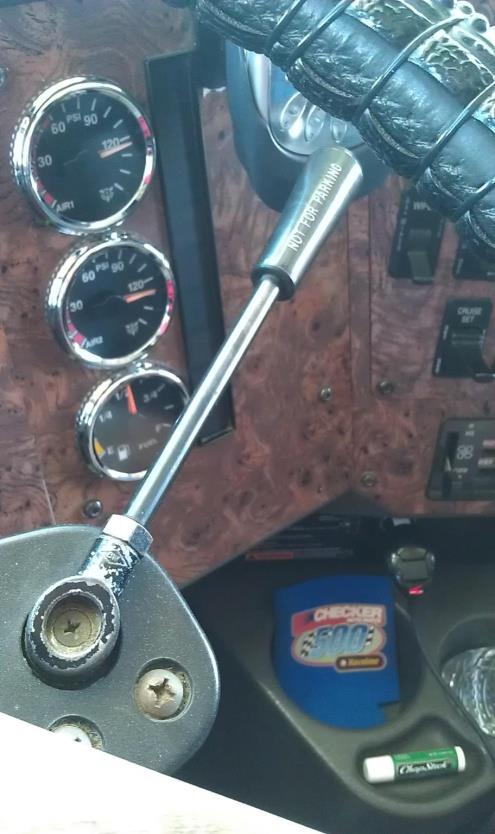
5-6
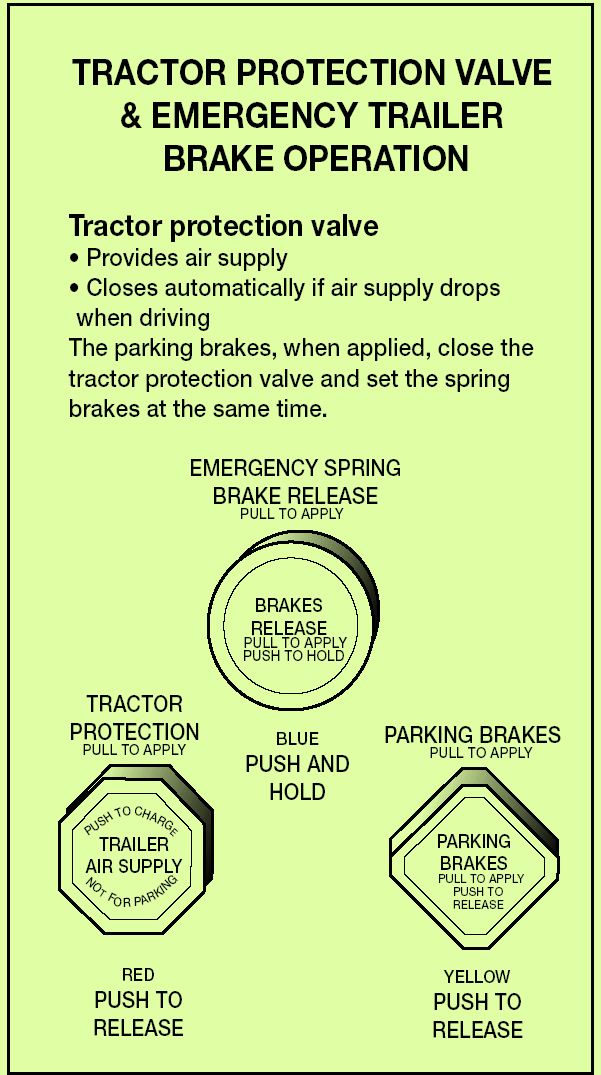
Figure 5.3 TPV and Brake Operation
5.1.16 Antilock Braking Systems (ABS)
Truck tractors with air brakes built on or after March 1, 1997, and other air brakes vehicles, (trucks, buses, trailers, and converter dollies) built on or after March 1, 1998, are required to be equipped with antilock brakes. Many commercial vehicles built before these dates have been voluntarily equipped with ABS. Check the certification label for the date of manufacture to determine if your vehicle is equipped with ABS. ABS is a computerized system that keeps your wheels from locking up during hard brake applications. Vehicles with ABS have yellow malfunction lamps to tell you if something isn’t working.
➢Tractors, trucks, and buses will have yellow 1998 are required to have a lamp on the left side. ➢On newer vehicles, the malfunction lamp comes on at start-up for a bulb check, and then goes out quickly. On older systems, the lamp could stay on until you are driving over five mph. If the lamp stays on after the bulb check, or goes on once you are under way, ou may have lost ABS control at one or more wheels.
In the case of towed units manufactured before it was required by the Department of Transportation, it may be difficult to tell if the unit is equipped with ABS. Look under the vehicle for the electronic control unit (ECU) and wheel speed sensor wires coming from the back of the brakes.
ABS is an addition to your normal brakes. It does not decrease or increase your normal braking capability. ABS only activates when wheels are about to lock up. ABS does not necessarily shorten your stopping distance, but it does help you keep the vehicle under control during hard braking.
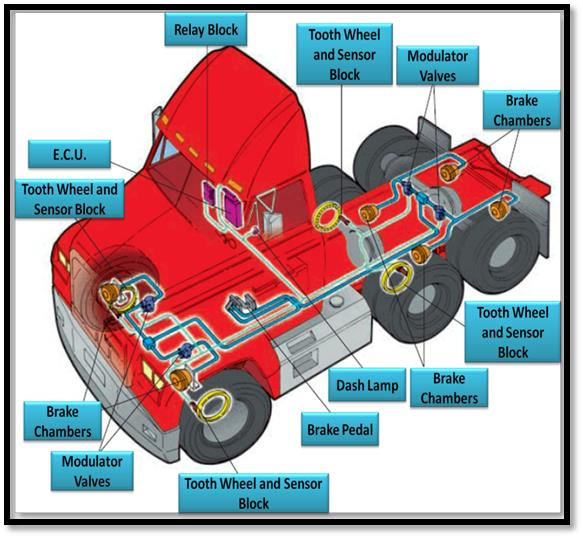
➢Trailers will have yellow ABS malfunction stopped in a dangerous location when the separate air supply runs out (See Figure 5.3). lamps on the left side, either on the front or rear corner. ➢Dollies manufactured on or after March 1,
Figure 5.4 ABS System ABS malfunction lamps on the instrument panel. 5-7
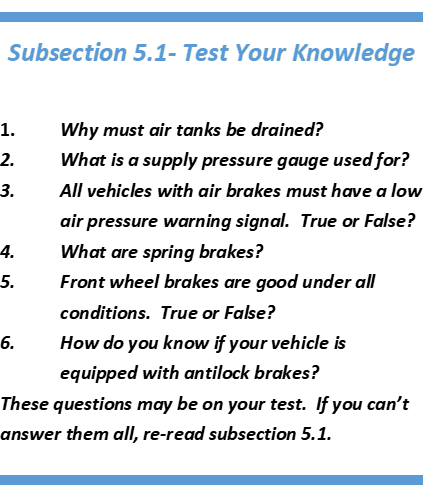
5.3 Inspecting Air Brake Systems
You should use the basic seven-step inspection procedure described in Chapter 2 to inspect your vehicle. There are more things to inspect on a vehicle with air brakes than one without them. These things are discussed below, in the order they fit into the seven-step method.
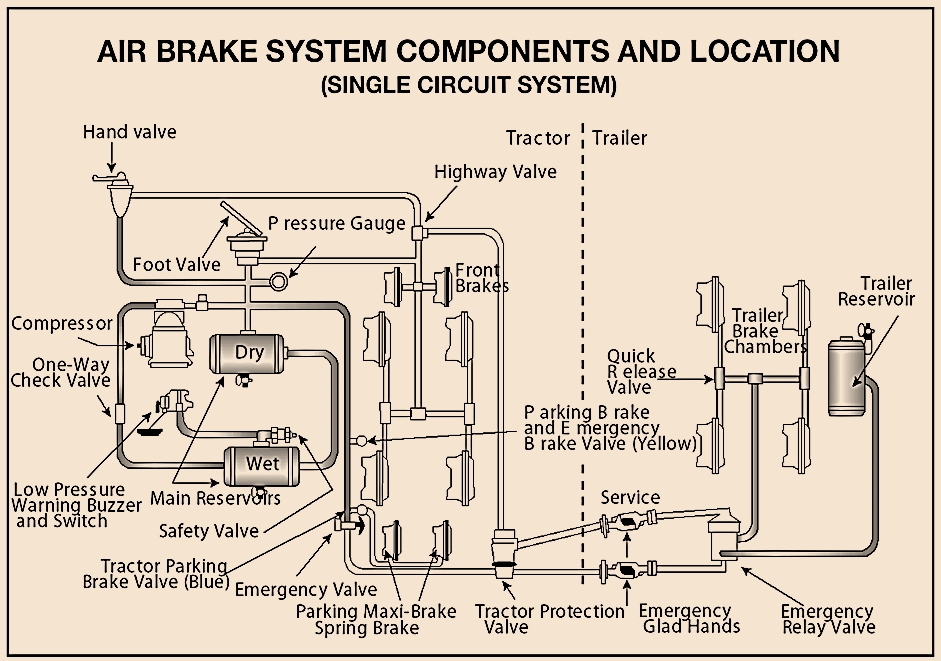
brakes on the rear axle or axles. The other system operates the regular brakes on the front axle, and possibly one rear axle. Both systems supply air to the trailer (if there is one). The first system is called the “primary” system. The other is called the “secondary” system (See Figure 5.4 and Air Brake Appendix 1 at end of this chapter).
Before driving a vehicle with a dual air system, allow time for the air compressor to build up a minimum of 100 psi pressure in both the primary and secondary systems. Watch the primary and secondary air pressure gauges (or needles, if the system has two needles in one gauge). Pay attention to the low air pressure warning light and buzzer. The warning light and buzzer should shut off when air pressure in both systems rises to a value set by the manufacturer. This value must be greater than 55 psi-- 60 psi is standard.
The warning light and buzzer should come on before the air pressure drops below 55 to 60 psi in either system. If this happens while driving, you should stop right away and safely park the vehicle. If one air system is very low on pressure, either the front or the rear brakes will not be operating fully. This means it will take you longer to stop. Bring the vehicle to a safe stop, and have the air brakes system fixed.
5.2 Dual Air Brake
Most heavy-duty vehicles use dual air brake systems for safety. A dual air brake system has two separate air brake systems, which use a single set of brake controls. Each system has its own air tanks, hoses, lines, etc. One system typically operates the regular 5-8 ➢Brake drums (or discs) must not have cracks longer than one half the width of the friction area. ➢Brake Linings (pads or friction material) must not be loose or soaked with oil or grease. ➢Linings must not be worn dangerously thin. It has been a long time standard on many truck and bus brakes that brake pads must be ¼” minimum thickness. However, this may be dangerously thin on some brakes. KNOW YOUR BRAKE SYSTEM and what a minimum safe brake pad thickness is. ➢Mechanical parts must be in place, not broken or missing. ➢Check the air hoses connected to the brake chambers to make sure they aren't cut or worn due to rubbing. 5.3.1 During Step 2: Engine Compartment Checks
Check Air Compressor Drive Belt (if compressor is belt- driven). If the air compressor is belt-driven, check the condition and tightness of the belt. It should be in good condition. vehicle to a repair facility as soon as possible to have the problem corrected.
The manual adjustment of automatic slack adjusters is dangerous because it may give the driver a false sense of security regarding the effectiveness of the braking system.
The manual adjustment of an automatic adjuster should only be used as a temporary measure to correct the adjustment in an emergency situation as it is likely the brake will soon be back out of adjustment since this procedure usually does not fix the underlying adjustment problem.
Note: Automatic slack adjusters are made by different manufacturers and do not all operate the same; therefore, the specific manufacturer’s Service Manual should be consulted prior to troubleshooting a brake adjustment problem.
Check Brake Drums (or Discs), Linings, and Hoses: 5.3.2 During Step 5: Walk-around Inspection
Check Slack Adjusters on S-cam Brakes: Park on level ground and chock the wheels to prevent the vehicle from moving. Turn off the parking brakes so you can move the slack adjusters. Use gloves and pull hard on each slack adjuster that you can reach. If a slack adjuster moves more than about one inch where the push rod attaches to it, it probably needs adjustment. Adjust it or have it adjusted. Vehicles with too much brake slack can be very hard to stop. Out-of-adjustment brakes are the most common problem found in roadside inspections. Be safe -check the slack adjusters.
All vehicles built since 1994 have automatic slack adjustors. Even though automatic slack adjustors adjust themselves during full brake applications, they must be checked.
Automatic adjusters should not have to be manually adjusted except when performing maintenance on the brakes and during installation of the slack adjusters. In a vehicle equipped with automatic adjusters, when the pushrod stroke exceeds the legal brake adjustment limit, it is an indication that a mechanical problem exists in the adjuster itself, a problem with the related foundation brake components, or that the adjuster was improperly installed.
The manual adjustment of an automatic adjuster to bring a brake pushrod stroke within legal limits is generally masking a mechanical problem and is not fixing it. Further, routine adjustment of most automatic adjusters will likely result in premature wear of the adjuster itself. It is recommended that when brakes equipped with automatic adjusters are found to be out of adjustment, the driver take the 5.3.3 During Step 7: Final Air Brake Check
Do the following checks instead of the hydraulic brake check shown in Chapter 2, Step 7: Check Brake System. An illustrated, detailed explanation of this process is in Chapter 11. 5-9 □Shut off the engine □Chock your wheels (if necessary) □Release the parking brake (all vehicles) □Release the tractor protection valve (combination vehicles) □Fully apply the foot brake. □Hold the foot brake for one minute. □Check the air gauge to see if the air pressure drops more than three pounds in one minute (single vehicle) or four pounds in one minute (combination vehicle). □If the air pressure falls more than three psi in one minute for single vehicles (more than four psi for combination vehicles), the air loss rate is too much. Check for air leaks and fix before driving the vehicle. Otherwise, you could lose your brakes while driving.
Test Low Pressure Warning Signal:
□Shut the engine off when you have enough air pressure so that the low pressure warning signal is not on. □Turn the electrical power on (key on) and step on and off the brake pedal to reduce air tank pressure. □The low air pressure warning light, buzzer, or signal must come on before the pressure drops to less than 55 to 60 psi in the air tank (or tank with the lowest air pressure, in dual air systems) (See Figure 5.5).
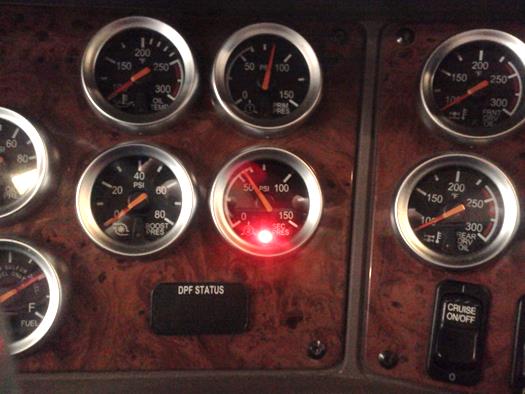
□Turn off the engine □release the parking brake (push knob in) □Time the air pressure drop. The loss rate should be less than two psi in one minute for single vehicles and less than three psi in one minute for combination vehicles. Low Air Pressure Warning Light Check Rate of Air Pressure Buildup: When the engine is at normal operating speed, the pressure should build from 85 to 100 psi within 45 seconds in dual air systems (if the vehicle has larger than minimum air tanks, the buildup time can be longer and still be safe. Check the manufacturer’s specifications.) In single air systems (pre-1975), typical requirements are pressure build up from 50 to 90 psi within 3 minutes with the engine at an idle speed of 600-900 rpm.
If air pressure does not build up fast enough, your pressure may drop too low during driving, requiring an emergency stop. Don't drive until you get the problem fixed.
Check Air Compressor Governor Cut-in and Cut-out Pressures: Pumping by the air compressor should start at about 100 psi and stop at about 125 psi (check manufacturer’s specifications). Run the engine at a fast idle. The air governor should cut-out the air compressor at about the manufacturer’s specified pressure. The air pressure shown by your gauge(s) will stop rising. With the engine idling, step on and off the brake to reduce the air tank pressure. The compressor should cut-in at about the manufacturer's specified cut-in pressure. The pressure should begin to rise.
If the air governor does not work as described above, it may need to be fixed. A governor that does not work properly may not keep enough air pressure for safe driving.
Test Air Leakage Rate: With a fully-charged air system (typically 125 psi):
Test the leakage rate without the foot brake applied: Next, test the leakage ratewith the foot brake applied. With the air pressure built up to governor cutoff (120 – 140 psi):
5-10
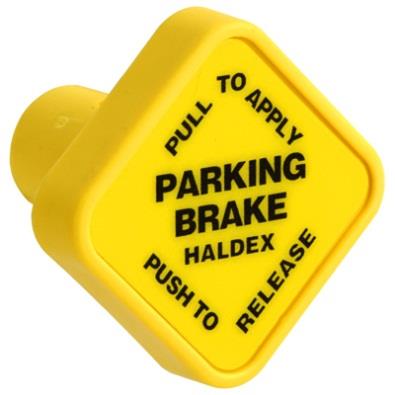
□Stop the vehicle □apply the parking brake.
□Place the vehicle in low gear.
□Drive forward slowly and pull gently against the brake to test that the brake will hold.
On Combination Vehicles, also test the trailer parking brakes as follows:
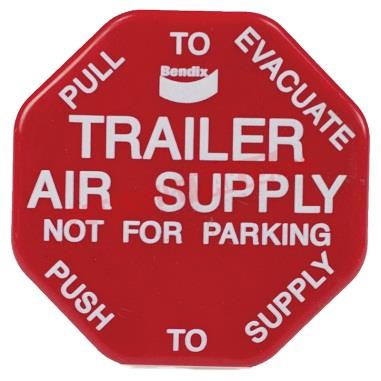
□Stop the vehicle □Apply (pull out) the Tractor Protection Valve (Trailer Air Supply) and release (push in) the parking brake.
□Place the vehicle in low gear.
□Drive forward slowly and pull gently against the brake.
If the brakes do not stop the vehicle from moving forward, they are faulty and must be fixed before you travel.
Test Service Brakes: □Wait for normal air pressure to build up □release the parking brake □move the vehicle forward slowly (about five mph) □apply the brakes firmly using the brake pedal.

Test Parking Brake:
Test the parking brake using the following method:
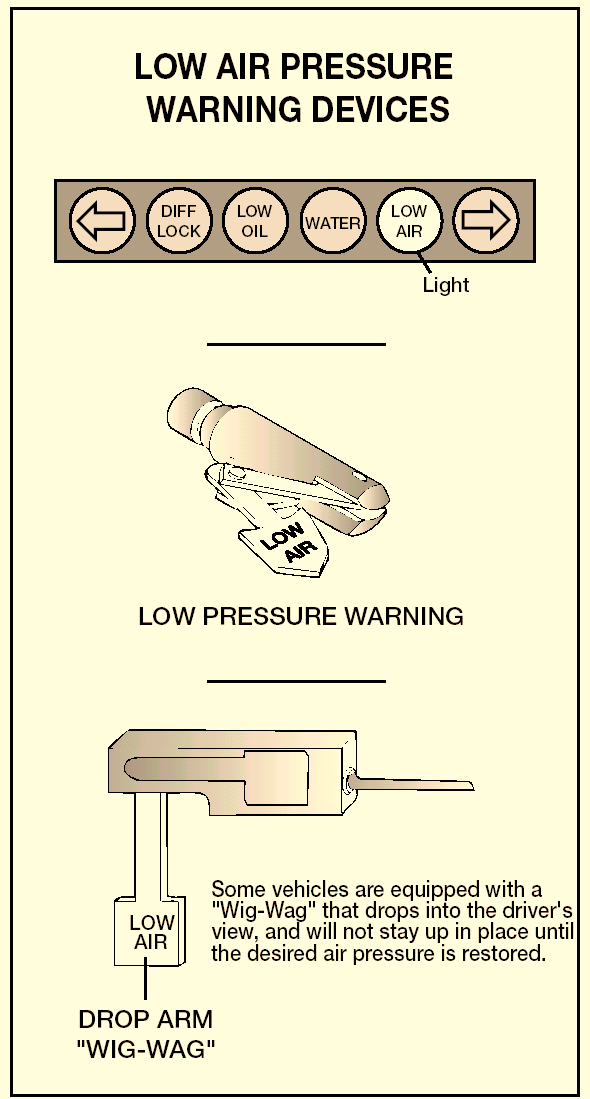
Figure 5.5 Low Air Pressure Warning
If the warning signal doesn’t work, you could lose air pressure and you would not know it. This could cause sudden emergency braking in a single-circuit air system. In dual systems, the stopping distance will be increased. Only limited braking can be done before the spring brakes come on.
Check That Spring Brakes Come On Automatically: Continue to fan off the air pressure by stepping on and off the brake pedal to reduce tank pressure. The tractor protection valve and parking brake valve should close (pop out) on a tractor-trailer combination vehicle, and the parking brake valve should close (pop out) on other combination and single vehicle types when the air pressure falls to the manufacturer’s specification (20 – 45 psi). This will cause the spring brakes to come on.
5-11 Subsections 5.2 and 5.3 Test Your Knowledge
- 1. What is a dual air brake system?
- 2. What are the slack adjusters?
- 3. How can you check slack adjusters?
- 4. How can you test the low pressure warning signal?
- 5. How can you check that the spring brakes come on automatically?
- 6. What are the maximum leakage rates? These questions may be on your test. If you can’t answer them all, re-read subsections 5.2 and 5.3 5.4 Using Air Brakes 5.4.1 Normal Stops Push the brake pedal down. Control the pressure so the vehicle comes to a smooth, safe stop. If you have a manual transmission, don’t push the clutch in until the engine rpm is down close to idle. When stopped, select a starting gear. 5.4.2 Braking with Antilock Brakes When you brake hard on slippery surfaces in a vehicle without ABS, your wheels may lock up. When your steering wheels lock up, you lose steering control. When your other wheels lock up, you may skid, jackknife, or even spin the vehicle. ABS helps you avoid wheel lock up. The computer senses impending lockup, reduces the braking pressure to a safe level, and you maintain control. You may or may not be able to stop faster with ABS, but you should be able to steer around an obstacle ➢Use only the braking force necessary to stop safely and stay in control. ➢Brake the same way, regardless of whether you have ABS on the tractor, the trailer, or both. ➢As you slow down, monitor your tractor and trailer and back off the brakes (if it is safe to do so) to stay in control. There is only one exception to this procedure, if you always drive a straight truck or combination with working ABS on all axles, in an emergency stop, you can fully apply the brakes. Without ABS, you still have normal brake functions. Drive and brake as you always have. Remember, if your ABS malfunctions, you still have regular brakes. Drive normally, but get the system serviced soon. 5.4.3 Emergency Stops If somebody suddenly pulls out in front of you, your natural response is to hit the brakes. This is a good Note any vehicle “pulling” to one side, unusual feel, or delayed stopping action. This test may show you problems, which you otherwise wouldn't know about until you needed the brakes on the road. while braking, and avoid skids caused by over braking. Having ABS on only the tractor, only the trailer, or even on only one axle, still gives you more control over the vehicle during braking. Brake normally. When only the tractor has ABS, you should be able to maintain steering control, and there is less chance of jackknifing. But, keep your eye on the trailer and let up on the brakes (if you can safely do so) if it begins to swing out. When only the trailer has ABS, there is less chance of the trailer swinging out (jackknifing). But if you lose steering control or start a tractor jackknife, let up on the brakes (if you can safely do so) until you gain control. When you drive a tractor-trailer combination with ABS, you should brake as you always have. In other words: 5-12
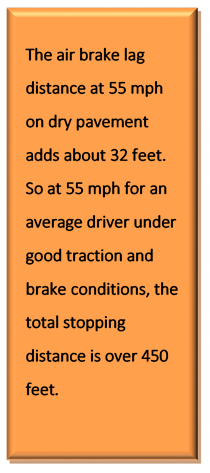

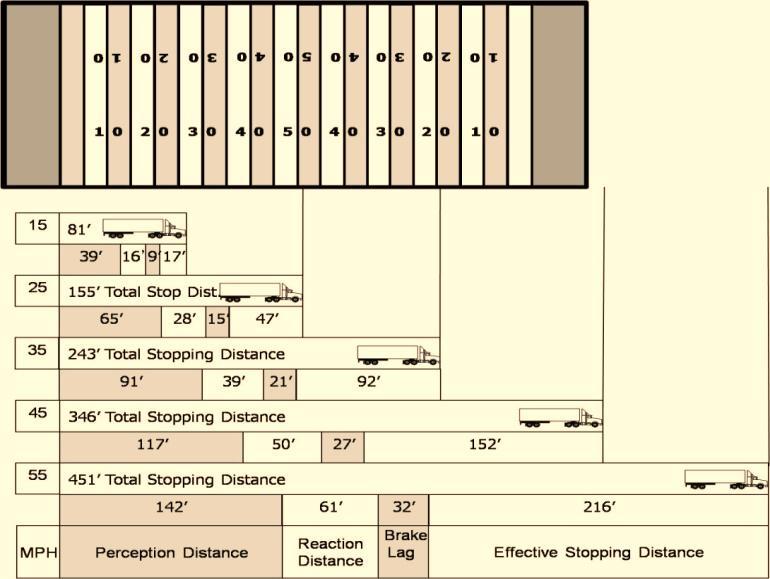
Controlled Braking: With this method, you apply the brakes as hard as you can without locking the wheels. Keep steering wheel movements very small while doing this. If you need to make a larger steering adjustment or if the wheels lock, release the brakes. Re-apply the brakes as soon as you can.
Stab Braking Figure 5.6 Stopping Distance
With hydraulic brakes (used on cars and light/medium trucks), the brakes work instantly. However, with air brakes, it takes a little time (one half second or more) for the air to flow through the lines to the brakes.
Thus, the total stopping distance for vehicles with air brake systems is made up of four different factors: ➢Apply your brakes all the way.
➢Release brakes when wheels lock up.
➢As soon as the wheels start rolling, apply the 5.4.4 Stopping Distance Stopping distance was described in Chapter 2 under "Speed and Stopping Distance." With air brakes there is an added delay - “Brake Lag”. This is the time required for the brakes to work after the brake pedal is pushed. response if there's enough distance to stop, and you use the brakes correctly.
You should brake in a way that will keep your vehicle in a straight line and allow you to turn if it becomes necessary. Unless you have ABS on your vehicle, you can use the “controlled braking” method or the “stab braking” method.
Perception Distance + Reaction Distance + Brake Lag Distance + Effective Stopping Distance =
Total Stopping Distance
(See Figure 5.6) brakes fully again (it can take up to one second for the wheels to start rolling after you release the brakes. If you re-apply the brakes before the wheels start rolling, the vehicle won't straighten out). 5-13 5.4.6 Proper Braking Technique Remember: The use of brakes on a long and/or steep downgrade is only a supplement to the braking effect of the engine. Once the vehicle is in the proper low gear, the following is the proper braking technique: 1.Apply the brakes just hard enough to feel a definite slowdown. 2.When your speed has been reduced to approximately five mph below your “safe” speed, release the brakes (this application should last for about three seconds). 5.4.7 Low Air Pressure If the low air pressure warning comes on, stop and safely park your vehicle as soon as possible. There might be an air leak in the system. Controlled braking is possible only while enough air remains in the air tanks. The spring brakes will come on when the air pressure drops into the range of 20 to 45 psi. A heavily loaded vehicle will take a long distance to stop because the spring brakes do not work on all axles. Lightly loaded vehicles or vehicles on slippery roads may skid out of control when the spring brakes come on. It is much safer to stop while there is enough air in the tanks to use the foot brakes.
5.4.8 Parking Brakes
Any time you park, use the parking brakes, except as noted below. Pull the parking brake control knob
40 mph. You now apply the brakes hard enough to gradually reduce your speed to 35 mph and then release the brakes. Repeat this as often as necessary until you have reached the end of the downgrade. 5.4.5 Brake Fading or Failure Brakes are designed so brake shoes or pads rub against the brake drum or disks to slow the vehicle. Braking creates heat, but brakes are designed to take a lot of heat. However, brakes can fade or fail from excessive heat caused by using them too much and not relying on the engine braking effect.
Excessive use of the service brakes results in overheating and leads to brake fade. Brake fade results from excessive heat causing chemical changes in the brake lining, which reduce friction, and also causing expansion of the brake drums. As the overheated drums expand, the brake shoes and linings have to move farther to contact the drums, and the force of this contact is reduced. Continued overuse may increase brake fade until the vehicle cannot be slowed down or stopped.
Brake fade is also affected by adjustment. To safely control a vehicle, every brake must do its share of the work. Brakes out of adjustment will stop doing their share before those that are in adjustment. The other brakes can then overheat and fade, and there will not be enough braking available to control the vehicle(s). Brakes can get out of adjustment quickly, especially when they are hot; therefore, check brake adjustment often. out to apply the parking brakes, push it in to release. The control will be a yellow, diamond-shaped knob labeled “parking brake” on newer vehicles. On older vehicles, it may be a round blue knob or some other shape (including a lever that swings from side to side or up and down).
Don’t use the parking brakes if the brakes are very hot (from just having come down a steep grade), or if the brakes are very wet in freezing temperatures. If parking brakes are used while the brakes are very hot, they can be damaged by the heat. If they are used in freezing temperatures when the brakes are very wet, they can freeze so the vehicle cannot move. Use wheel chocks on a level surface to hold the vehicle. Let hot brakes cool before using the 3.When your speed has increased to your “safe” speed, repeat steps 1 and 2.
For example, if your “safe” speed is 40 mph, you would not apply the brakes until your speed reaches 5-14 Subsection 5.4 Test Your Knowledge 1. Why should you be in the proper gear before starting down a hill?
2. What factors can cause brakes to fade or fail?
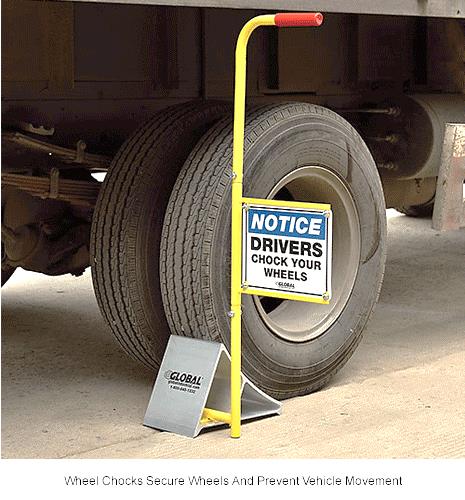
3. The use of brakes on a long, steep downgrade is only a supplement to the braking effect of the engine. True or False?
4. If you are away from your vehicle only a short time, you do not need to use the parking brake. True or False?
5. How often should you drain air tanks?
6. How do you brake when you drive a tractor-trailer combination with ABS?
7. You still have normal brake functions if your ABS is not working. True or False?
These questions may be on your test. If you can’t answer them all, re-read subsection 5.4. parking brakes. If the brakes are wet, use the brakes lightly while driving in a low gear to heat and dry them.
If your vehicle does not have automatic air tank drains, drain your air tanks at the end of each working day to remove moisture and oil; otherwise the brakes could fail.
Never leave your vehicle unattended without applying the parking brakes or chocking the wheels. Your vehicle might roll away and cause injury and damage.
5-15
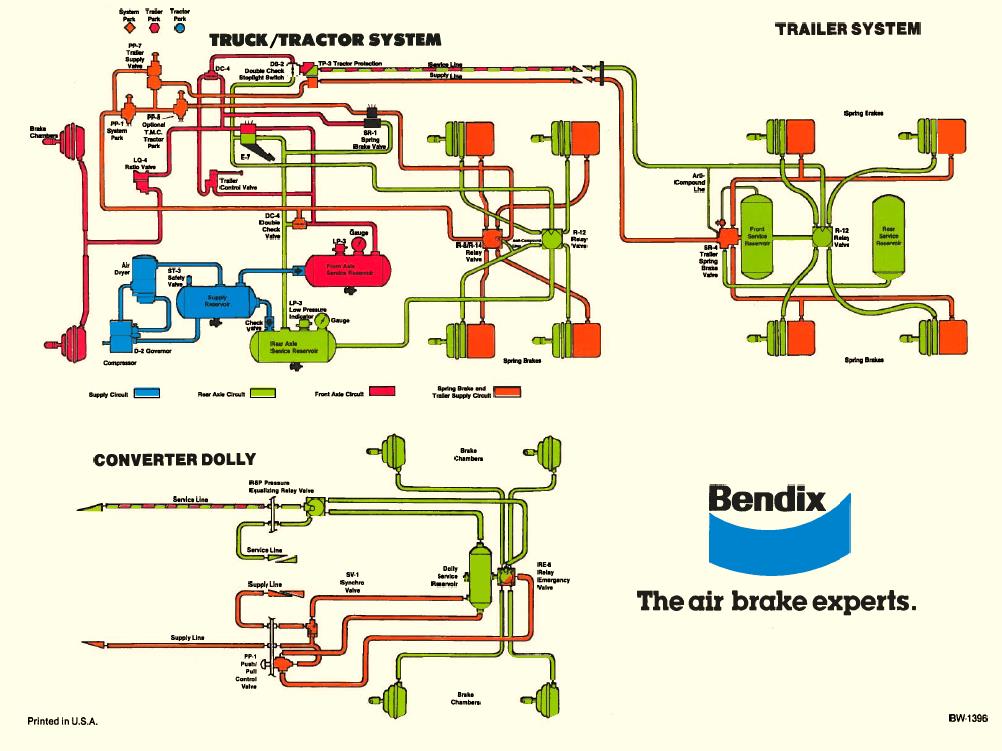

Appendix 1- the Air Brake System5-16
5-1 so it makes a trailer lean, a rollover is more likely. Make sure your cargo is centered and spread out as much as possible (Cargo distribution is covered in Chapter 3 of this manual).
Rollovers happen when you turn too fast. Drive slowly around corners, on ramps, and off ramps. Avoid quick lane changes, especially when fully loaded. Driving Combinations
Combination Vehicle Air Brakes
Antilock Brake Systems
Coupling and Uncoupling
Inspecting Combinations
This chapter provides information needed to pass the tests for combination vehicles (tractor-trailer, doubles, triples, straight truck with trailer). The information is only to give you the minimum knowledge needed for driving common combination vehicles. You should also study Chapter 7 if you need to pass the test for doubles and triples.
6.1.2 Steer Gently
Trucks with trailers have a dangerous “crack-the-whip” effect. When you make a quick lane change, the crack-the-whip effect can turn the trailer over. There are many accidents where only the trailer has overturned.
“Rearward amplification” causes the crack-the-whip effect Figure 6.1 shows eight types of combination vehicles and the rearward amplification each has in a quick lane change. Vehicles with the least crack-the-whip effect are shown at the top and those with the most, at the bottom. Rearward amplification of 2.0 in the chart means that the rear trailer is twice as likely to turn over as the tractor. You can see that triples have a rearward amplification of 3.5. This means you can roll the last trailer of triples 3.5 times as easily as a five-axle tractor.
Steer gently and smoothly when you are pulling trailers. If you make a sudden movement with your steering wheel, your trailer could tip over. Follow far enough behind other vehicles (at least 1 second for each 10 feet of your vehicle length, plus another second if going over 40 mph). Look far enough down the road to avoid being surprised and having to make a sudden lane change. At night, drive slowly enough to see obstacles with your headlights before it is too late to change lanes or stop gently. Slow down to a safe speed before going into a turn. 6.1 Driving Combination Vehicles Safely Combination vehicles are usually heavier, longer, and require more driving skill than single commercial vehicles. This means that drivers of combination vehicles need more knowledge and skill than drivers of single vehicles. In this section, we talk about some important safety factors that apply specifically to combination vehicles.
6.1.1 Rollover Risks
More than half of truck driver deaths in crashes are the result of truck rollovers. When more cargo is piled up in a truck, the “center of gravity” moves higher up from the road. The truck becomes easier to turn over. Fully loaded rigs are ten times more likely to roll over in a crash than empty vehicles.
The following two things will help you prevent rollover, 1) keep the cargo as close to the ground as possible, and 2) drive slowly around turns. Keeping cargo low is even more important in combination vehicles than in straight trucks. Also, keep the load centered on your vehicle. If the load is to one side Chapter 6: Combination Vehicles
This Chapter Covers:
6-1 Figure 6.1 Rearward Amplification
6.1.3 Brake Early
Control your speed whether fully loaded or empty. Large combination vehicles take longer to stop when they are empty than when they are fully loaded. When lightly loaded, the very stiff suspension springs and strong brakes give poor traction and make it very easy to lock up the wheels. Your trailer can swing out and strike other vehicles. Your tractor can jackknife very quickly. You also must be very careful about driving “bobtail” tractors (tractors without semitrailers). Tests have shown that bobtails can be very hard to stop smoothly. It takes them longer to stop than a tractor-semitrailer loaded to maximum gross weight.
In any combination vehicle, allow lots of following distance and look far ahead, so you can brake early. Don't be caught by surprise and have to make a “panic” stop. ➢Low-slung units (lowboy, car carrier, moving van, possum-belly livestock trailer).
➢Single-axle tractor pulling a long trailer with its landing gear set to accommodate a tandem-axle tractor.
If for any reason you get stuck on the tracks, get out of the vehicle and away from the tracks. Check signposts or signal housing at the crossing for emergency notification information. Call 911 or other emergency number and give the location of the crossing using all identifiable landmarks, especially the DOT number, if posted.

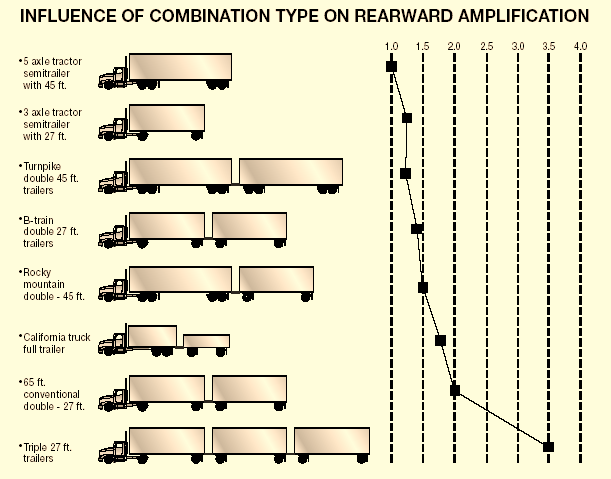
6.1.4 Railroad-highway Crossings
Railroad-highway crossings can also cause problems, particularly when pulling trailers with low underneath clearance. These trailers can get stuck on raised crossings: 6-2
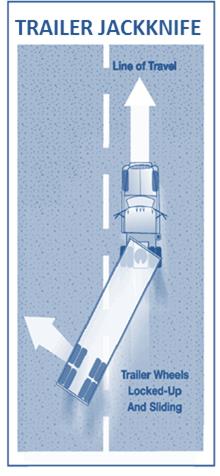
6.1.6 Turn Wide For Off-Tracking
When a vehicle goes around a corner, the rear wheels follow a different path than the front wheels. This is called off-tracking or "cheating."

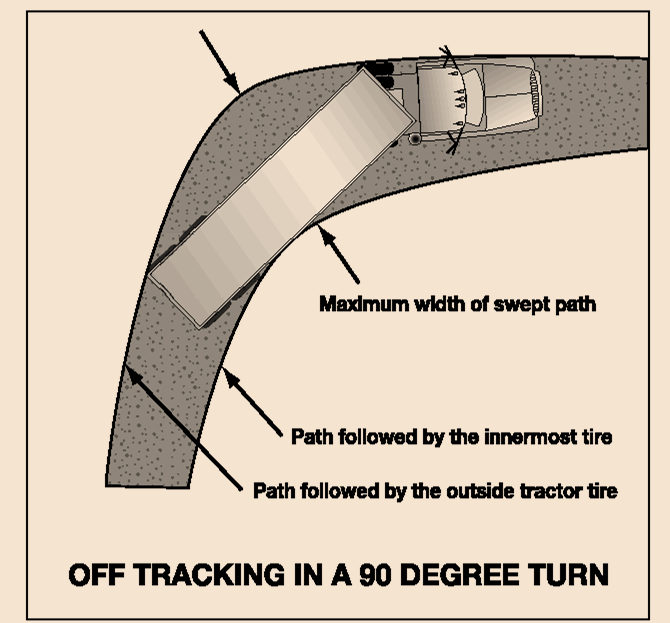
Figure 6.3 Off-Tracking
Figure 6.3 shows how off-tracking causes the path followed by a tractor to be wider than the rig itself. Longer vehicles will off-track more. The rear wheels of the powered unit (truck or tractor) will off-track some, and the rear wheels of the trailer will off-track even more. If there is more than one trailer, the rear wheels of the last trailer will off-track the most. Steer the front end wide enough around a corner so the rear end does not run over the curb, pedestrians, etc. However, keep the rear of your vehicle close to the curb. This will stop other drivers from passing you on the right. 6.1.5 Prevent Trailer Skids When the wheels of a trailer lock up, the trailer will tend to swing around. This is more likely to happen when the trailer is empty or lightly loaded. This type of jackknife is often called a “trailer jackknife” (See Figure 6.2). swings out of your lane, it’s very difficult to prevent a jackknife.
Stop Using the Brake: Release the brakes to get traction back. Do not use the trailer hand brake (if you have one) to “straighten out the rig.” This is the wrong thing to do since the brakes on the trailer wheels caused the skid in the first place. Once the trailer wheels grip the road again, the trailer will start to follow the tractor and straighten out.
Figure 6.2 Trailer Jackknife
The procedure for stopping a trailer skid is:
Recognize the Skid: The earliest and best way to recognize that the trailer has started to skid is by seeing it in your mirrors. Any time you apply the brakes hard, check the mirrors to make sure the trailer is staying where it should be. Once the trailer 6-3
| . Narrow, mountain roads with
steep grades and sharp curves present unique |
challenges for both the driver and the engineer. |
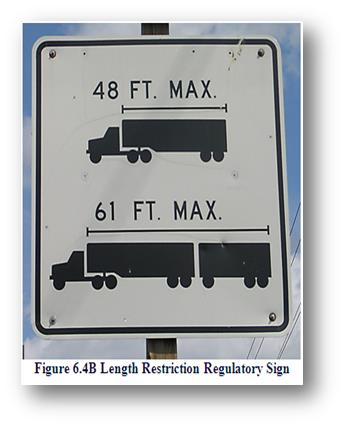
If you cannot complete your turn without entering another traffic lane, turn wide as you complete the turn. This is better than swinging wide to the left before starting the turn because it will keep other drivers from passing you on the right. See Figure 6.4.
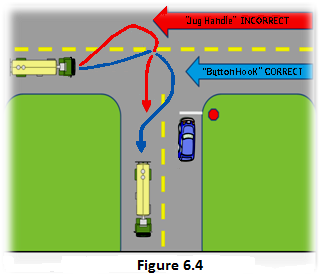
Figure 6.4 Jug Handle vs. Buttonhook turns
Sometimes the road is too narrow and the turn at the intersection is too tight to utilize the Button Hook Method. On these occasions you will be forced to use the Jug Handle Method to complete the turn successfully; however, these instances are rare. You must use the Button Hook Method if at all possible, because it is the safest and most practical way to complete a turn successfully.
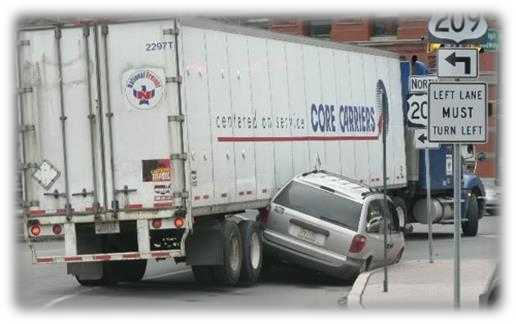
Transportation engineers take into consideration several factors when determining the type and size of vehicles a highway can safely support. Two (2) of the factors engineers consider when setting restrictions on a highway, is the off- tracking and swept path characteristics of the various truck and trailer combinations. Narrow, mountain roads with steep grades and sharp curves present unique challenges for both the driver and the engineer.
Figure 6.4B is a regulatory sign stating the legally allowed vehicle combinations lengths that can operate on a specific highway or section of highway. Vehicles in excess of the listed dimensions may operate on a highway or section of highway with an over-legal permit. The permit will contain additional operating requirements that must be met such as off-tracking and overall length restrictions. These additional requirements help to ensure the vehicle configuration remains in the lane of travel and not drift into oncoming traffic. Figure 6.4B also reinforces the principle that a single truck and trailer combination can have greater off-tracking and swept path issues than the double trailer combination. Highway Restrictions: Knowing what off-tracking is, and how it affects your vehicle, will help you understand the reason behind highway restrictions.
6-4
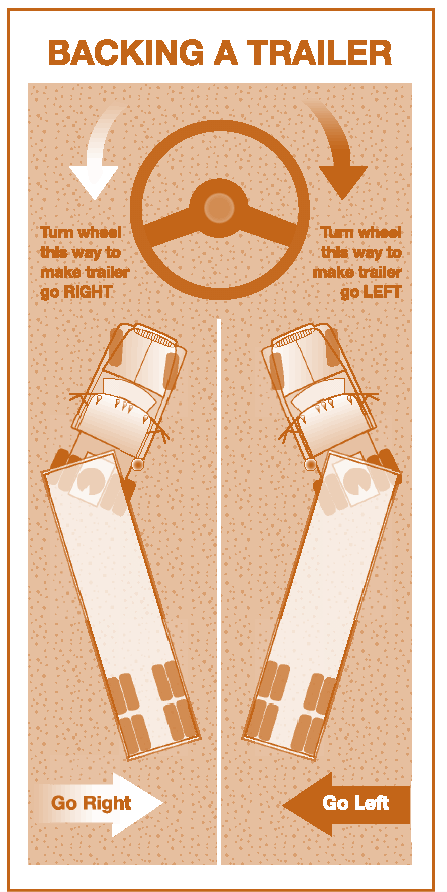
Subsection 6.1 Test Your Knowledge 1. What two things are important to prevent rollover? 2. When you turn suddenly while pulling doubles, which trailer is most likely to turn over? 3. Why should you not use the trailer hand brake to straighten out a jackknifing trailer? 4. What is off-tracking? 5. When you back a trailer, you should position your vehicle so you can back in a curved path to the driver’s side. True or False? 6. What type of trailers can get stuck on railroad-highway crossings?
These questions may be on your test. If you can’t answer them all, re-read subsection 6.1. Figure 6.5 Backing a Trailer 6.1.7 Backing with a Trailer
When backing a car, straight truck, or bus, you turn the top of the steering wheel in the direction you want to go. When backing a trailer, you turn the steering wheel in the opposite direction. Once the trailer starts to turn, you must turn the wheel the other way to follow the trailer.
Whenever you back up with a trailer, try to position your vehicle so you can back in a straight line. If you must back on a curved path, back to the driver’s side so you can see (See Figure 6.5). Look at Your Path: Look at your line of travel before you begin. Get out and walk around the vehicle. Check your clearance to the sides and overhead, in and near the path your vehicle.
Use Mirrors on Both Sides: Check the outside mirrors on both sides frequently. Get out of the vehicle and re-inspect your path if you are unsure.
Back Slowly: This will let you make corrections before you get too far off course.
Correct Drift Immediately: As soon as you see the trailer getting off the proper path, correct it by turning the top of the steering wheel in the direction of the drift.
Pull Forward: When backing a trailer, make pull-ups to reposition your vehicle as needed.
6-5 6.2.2 Tractor Protection Valve
The tractor protection valve keeps air in the tractor or truck brake system should the trailer break away or develop a bad leak. The tractor protection valve is controlled by the “trailer air supply” control valve in the cab. The control valve allows you to open and shut the tractor protection valve. The tractor protection valve will close automatically if air pressure is low (in the range of 20 to 45 psi). When the tractor protection valve closes, it stops any air from going out of the tractor. It also lets the air out of the trailer emergency line which causes the trailer emergency brakes to come on. If the emergency brakes are activated, you could possibly lose control of your vehicle (Emergency brakes are covered later). 6.2.1 Trailer Hand Valve
The trailer hand valve (also called the Trolley Valve or Johnson Bar) operates the trailer(s) brakes only and is entirely independent of the tractor brakes. The trailer hand valve should be used only to test the trailer brakes. Do not use it in driving because of the danger of making the trailer skid. The foot brake sends air to all of the brakes on the vehicle (including the trailer(s). There is much less danger of causing a skid or jackknife when using just the foot brake.
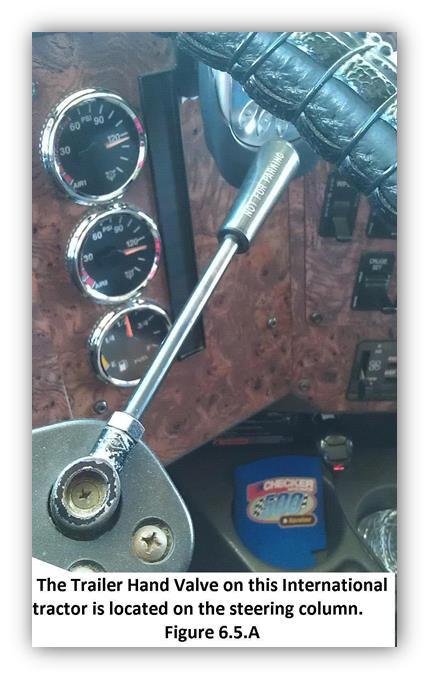
6.2.3 Trailer Air Supply Control
The trailer air supply control on newer vehicles is a red eight-sided knob, which you use to control the tractor protection valve. You push it in to supply the trailer with air, and pull it out to shut the air off and put on the trailer emergency brakes. The valve will pop out (thus closing the tractor protection valve) when the air pressure drops into the range of 20 to 45 psi.
Tractor protection valve controls, or “emergency” valves on older vehicles, may not operate automatically. There may be a lever rather than a knob. The “normal” position is used for pulling a trailer. The “emergency” position is used to shut the air off and put on the trailer emergency brakes.
6.2.4 Trailer Air Lines
Every combination vehicle has two air lines, the service line and the emergency line. They run 6.2 Combination Vehicle Air Brakes
You should study Chapter 5: Air Brakes before reading this section. In combination vehicles, the braking system has parts to control the trailer brakes in addition to the parts previously described in Chapter 5. These parts are described below. Never use the hand valve for parking, because all the air might leak out unlocking the brakes (in trailers that don't have spring brakes). Always use the parking brakes when parking. If the trailer does not have spring brakes, use wheel chocks to keep the trailer from moving. (See Figure 6.5.A)
6-6
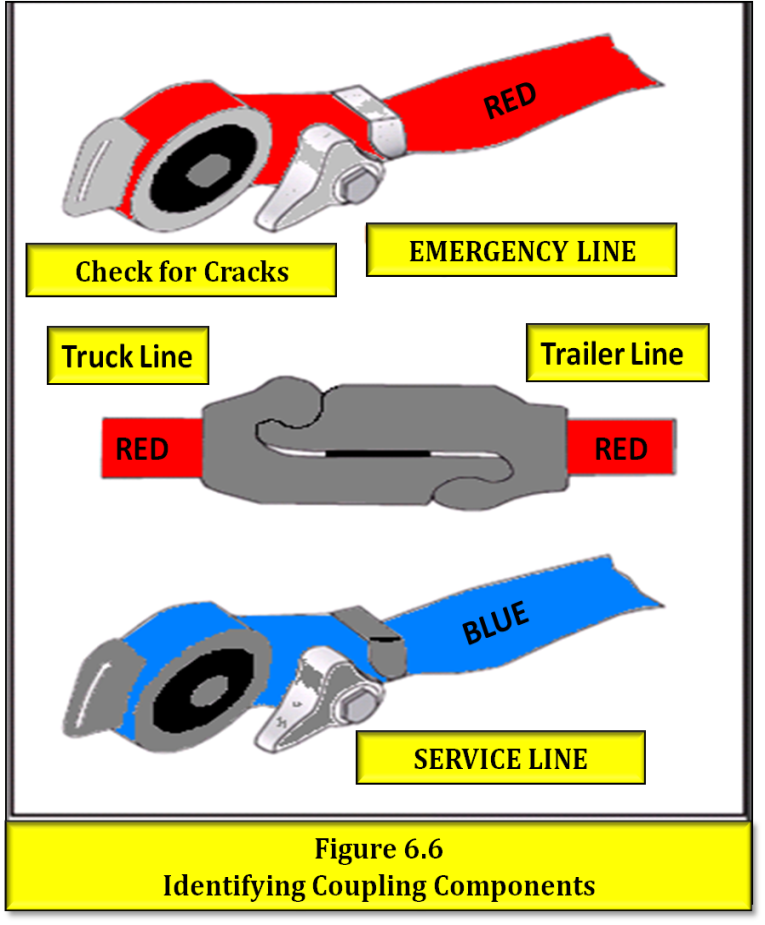
between each vehicle (tractor to trailer, trailer to dolly, dolly to second trailer, etc.)
Service Air Line: The service line (also called the control line or signal line) carries air, which is controlled by the foot brake or the trailer hand brake. Depending on how hard you press the foot brake or pull the hand valve, the pressure in the service line will similarly change. The service line is connected to relay valves. These valves allow the trailer brakes to be applied more quickly than would otherwise be possible.
Emergency Air Line: The emergency line (also called the supply line) has two purposes. First, it supplies air to the trailer air tanks. Second, the emergency line controls the emergency brakes on combination vehicles. Loss of air pressure in the emergency line causes the trailer emergency brakes to come on. The pressure loss could be caused by a trailer breaking loose, thus tearing apart the emergency air hose, or it could be caused by a hose, metal tubing, or other part breaking, letting the air out. When the emergency line loses pressure, it also causes the tractor protection valve to close (the air supply knob will pop out).
Emergency lines are often coded with the color red (red hose, red couplers, or other parts) to keep from getting them mixed up with the blue service line. the words “service” and “emergency” stamped on them (See Figure 6.6).
Figure 6.6 Coupling Components
If you do cross the air-lines, supply air will be sent to the service line instead of going to charge the trailer air tanks. Air will not be available to release the trailer spring brakes (parking brakes). If the spring brakes don't release when you push the trailer air supply control, check the air line connections.
Older trailers do not have spring brakes. If the air supply in the trailer air tank has leaked away there will be no emergency brakes, and the trailer wheels will turn freely. If you crossed the air lines, you could drive away but you wouldn’t have trailer brakes. This would be very dangerous. Always test the trailer brakes before driving with the hand valve or by pulling the air supply (tractor protection valve) control. Pull gently against them in a low gear to make sure the brakes work.
Some vehicles have “dead end” or dummy couplers to which the hoses may be attached when they are not in use. This will prevent water and dirt from getting into the coupler and the air lines. Use the 6.2.5 Hose Couplers (Glad Hands)
“Glad hands” are coupling devices used to connect the service and emergency air lines from the truck or tractor to the trailer. The couplers have a rubber seal, which prevents air from escaping. Clean the couplers and rubber seals before a connection is made. When connecting the glad hands, press the two seals together with the couplers at a 90-degree angle to each other. A turn of the glad hand attached to the hose will join and lock the couplers.
When coupling, make sure to couple the proper glad hands together. To help avoid mistakes, colors are sometimes used. Blue is used for the service lines and red for the emergency (supply) lines. Sometimes, metal tags are attached to the lines with 6-7 6.2.6 Trailer Air Tanks
Each trailer and converter dolly has one or more air tanks. They are filled by the emergency (supply) line from the tractor. They provide the air pressure used to operate trailer brakes. Air pressure is sent from the air tanks to the brakes by relay valves.
The pressure in the service line tells how much pressure the relay valves should send to the trailer brakes. The pressure in the service line is controlled by the brake pedal (and the trailer hand brake).
It is important that you don’t let water and oil build up in the air tanks. If you do, the brakes may not work correctly. Each tank has a drain valve on it, and you should drain each tank every day. If your tanks have automatic drains, they will keep most moisture out, but you should still open the drains to make sure. Subsection 6.2 Test Your Knowledge 1. Why should you not use the trailer hand valve while driving? 2. Describe what the trailer air supply control does. 6.2.7 Shut-off Valves
Shut-off valves (also called “cut-out cocks”) are used in the service and supply air lines at the back of trailers used to tow other trailers. These valves permit closing the air-lines off when another trailer is not being towed. You must check that all shut-off valves are in the open position except the ones at the back of the last trailer, which must be closed. 3. Describe what the service line is for. 4. What is the emergency air line for? 5. Why should you use chocks when parking a trailer without spring brakes? 6. Where are shut-off valves? These questions may be on your test. If you can’t answer them all, re-read subsection 6.2. dummy couplers when the air lines are not connected to a trailer. If there are no dummy couplers, the glad hands can sometimes be locked together (depending on the couplings). It is very important to keep the air supply clean. The emergency brakes come on whenever the air supply knob is pulled out or the trailer is disconnected.
A major leak in the emergency line will cause the tractor protection valve to close and the trailer emergency brakes to come on, but the brakes will hold only as long as there is air pressure in the trailer air tank. Eventually, the air will leak away and then there will be no brakes; therefore, it is very important for safety that you use wheel chocks when you park trailers without spring brakes. You may not notice a major leak in the service line until you try to put the brakes on. Then, the air loss from the leak will lower the air tank pressure quickly. If it goes low enough, the trailer emergency brakes will come on.
6.2.8 Trailer Service, Parking, and Emergency
Brakes
Newer trailers have spring brakes just like trucks and truck tractors; however, converter dollies and trailers built before 1975 are not required to have spring brakes. Those that do not have spring brakes have emergency brakes, which work from the air stored in the trailer air tank. The emergency brakes come on whenever air pressure in the emergency line is lost. These trailers have no parking brake. 6-8 6.3.1 Trailers Required to Have ABS
All trailers and converter dollies built on or after March 1, 1998 are required to have ABS; however, many trailers and converter dollies built before this date have been voluntarily equipped with ABS. Trailers will have yellow ABS malfunction lamps on the left side, either on the front or rear corner (See Figure 6.7). Dollies manufactured on or after March 1, 1998 are required to have a lamp on the left side.
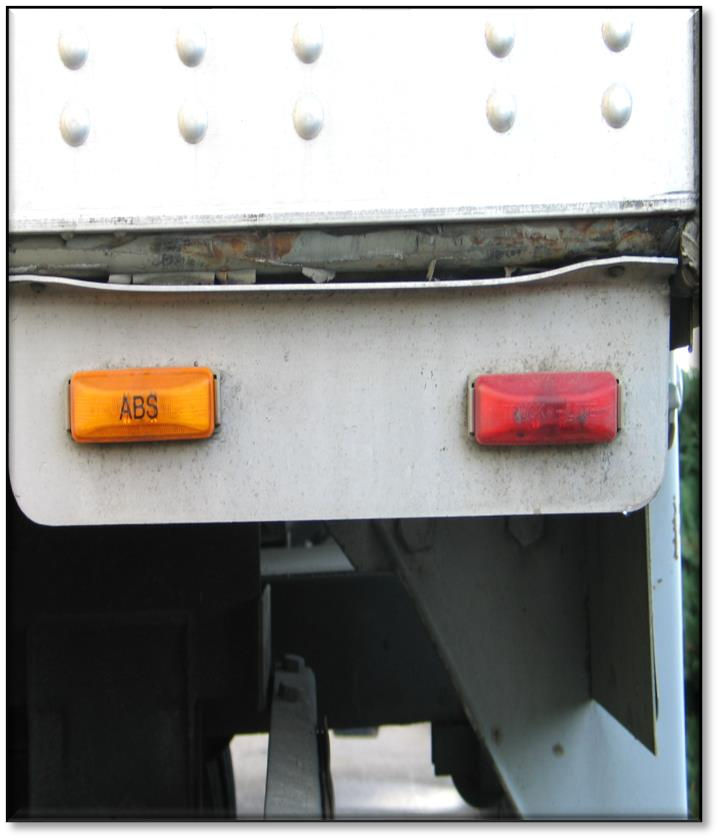
Figure 6.7 – ABS Malfunction warning Light.
The Yellow ABS Light will come on and stay on if there is a problem with the ABS System
In the case of vehicles manufactured before the required date, it may be difficult to tell if the unit is equipped with ABS. Look under the vehicle for the ECU and wheel speed sensor wires coming from the back of the brakes. ➢Use only the braking force necessary to stop safely and stay in control.
➢Brake the same way, regardless of whether you have ABS on the tractor, the trailer, or both.
➢As you slow down, monitor your tractor and trailer and back off the brakes (if it is safe to do so) to stay in control.
Remember, if your ABS malfunctions, you still have regular brakes. Drive normally, but get the system serviced soon. ABS won’t allow you to drive faster, follow more closely, or drive less carefully. 6.3.2 Braking with ABS
ABS is an addition to your normal brakes. It does not decrease or increase your normal braking capability. ABS only activates when wheels are about to lock up.
ABS does not necessarily shorten your stopping distance, but it does help you keep the vehicle under control during hard braking.
ABS helps you avoid wheel lock up. The computer senses impending lockup, reduces the braking pressure to a safe level, and you maintain control.
Having ABS on only the trailer, or even on only one axle, still gives you more control over the vehicle during braking.
When only the trailer has ABS, the trailer is less likely to swing out, but if you lose steering control or start a tractor jackknife, let up on the brakes (if you can safely do so) until you regain control.
When you drive a tractor-trailer combination with ABS, you should brake as you always have. In other words: 6.3 Antilock Brake Systems
6-9 6.4.1 Coupling Tractor-Semitrailers
Step 1: Inspect Fifth Wheel
□Check for damaged/missing parts.
□Check to see that mounting to tractor is secure, no cracks in frame, etc.
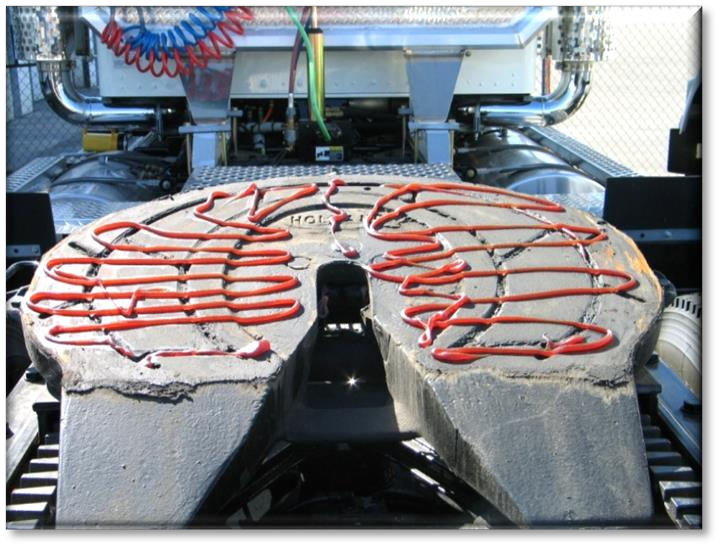
□Be sure that the fifth wheel plate is greased as required. Failure to keep the fifth wheel plate lubricated could cause steering problems because of friction between the tractor and trailer.
Check if fifth wheel is in proper position for coupling:
□Wheel tilted down toward rear of tractor.
□Jaws open. □Safety unlocking handle in the automatic lock position.
□If you have a sliding fifth wheel, make sure it is locked.
□Make sure the trailer kingpin is not bent or broken.
Step 2: Inspect Area and Chock Wheels
□Make sure area around the vehicle is clear.
□Be sure trailer wheels are chocked or spring brakes are on.
□Check that cargo (if any) is secured against movement due to tractor being coupled to the trailer.
Step 3: Position Tractor
□Put the tractor directly in front of the trailer. Never back under the trailer at an angle because you might push the trailer sideways and break the landing gear.
□Check position, using outside mirrors, by looking down both sides of the trailer.
Step 4: Back Slowly
□Back until fifth wheel just touches the trailer- 6.4 Coupling and Uncoupling
Knowing how to couple and uncouple correctly is basic to safe operation of combination vehicles. Wrong coupling and uncoupling can be very dangerous. General coupling and uncoupling steps are listed below. There are differences between different rigs, so learn the details of coupling and uncoupling the truck(s) you will operate.
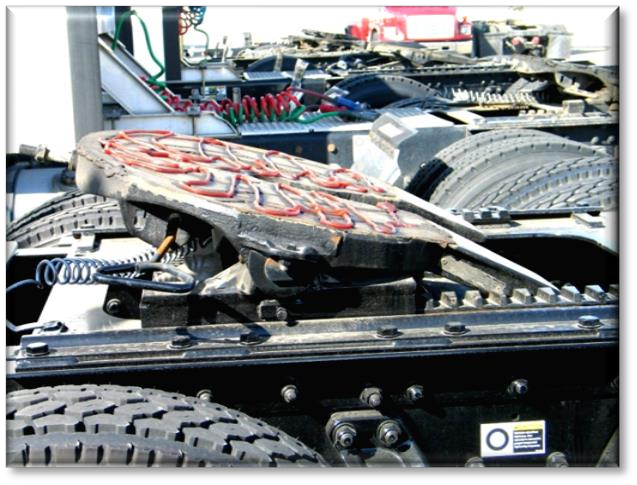
-Don’t hit the trailer.
6-10 □Put on the parking brake.
□Put transmission in neutral.
Step 6: Check Trailer Height □The trailer should be low enough that it is raised slightly by the tractor when the tractor is backed under it. Raise or lower the trailer as needed. If the trailer is too low, the tractor may strike and damage the trailer nose. If the trailer is too high, it may not couple correctly.
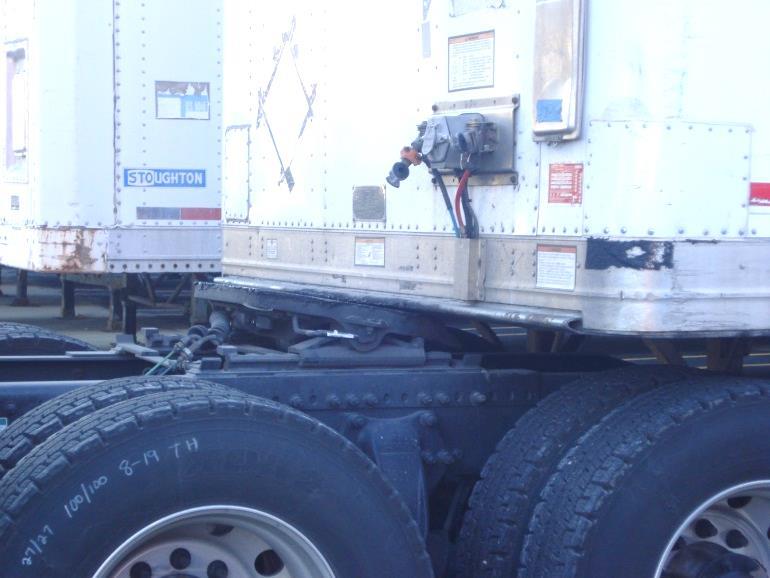
□Check that the kingpin and fifth wheel are aligned. Step 7: Connect Air Lines to Trailer □Check glad hand seals and connect tractor emergency air line to trailer emergency glad hand. □Check glad hand seals and connect tractor service air line to trailer service glad hand. □Make sure air lines are safely supported where they won't be crushed or caught while the tractor is backing under the trailer. Step 8: Supply Air to Trailer □From cab, push in “air supply” knob or move tractor protection valve control from the “emergency” to the “normal” position to supply air to the trailer brake system.
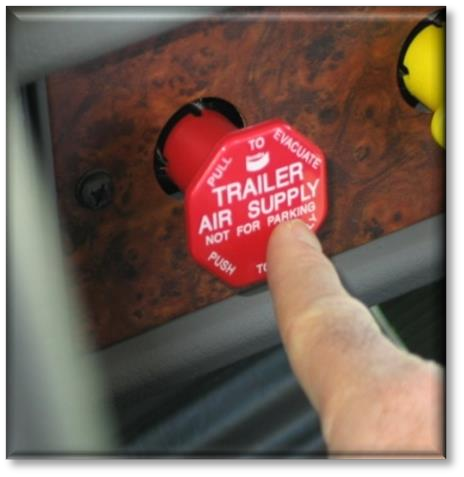
□Wait until the air pressure is normal. □Check brake system for crossed air lines. □Shut engine off so you can hear the brakes. □Apply and release trailer brakes and listen for sound of trailer brakes being applied and released. You should hear the brakes move when applied and air escape when the brakes are released. □Check air brake system pressure gauge for signs of major air loss. □When you are sure trailer brakes are working, start the engine. □Make sure air pressure is up to normal.
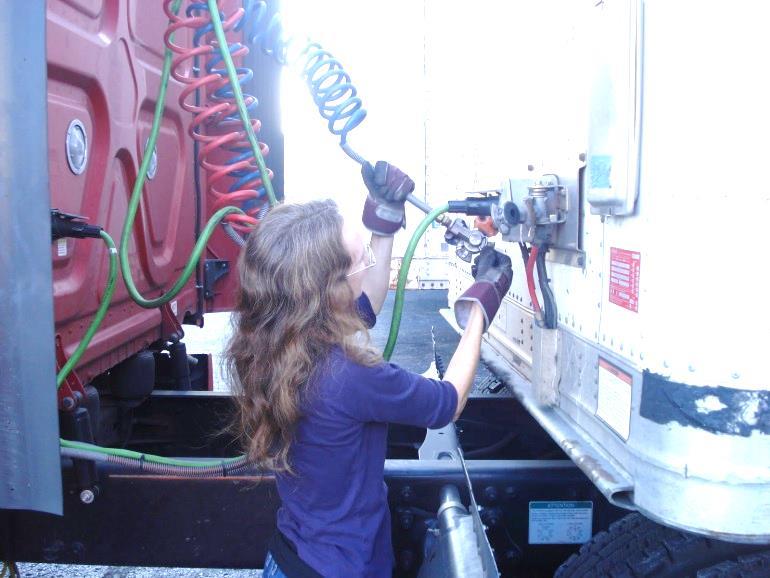
Step 5: Secure Tractor
6-11 tractor protection valve control from “normal” to “emergency.” Step 10: Back Under Trailer □Use lowest reverse gear. □Back tractor slowly under trailer to avoid hitting the kingpin too hard. □Stop when the kingpin is locked into the fifth wheel. Step 11: Check Connection for Security □Raise trailer landing gear slightly off ground. □Pull tractor gently forward while the trailer brakes are still locked to check that the trailer is locked onto the tractor. Step 12: Secure Vehicle □Put transmission in neutral. □Put parking brakes on. □Shut off engine and take the key with you so someone else won't move truck while you are under it. Step 13: Inspect Coupling □Use a flashlight, if necessary.
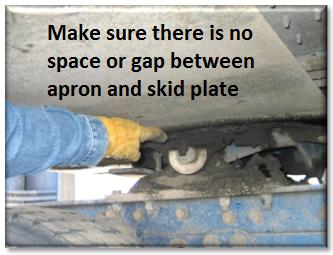
□Make sure there is no space between the fifth wheel. Make sure the fifth wheel jaws have closed around the shank of the kingpin.
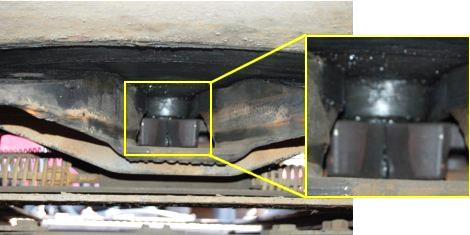
□Check that the fifth wheel locking lever is in the “lock” position. □Check that the safety latch is in position over locking lever (on some fifth wheels the catch must be put in place by hand). □If the coupling isn’t right, don’t drive the coupled unit, get it fixed.
Step 14: Connect Electrical Cord/ Check Air Lines □Plug the electrical cord into the trailer and fasten the safety catch.

□Check both air lines and electrical line for signs of damage.
□Make sure air and electrical lines will not hit □Go under trailer and look into the back of the Step 9: Lock Trailer Brakes □Pull out the “air supply” knob or move the
apron on the trailer and the fifth wheel skid plate. If there is space, something is wrong (kingpin may be on top of the closed fifth wheel jaws, and trailer would come loose easily). any moving parts of the vehicle.
6-12 □Use low gear range (if so equipped) to begin raising the landing gear. Once free of weight, switch to the high gear range.
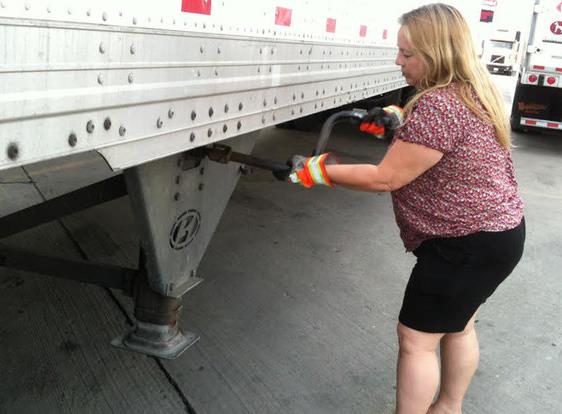
□Raise the landing gear all the way up. Never drive with landing gear only part way up as it may catch on railroad tracks or other things. □After raising landing gear, secure the crank handle safely. □When the full weight of the trailer is resting on tractor: - Check for enough clearance between rear of tractor frame and landing gear (when the tractor turns sharply, it must not hit the landing gear). - Check that there is enough clearance between the top of the tractor tires and the nose of the trailer.
Step 16: Remove Trailer Wheel Chocks
Remove and store wheel chocks in a safe

place. Step 1: Position Vehicle
□Make sure surface of parking area can support weight of trailer. □Have tractor lined up with the trailer (pulling out at an angle can damage landing gear). Step 2: Ease Pressure on Locking Jaws
□Shut off trailer air supply to lock trailer brakes. □Ease pressure on fifth wheel locking jaws by backing up gently. (This will help you release the fifth wheel locking lever). □Put parking brakes on while tractor is pushing against the kingpin. (This will hold the vehicle with pressure off the locking jaws).
Step 3: Chock Trailer Wheels □Chock the trailer wheels if the trailer doesn’t have spring brakes or if you're not sure. (The air could leak out of the trailer air tank, releasing its emergency brakes. Without chocks, the trailer could move). Step 4: Lower the Landing Gear □If the trailer is empty, lower the landing gear until it makes firm contact with the ground. □If the trailer is loaded, after the landing gear makes firm contact with the ground, turn crank in low gear a few extra turns. This will lift some weight off the tractor. (Do not lift trailer off the fifth wheel). This will: - Make it easier to unlatch fifth wheel. - Make it easier to couple next time. 6.4.2 Uncoupling Tractor-Semitrailers
The following steps will help you to uncouple safely: Step 15: Raise Trailer Landing Gear
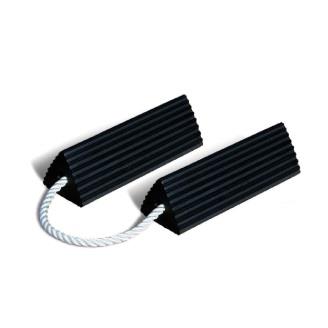
6-13 □Disconnect air lines from trailer. Connect air line glad hands to dummy couplers at back of cab or couple them together. □Hang electrical cable with plug down to prevent moisture from entering it. □Make sure lines are supported so they won’t be damaged while driving the tractor. Step 6: Unlock Fifth Wheel □Raise the release handle lock. □Pull the release handle to “open” position. □Keep legs and feet clear of the rear tractor wheels to avoid serious injury in case the vehicle moves. Step 7: Pull Tractor Partially Clear of Trailer □Pull tractor forward until fifth wheel comes out from under the trailer. □Stop with the tractor frame under the trailer (prevents trailer from falling to ground if landing gear should collapse or sink). Step 8: Secure Tractor □Apply parking brake. □Place transmission in neutral. Step 9: Inspect Trailer Supports
□Make sure the ground is supporting the trailer. □Make sure the landing gear is not damaged.
Step 10: Pull Tractor Clear of Trailer
□Release parking brakes. □Check the area and drive tractor forward until it clears. Test Your Knowledge 1. What might happen if the trailer is too high when you try to couple?
2. After coupling, how much space should be between the trailer apron and fifth wheel plate?
3. You should look into the back of the fifth wheel to see if it is locked onto the kingpin. True or False?
4. To drive you need to raise the landing gear only until it just lifts off the pavement. True or False?
5. How do you know if your trailer is equipped with antilock brakes?
These questions may be on your test. If you can’t answer them all, re-read subsections 6.3 and 6.4.
6.4.3 Coupling a Pintle Hook
Step 1: Inspect Pintle Hook □Before operating, check for worn, damaged, or missing parts, and make sure mount is secure. □If the pintle hook is not secured to the Step 5: Disconnect Air Lines and Electrical Cable Subsections 6.3 and 6.4
mounting surface, the pintle hook could separate from the vehicle which, if not avoided, could result in death or serious injury.
6-14 □Unlock and remove the tethered lock pin, if applicable (Figure 16).
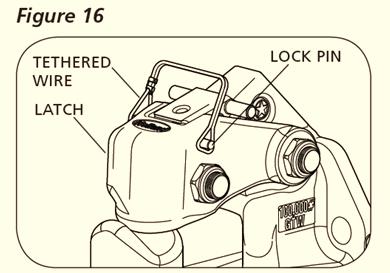
□Lift the lock handle away from the vehicle until the lock clears the lock seat on the hook body. □Open the latch by rotating the latch assembly up toward the vehicle until the latch is in its most upright position, then release the lock handle. (Figure 17 and 18)
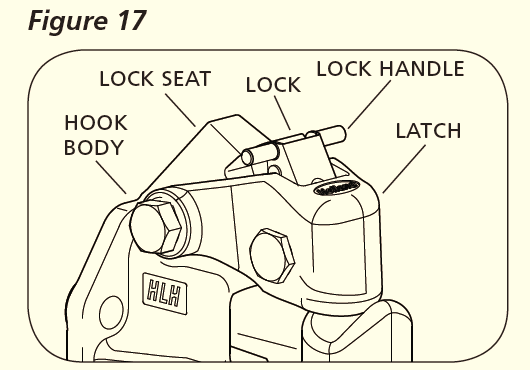
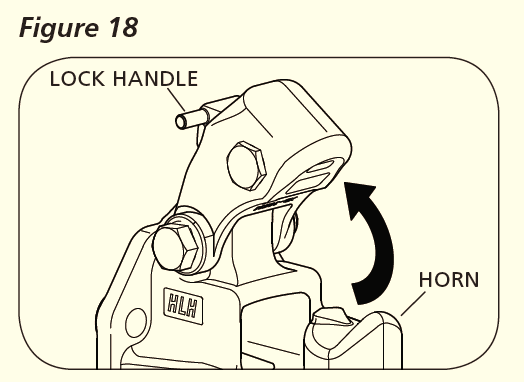
Step 3: Lower Drawbar into Place
□Position the drawbar eye over the horn of the pintle hook and lower it into place. □Push the latch closed. When correctly locked, the lock handle will rotate and move up until it is flush with the top of the latch (Figure 19).
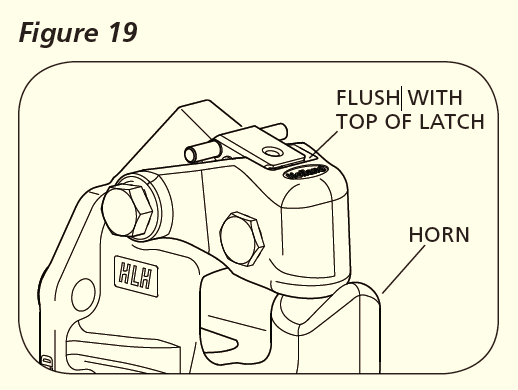
□Insert the tethered lock pin through the latch and lock holes, and close the tethered wire lock pin, if applicable (Figure 16).
□Failure to correctly lock the latch can result in separation of the trailer and vehicle which, if not avoided, could result in death or serious injury.
6.4.4 Uncoupling a Pintle Hook
Step 1: Park on Level Surface □Park the trailer on a firm level surface and block trailer tires.
Step 2: Disconnect Electrical Connector, Breakaway Brake Switch and Safety Chains □Disconnect electrical connector. □Disconnect breakaway brake switch lanyard. □Disconnect safety chains from tow vehicle.
Step 3: Unlock the Coupler □Unlock the coupler and open it.
Step 4: Check Ground Surface for Correct Support □Before extending jack, make certain the Step 2: Unlock Lock Pin and Open Latch Step 4: Lock Pintle Hook
ground surface below the jack pad will support the tongue load.
6-15 transfer the weight of the trailer tongue to the jack.
Step 6: Raise Trailer Coupler □Raise the trailer coupler above the tow vehicle hitch. Step 7: Drive Forward □Drive tow vehicle forward.
6.4.5 - Coupling a Drawbar
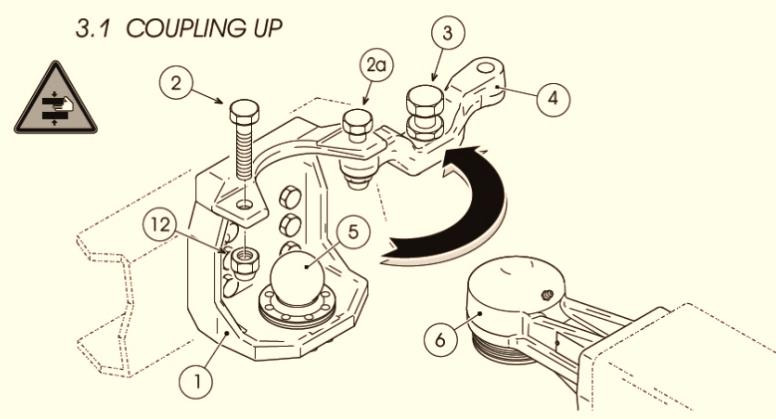
Step 1: Remove Safety Lock screw and Rotate Safety Cover Bar
□Remove safety lock screw (2), recover and keep the relative self-locking nut (12) aside then also loosen safety lock screw (2a) and turn out the adjustment screw (3) by at least five turns. □Rotate the safety cover bar (4) outwards so that it is completely open.
Step 2: Reverse Truck □Reverse truck very slowly until the ball cup drawbar eye (6) is in position exactly above the drawbar coupling ball (5).
Step 3: Lower the Drawbeam □Lower the drawbeam until the ball cup and fit in safety lock screw (2) together with its self-locking nut. □Tighten in both the lock screws (2, 2a) together with their relative self-locking nuts (12, 12a) at a 350 to 400 Nm torque wrench setting. Step 5: Adjust the Adjustment Screw □Adjust the adjustment screw (3) until a 0.3 - 0.5 mm vertical clearance between the guard disk (13) and the ball cup (6) is reached. Lock setting with counter nut (11).
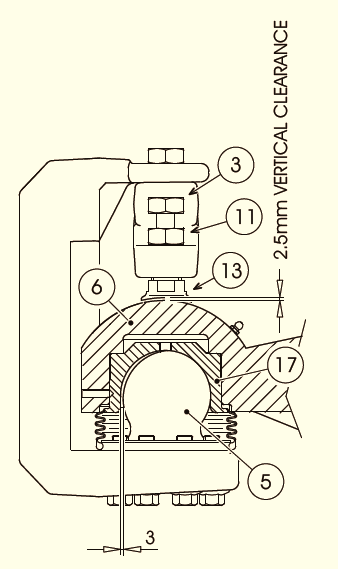
□In the event that the safety cover bar (4) will not perfectly lodge into its seating appropriately, travel is strictly forbidden. Step 5: Rotate Jack Handle Step 4: Rotate the Safety Cover Bar □Rotate jack handle to extend the jack and □Rotate the safety cover bar back inwards (4)
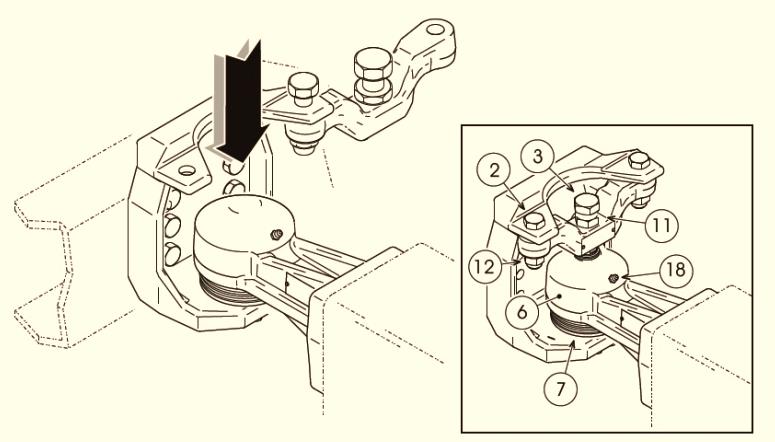
drawbar eye (6) lies completely covering the drawbar coupling ball (5).
6-16 □Protect the part that is still visible of the coupling ball (5) with the rubber dust proof bellows protection cover (7). □Accurately anchor the edge directly onto the ball itself.
Step 7: Lubricate the Drawbar Eye
□Lubricate the inside of the drawbar eye ball cup (6) directly through the grease nipple (18).
6.4.6 - Uncoupling a Drawbar
Step 1: Turn Trailer Brake On □Make sure that the trailer brake is on.
Step 2: Remove Cover and Loosen Screws □Remove the rubber dust proof bellows protection cover (7). □Loosen the adjustment screw (3) and the counter nut (11). □Loosen safety lock screw (2a) and remove safety lock screw (2) together with its self-locking nut (12).
Step 3: Rotate Safety Cover Bar and Lift Trailer Drawbeam
□Rotate the safety cover bar (4) outwards so that it is completely open. □Lift the trailer drawbeam until the drawbar coupling ball (5) is fully visible, then travel forward with the trailer very slowly. □Rotate the safety cover bar inwards (4) until it lodges back in its housing.
Step 4: Lock Safety Screw and Tighten Self-Locking Nut
□Fit in safety lock screw (2) and tighten in self-locking nut (12). □Open the clamp latch on the Gooseneck coupler. □Make sure that the Gooseneck ball is properly lubricated.
Step 2: Position Coupler and Latch the Clamp □Position the trailer's coupler directly over the ball and lower the Gooseneck trailer into position and latch the clamp.
Step 3: Attach Safety Chains
□Attach your safety chains. Remember that all trailers are required by law to have safety chains.
Step 4: Connect Trailer Light Wiring □Connect your trailer light wiring to your vehicle's connector. □Check all of your lights, including your brake lights. Step 5: Lower and Stow the Trailer Jacks □Completely lower and stow the trailer jacks, allowing the weight to settle onto the tow vehicle.
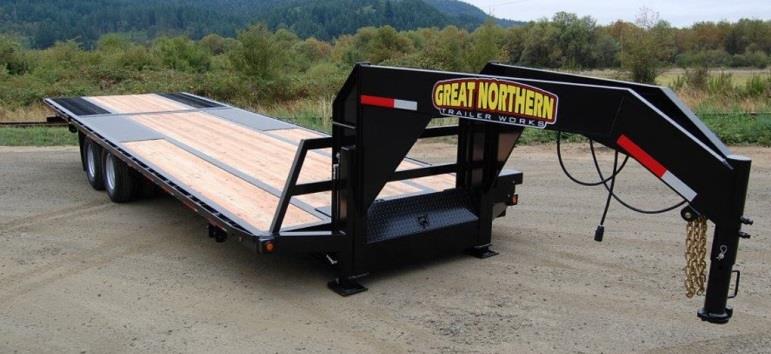
6.4.7 - Coupling a Gooseneck Hitch
Step 6: Protect Coupling Ball and Anchor Edge onto Ball If you are hooking up a Gooseneck or a fifth wheel hitch, the procedure is a little different from a receiver and ball, but it is not more difficult.
Step 1: Open the Latch & Lubricate the Gooseneck Ball
6-17 Step 1: Remove Safety Pin and Clip
□Simply remove safety pin and clip. Step 2: Rotate Handle and Raise Trailer off Ball
□Rotate handle to this position (Fig. B) and raise trailer off ball. Coupler will return to load position automatically.
Step 3: Install Safety Pin and Clip
□Install safety pin and clip. (Fig. B)
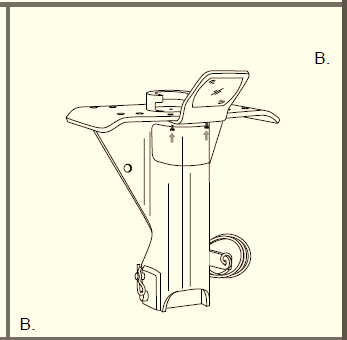
6.5 Inspecting a Combination Vehicle
Use the seven-step inspection procedure described in Chapter 2 to inspect your combination vehicle. There are more things to inspect on a combination vehicle than on a single vehicle (for example, tires, wheels, lights, reflectors, etc.); however, there are also some new things to check, which are discussed in this section. □Securely mounted to frame.
□No missing or damaged parts.
□Enough grease.
□No visible space between trailer apron and fifth wheel plate.
□Locking jaws around the shank, not the head of kingpin (See Figure 6.8).
□Release arm properly seated and safety latch/lock engaged.
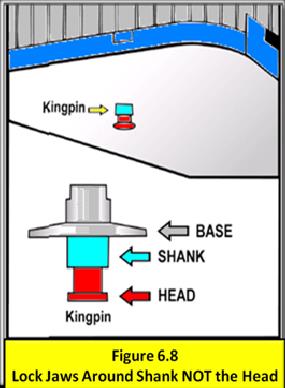
6.4.8 Uncoupling a Gooseneck Hitch
6.5.1 Additional Things to Check During a
Walk-Around Inspection
Do these checks in addition to those already listed in Chapter 2.
Coupling System Areas:
Check fifth wheel (lower):
6-18 frame. □Kingpin not damaged.
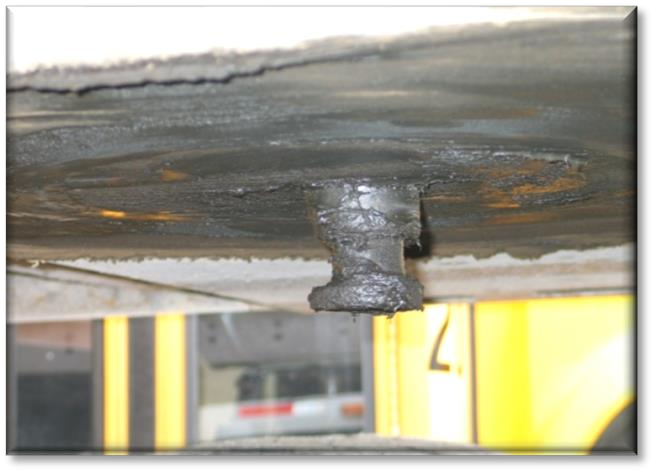
Air and electric lines to trailer: □Electrical cord firmly plugged in and secured. □Air lines properly connected to glad hands, no air leaks, properly secured with enough slack for turns. □All lines free from damage. Sliding fifth wheel:

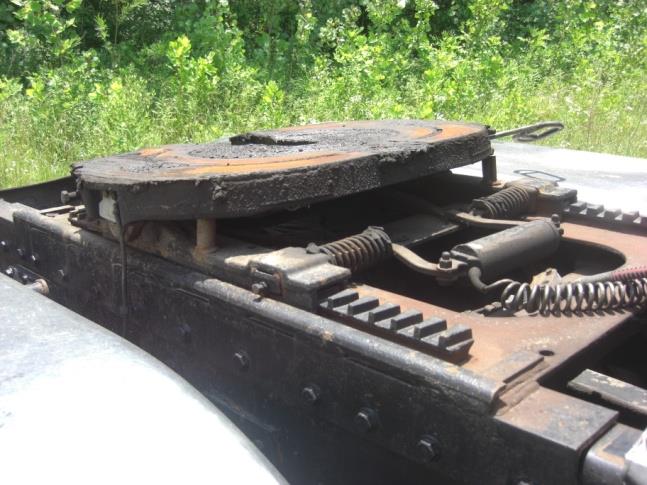
Figure 6.9 Sliding Fifth Wheel □Slide not damaged or parts missing. □Properly greased. □All locking pins present and locked in place. □If air powered - no air leaks.
□Check that fifth wheel is not so far forward □ Fully raised, no missing parts, not bent or otherwise damaged. □ Crank handle in place and secured. □ If power operated, no air or hydraulic leaks.
6.5.2 Combination Vehicle Brake Check
Do these checks in addition to Section 5.3, Inspecting Air Brake Systems. Chapter 11 has illustrated, detailed instructions.
The following section explains how to check air brakes on combination vehicles. Check the brakes on a double or triple trailer as you would any combination vehicle.
Check That Air Flows to All Trailers: Use the tractor parking brake and/or chock the wheels to hold the vehicle. Wait for air pressure to reach normal, then push in the red “trailer air supply” knob. This will supply air to the emergency (supply) lines. Use the trailer handbrake to provide air to the service line. Go to the rear of the vehicle and open the emergency line shut-off valve at the rear of the last trailer. You should hear air escaping; thereby, showing the entire system is charged. Close the emergency line valve. Open the service line valve to check that service pressure goes through all the trailers (this test assumes that the trailer handbrake or the service brake pedal is on), and then close the valve. If you do NOT hear air escaping from both lines, check to see that the shut-off valves on the trailer(s) and dolly(s) are in the OPEN position. You MUST have air all the way to the back of the last trailer in the combination for all the brakes to work.
Test Tractor Protection Valve: Charge the trailer air brake system (that is, build up normal air pressure and push the “air supply” knob in). Shut the engine off and step on and off the brake pedal several times to reduce the air pressure in the tanks. The trailer air supply control (also called the tractor protection valve control) should pop out (or go from “normal” to “emergency” position) when the air pressure falls into the pressure range specified by the Landing Gear Check fifth wheel (upper): □Glide plate securely mounted to trailer
that tractor frame will hit landing gear, or the cab will hit the trailer during turns. 6-19 Test Your Knowledge 1. Which shut-off valves should be open and which closed? 2. How can you test that air flows to all trailers? 3. How can you test the tractor protection valve? 4. How can you test the trailer emergency brakes? 5. How can you test the trailer service brakes? These questions may be on your test. If you can’t answer all of them, re-read subsection 6.5.
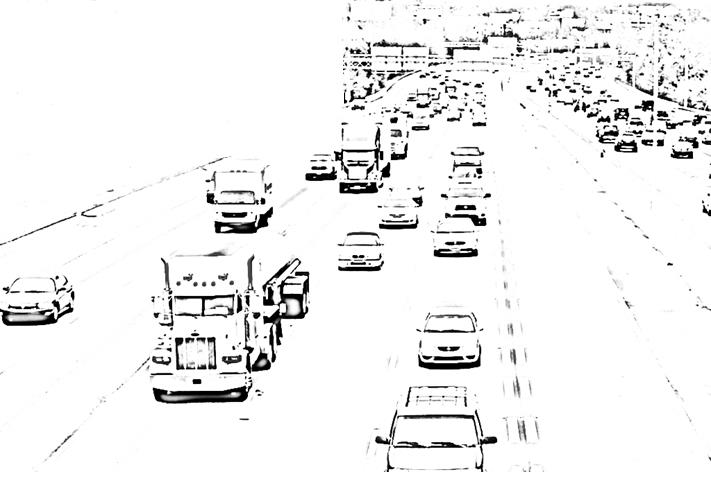
manufacturer (usually within the range of 20 to 45 psi).
If the tractor protection valve doesn’t work right, an air hose or trailer brake leak could drain all the air from the tractor. This would cause the emergency brakes to come on, with possible loss of control of the vehicle.
Test Trailer Emergency Brakes: Charge the trailer air brake system and check that the trailer rolls freely. Then stop and pull out the trailer air supply control (also called tractor protection valve control or trailer emergency valve), or place it in the “emergency” position. Pull gently on the trailer with the tractor to check that the trailer emergency brakes are on.
Test Trailer Service Brakes: Check for normal air pressure, release the parking brakes, move the vehicle forward slowly, and apply trailer brakes with the hand control (trolley valve), if so equipped. You should feel the brakes come on. This tells you the trailer brakes are connected and working. (The trailer brakes should be tested with the hand valve but controlled in normal operation with the foot pedal, which applies air to the service brakes at all wheels). Subsection 6.5
6-20 This Chapter Covers:
Pulling Double/Triple Trailers

Coupling and Uncoupling
Inspecting Doubles and Triples
Checking Air Brakes
This chapter has information you need to pass the CDL knowledge test for driving safely with double and triple trailers. It tells about how important it is to be very careful when driving with more than one trailer, how to couple and uncouple correctly, and about inspecting doubles and triples carefully (you should also study Chapters 2, 5, and 6).
7.1 Pulling Double/Triple Trailers
Take special care when pulling two and three trailers. There are more things that can go wrong, and doubles/triples are less stable than other commercial vehicles. Some areas of concern are discussed below.
7.1.1 Prevent Trailer from Rolling Over
To prevent trailers from rolling over, you must steer gently and go slowly around corners, on ramps, off ramps, and curves. A safe speed on a curve for a straight truck or a single trailer combination vehicle may be too fast for a set of doubles or triples.
7.1.2 Beware of the Crack-the-Whip Effect
Doubles and triples are more likely to turn over than other combination vehicles because of the “crack-the-whip” affect. You must steer gently when pulling trailers. The last trailer in a combination is most likely to turn over. If you don't understand the crack-the-whip affect, study subsection 6.1.2 of this manual.
7.1.3 Inspect Completely
There are more critical parts to check when you have two or three trailers. Check them all and follow the procedures described later in this section. 7.1.4 Look Far Ahead Doubles and triples must be driven very smoothly to avoid rollover or jackknife; therefore, look far ahead so you can slow down or change lanes gradually when necessary.
7.1.5 Manage Space
Doubles and triples take up more space than other commercial vehicles. They are not only longer, but also need more space because they can’t be turned or stopped suddenly. Allow more following distance. Make sure you have large enough gaps before entering or crossing traffic. Be certain you are clear at the sides before changing lanes.
7.1.6 Adverse Conditions
Be more careful in adverse conditions. In bad weather, slippery conditions, and mountain driving, you must be especially careful if you drive double and triple bottoms. You will have greater length and more dead axles to pull with your drive axles than other drivers. There is more chance for skids and loss of traction.
7.1.7 Parking the Vehicle
Make sure you do not get in a spot you cannot pull straight through. You need to be aware of how parking lots are arranged in order to avoid a long and difficult escape.
7.1.8 Antilock Braking Systems on Converter
Dollies Converter dollies built on or after March 1, 1998, are required to have antilock brakes. These dollies will have a yellow lamp on the left side of the dolly.
7.2 Coupling and Uncoupling
Knowing how to couple and uncouple correctly is basic to safe operation of doubles and triples. Wrong coupling and uncoupling can be very dangerous. Coupling and uncoupling steps for doubles and triples are listed below. Chapter 7: Doubles and Triples
7-1

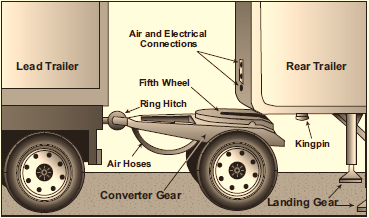
Figure 7.1 Converter gear on a dolly
A converter gear on a dolly is a coupling device of one or two axles and a fifth wheel by which a semitrailer can be coupled to the rear of a tractor-trailer combination forming a double bottom rig. (See Figure 7.1). ➢Position combination as close as possible to converter dolly.
➢Move dolly to rear of first semitrailer and couple it to the trailer.
➢Lock pintle hook.
➢Secure dolly support in raised position.
➢Pull dolly into position as close as possible to nose of the second semitrailer.
➢Lower the dolly support.
➢Unhook the dolly from the first trailer.
➢Wheel the dolly into position in front of the second trailer in line with the kingpin.
Connect Converter Dolly to Front Trailer
➢Back first semitrailer into position in front of dolly tongue.
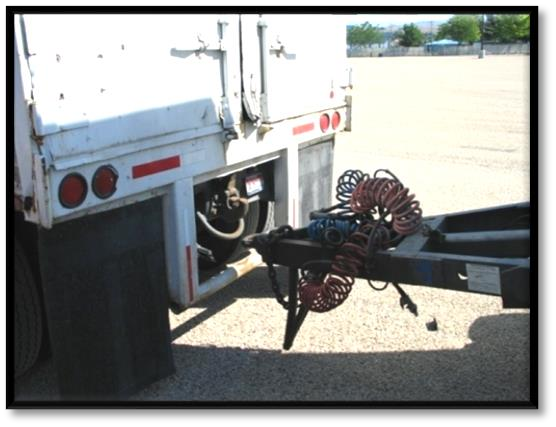
7.2.1 Coupling Twin Trailers
Secure Second (Rear) Trailer
If the second trailer doesn’t have spring brakes, drive the tractor close to the trailer, connect the emergency line, charge the trailer air tank, and disconnect the emergency line. This will set the trailer emergency brakes (if the slack adjusters are correctly adjusted). Chock the wheels if you have any doubt about the brakes.
For the safest handling on the road, the more heavily loaded semitrailer should be in first position behind the tractor, and the lighter trailer should be in the rear. Position Converter Dolly in Front of Second (Rear) Trailer
Release dolly brakes by opening the air tank petcock (valve), or if the dolly has spring brakes, use the dolly parking brake control.
If the distance is not too great, wheel the dolly into position by hand so it is in line with the kingpin. If the distance is too far between the dolly and the trailer, use the tractor and first semitrailer to pick up the converter dolly:
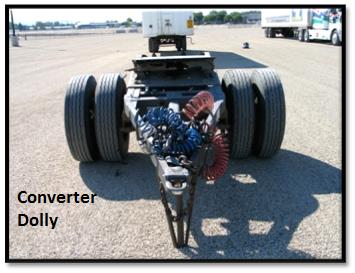
7-2 •Lock pintle hook.
•Secure converter gear support in raised position.
Connect Converter Dolly to the Rear Trailer
➢Make sure the trailer brakes are locked and/or wheels chocked.
➢Make sure the trailer height is correct (it must be slightly lower than the center of the fifth wheel, so the trailer is raised slightly when the dolly is pushed under it).
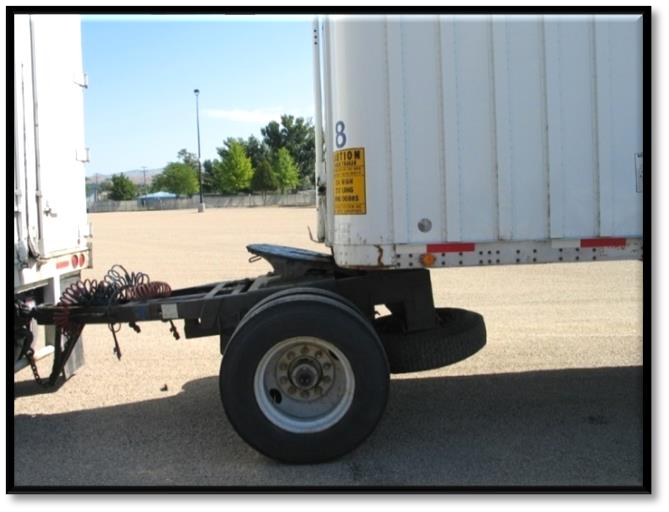
➢Back the converter dolly under the rear trailer.
➢Raise the landing gear slightly off of the ground to prevent damage if the trailer moves. ➢Make a visual check of coupling (no space between the trailer apron and the fifth wheel plate, and the locking jaws are closed around the kingpin).
➢Connect the safety chains, air hoses, and light cords.
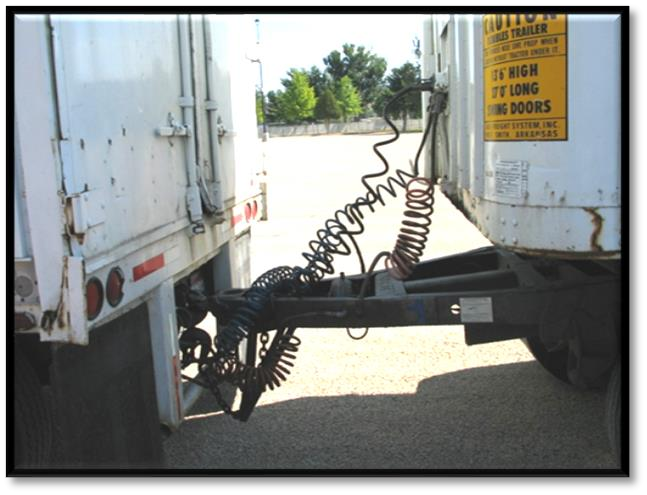
➢Close the converter dolly air tank petcock (valve).
➢Close the service and emergency air shut-off valves at the rear of the second trailer.
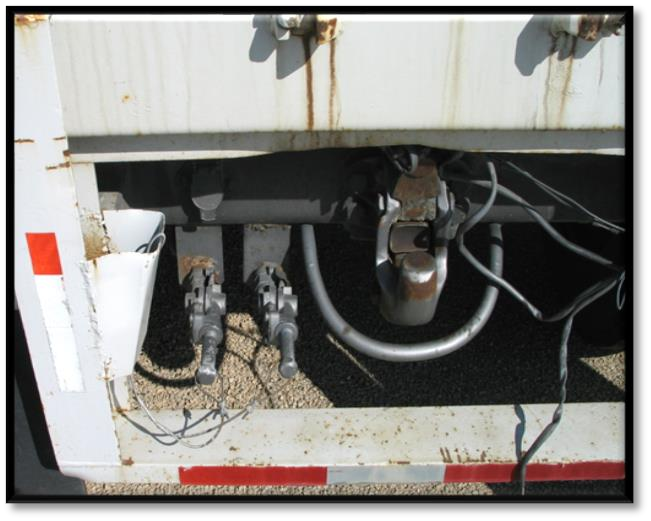
➢Open the service and emergency air shut-off valves at rear of the first trailer and on the converter dolly (if so equipped). ➢Hook dolly to front trailer. ➢Test the coupling by pulling against the pin

of the second semitrailer.
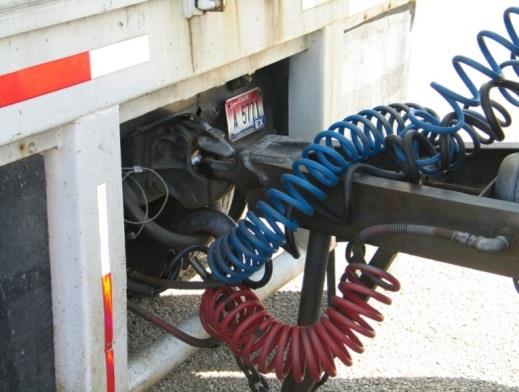
➢Raise the landing gear completely. 7-3
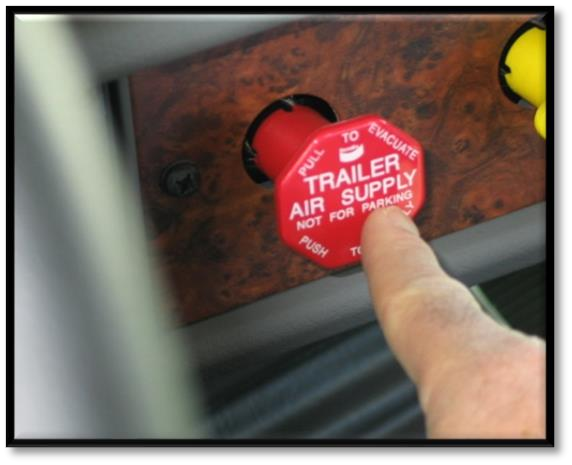
7.2.2 Uncoupling Twin Trailers
Uncouple Rear Trailer
➢Park the vehicle in a straight line on firm level ground.
➢Apply the parking brakes so the vehicle won’t move.
➢Chock the wheels of the second trailer if it doesn't have spring brakes.
➢Lower the landing gear of the second semitrailer enough to remove some of the weight from the dolly.
➢Close the air shut-off valves at the rear of the first semitrailer (and on the dolly if so equipped).
➢Disconnect all of the dolly air and electric lines and secure them.
➢Release the dolly brakes.
➢Release converter dolly fifth wheel latch. ➢Lower the dolly landing gear.
➢Disconnect the safety chains.
➢Apply the converter gear spring brakes or chock the wheels.
➢Release the pintle hook on the first semi-trailer.
➢Slowly pull clear of the dolly.
Never unlock the pintle hook with the dolly still under the rear trailer. The dolly tow bar may fly up, possibly causing injury, and making it very difficult to re-couple the equipment.
7.2.3 Coupling & Uncoupling Triple Trailers
Couple Tractor & First Semitrailer to Second, Third Trailers
➢Couple the tractor to the first trailer. Use the method already described for coupling tractor-semitrailers.
➢Move the converter dolly into position and couple first trailer to second trailer using the method for coupling doubles. The triple trailer combination is now complete.
Uncouple Triple-trailer Combination
➢Uncouple the third trailer by pulling the dolly out, then unhitching the dolly using the method for uncoupling doubles.
➢Uncouple the remainder of the vehicle as ➢Slowly drive the tractor forward with the ➢Charge the trailer brakes (push “air supply” knob in), and check for air at rear of second trailer by opening the emergency air line shut-off. If air pressure isn't there, something is wrong and the brakes won't work. first semitrailer and dolly still attached in order to pull the dolly out from under the rear semitrailer.
Uncouple Converter Dolly
you would any double-bottom vehicle using the method already described.
7-4 ➢Glide plate (apron) securely mounted to the The methods described so far apply to the more common tractor-trailer combinations. However, there are other ways of coupling and uncoupling the many types of truck-trailer and tractor-trailer combinations that are in use. There are too many to cover in this manual. You will need to learn the correct way to couple the vehicle(s) you will drive according to the manufacturer and/or owner specifications. trailer frame.
➢Kingpin not damaged.
➢Air and electric lines to trailer.
➢Electrical cord firmly plugged in and secured.
➢Air lines properly connected to glad hands, no air leaks, properly secured with enough slack for turns.
➢All lines free from damage.
Sliding fifth wheel:
➢Slide not damaged or parts missing. 7.3 Inspecting Doubles & Triples Use the seven-step inspection procedure described in Chapter 2 to inspect your combination vehicle. There are more things to inspect on a combination vehicle than on a single vehicle. Many of these items are simply more of what you would find on a single vehicle (for example, tires, wheels, lights, reflectors, etc.); however, there are also some new things to check. These are discussed below. ➢Properly greased.
➢All locking pins present and locked in place. 7.3.1 Additional Checks
Do these checks in addition to those already listed in Chapter 2, Step 5: Do the Walk-around Inspection.
Coupling System Areas
Check fifth wheel (lower): ➢If air powered, no air leaks.
➢Check that fifth wheel is not so far forward that tractor frame will hit the landing gear, or the cab of the tractor hit the trailer during turns.
Landing Gear: ➢Securely mounted to frame.
➢No missing or damaged parts.
➢Enough grease. ➢Fully raised, no missing parts, not bent or otherwise damaged.
➢Crank handle in place and secured.
➢No visible space between trailer apron and fifth wheel plate.
➢Locking jaws around the shank, not the head, of the kingpin.
➢Fifth wheel release arm properly seated and Check fifth wheel (upper): 7.2.4 Coupling & Uncoupling Other Combinations
➢If power operated, no air or hydraulic leaks.
safety latch/lock engaged. 7-5 and emergency lines). - Rear of front trailers: OPEN. - Rear of last trailer: CLOSED. - Converter dolly air tank drain valve: CLOSED.
➢Be sure air lines are supported and glad hands are properly connected.
➢If spare tire is carried on converter gear (dolly), make sure it’s secured.
➢Be sure pintle-eye of dolly is in place in pintle hook of trailer(s).
➢Make sure pintle hook is latched.
➢Safety chains should be secured to trailer(s).
➢Be sure light cords are firmly in sockets on trailers.
7.3.2 Additional Things to Check during a
Walk-Around Inspection Do these checks in addition to subsection 5.3, Inspecting Air Brake Systems.
7.4 Doubles/Triples Air Brake Check
Check the brakes on a double or triple trailer as you would any combination vehicle. Subsection 6.5.2 explains how to check air brakes on combination vehicles. You must also make the following checks on your double or triple trailers. Double and Triple Trailers: should hear air escaping indicating the entire system is charged. Close the emergency line valve and open the service line valve to check that service pressure goes through all the trailers (this test assumes that the trailer handbrake or the service brake pedal is on), and then close the valve.
If you do NOT hear air escaping from both lines, check that the shut-off valves on the trailer(s) and dolly(s) are in the OPEN position. You MUST have air all the way to the back of the last trailer in the combination for all the brakes to work.
Test Tractor Protection Valve: Charge the trailer air brake system (that is, build up normal air pressure and push the “air supply” knob in). Shut the engine off and step on and off the brake pedal several times to reduce the air pressure in the tanks. The trailer air supply control (also called the tractor protection valve control) should pop out (or go from “normal” to “emergency” position) when the air pressure falls into the pressure range specified by the manufacturer (usually within the range of 20 to 45 psi). If the tractor protection valve doesn’t work properly, an air hose or trailer brake leak could drain all the air from the tractor. This would cause the emergency brakes to come on, with a possible loss of control of the vehicle.
Test Trailer Emergency Brakes: Charge the trailer air brake system and check that the trailer rolls freely. Then stop and pull out the trailer air supply control (also called tractor protection valve control or trailer emergency valve) or place it in the “emergency” position. Pull gently on the trailer with the tractor to check that the trailer emergency brakes are on.
Test Trailer Service Brakes: Check for normal air pressure, release the parking brakes, move the vehicle forward slowly, and apply the trailer brakes with the hand control (trolley valve), if so equipped. You should feel the brakes come on. This tells you the trailer brakes are connected and working. The trailer brakes should be tested with the hand valve, but controlled in normal operation with the foot pedal, which applies air to the service brakes at all wheels.) ➢Shut-off valves (at rear of trailers, in service
7.4.1 Additional Air Brake Checks
Check That Air Flows to All Trailers (Double and Triple Trailers): Use the tractor parking brake and/or chock the wheels to hold the vehicle. Wait for the air pressure to reach normal, then push in the red “trailer air supply” knob. This will supply air to the emergency (supply) lines. Use the trailer handbrake to provide air to the service line. Go to the rear of the vehicle and open the emergency line shut-off valve at the rear of the last trailer. You 7-6